
1. Giriş
Thank you for choosing the Brightever 2-Pack Dusk to Dawn Outdoor Wall Lantern. This manual provides essential information for the safe installation, operation, and maintenance of your new outdoor lighting fixtures. Please read these instructions thoroughly before installation and retain them for future reference.
These outdoor wall lanterns feature a sophisticated photocell sensor for automatic dusk-to-dawn operation, durable construction, and a unique waterfall glass design, suitable for various outdoor applications.

Image: The Brightever 2-Pack Dusk to Dawn Outdoor Wall Lanterns, showcasing their design and integrated sensors.
2. Ürün Bittiview
Temel Özellikler:
- Dusk to Dawn Photocell Sensor: Automatically turns the light on at dusk and off at dawn, optimizing energy efficiency.
- Dayanıklı Yapı: Features sturdy, thick waterfall glass and an anti-corrosion pure aluminum framework with a black alloy finish.
- Hava Koşullarına Dayanıklı: Designed to withstand various weather conditions including rain, snow, and extreme temperatures.
- Açık Alt Tasarım: Facilitates easy bulb replacement and maintenance.
- Standart E26 Tabanı: Compatible with a variety of E26 Edison bulbs (LED, CFL, Incandescent). Bulbs are not included.

Image: Key features including unique waterfall glass, upgraded photocell sensor, E26 standard base, and corrosion-resistant aluminum construction.

Image: Illustration of the fixture's weather resistance, including sunproof, windproof, snowproof, and waterproof capabilities.
Kutuda Neler Var:
- 2 x Brightever Outdoor Wall Lanterns
- 1 x Kullanım Kılavuzu
- Mounting Hardware (including 3x 10AWG Wire Connectors, 2x M4-25 Phillips' Head Screws per fixture)

Image: Product dimensions and included mounting hardware. Each fixture includes wire connectors and screws.
3. Güvenlik Bilgileri
UYARI: To avoid the risk of fire, electric shock, or personal injury, always follow these safety guidelines:
- Always turn off the power at the main circuit breaker or fuse box before beginning installation, maintenance, or bulb replacement.
- Kurulum sürecinden emin değilseniz, kalifiye bir elektrikçiye danışın.
- Tüm elektrik bağlantılarının yerel yönetmelik ve kanunlara uygun olarak yapıldığından emin olun.
- Yalnızca belirtilen tip ve güçteki ampulleri kullanın.tage. Ayrıntılar için "Teknik Özellikler" bölümüne bakınız.
- Do not install on a dimmer switch if using the dusk-to-dawn feature, as it may interfere with the sensor's operation.
- Kırılmayı önlemek için cam parçaları dikkatli tutun.
4. Kurulum Talimatları
This fixture is designed for wall-mount installation. All necessary mounting hardware is included.
Gerekli Araçlar (Dahil Değildir):
- Yıldız uçlu tornavidalar
- Tel striptizci
- Elektrik bandı
- Güvenlik gözlüğü
Kurulum Adımları:
- Gücü Kapatın: Başlamadan önce, bağlantı kutusuna giden güç kaynağının devre kesiciden kapatıldığından emin olun.
- Montaj Plakasını Hazırlayın: Attach the mounting plate (pre-assembled with the fixture) to the junction box using the provided screws. Ensure it is securely fastened.
- Elektrik Bağlantılarını Yapın:
- Bağlan siyah Armatürden gelen kablo siyah (hot) wire from the junction box using a wire connector.
- Bağlan beyaz Armatürden gelen kablo beyaz (neutral) wire from the junction box using a wire connector.
- Bağlan zemin Armatürden gelen kablo zemin wire from the junction box (or to the green ground screw on the mounting plate) using a wire connector.
- Ensure all connections are tight and secure. Wrap connections with electrical tape if desired for added insulation.
- Fikstürü Takın: Armatür parçasını montaj plakasıyla dikkatlice hizalayın ve birlikte verilen vidalarla sabitleyin.
- Ampulü takın: Insert an E26 base bulb (not included) into the socket. Do not exceed the maximum wattage specified in the "Specifications" section.
- Gücü Geri Yükle: Sigortadan elektriği tekrar açın.

Image: Product dimensions for reference during installation. Height: 12.6 inches, Width: 8.07 inches, Depth from wall: 8.07 inches.
5. Operasyon
The Brightever Outdoor Wall Lantern is equipped with a built-in dusk-to-dawn photocell sensor for automatic operation.
- Otomatik Açma/Kapama: The sensor detects ambient light levels. The fixture will automatically turn on when it gets dark (dusk) and turn off when it becomes light (dawn).
- Sensör Yerleşimi: Ensure the photocell sensor (located on the top of the fixture) is not obstructed by eaves, trees, or other objects that could block natural light. Avoid installing the fixture near other light sources (e.g., streetlights, floodlights) that could interfere with the sensor's ability to detect darkness, causing it to turn off prematurely.
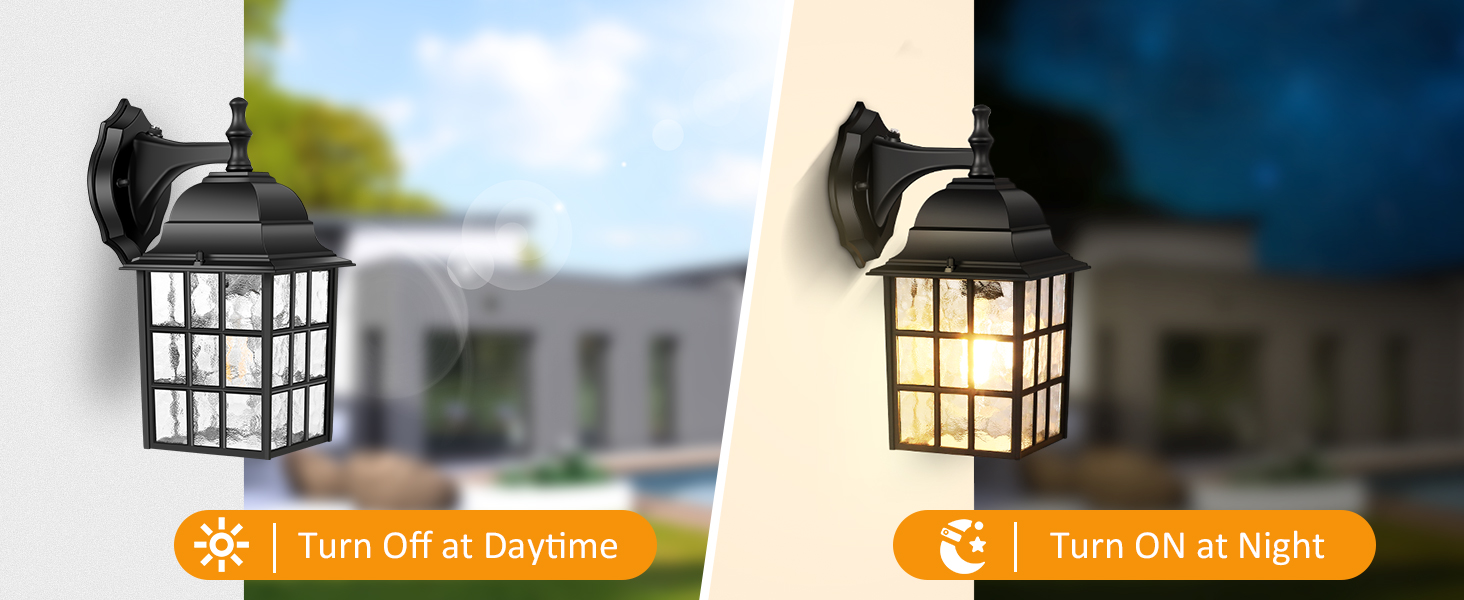
Image: Illustration of the light turning off automatically during the day and turning on automatically at night due to the photocell sensor.
6. Bakım
Ampul Değişimi:
- Gücü Kapatın: Always turn off the power to the fixture at the circuit breaker before replacing the bulb.
- Erişim Ampulü: The fixture features an open bottom design. Simply reach into the bottom of the lantern to unscrew the old bulb.
- Yeni Ampulü Takın: Screw in a new E26 base bulb. Ensure the new bulb's wattage does not exceed the maximum specified (refer to "Specifications").
- Gücü Geri Yükle: Sigortadan elektriği tekrar açın.
Temizlik:
- Ensure the power is off and the fixture is cool before cleaning.
- Armatürü yumuşak bir bezle silin.amp Bez kullanın. Aşındırıcı temizleyiciler veya çözücüler kullanmayın, çünkü bunlar yüzeye veya cama zarar verebilir.
- Regularly clean the photocell sensor to ensure optimal performance.
7. Sorun Giderme
| Sorun | Olası Neden | Çözüm |
|---|---|---|
| Gece ışık yanmıyor. |
|
|
| Işık gündüzleri de açık kalıyor. |
|
|
| Işık titriyor. |
|
|
8. Özellikler
| Özellik | Detay |
|---|---|
| Marka | Daha parlak |
| Model Numarası | 9033-BK |
| Renk | Siyah |
| Malzeme | Metal (Aluminum), Waterfall Glass |
| Ürün Boyutları (U x G x Y) | 8.07" x 8.07" x 12.6" |
| Ürün Ağırlığı | 5.7 Pounds (per 2-pack) |
| Güç Kaynağı | Kablolu Elektrik |
| Cilttage | 120 Volt |
| Ampul Tabanı | E26 (Ampul dahil değildir) |
| Maksimum Vattage (LED) | 14W |
| Maksimum Vattage (Incandescent) | 100W |
| Özel Özellikler | Dusk to Dawn Sensor, Waterproof, Anti-Rust, Energy Efficient |
| İç/Dış Mekan Kullanımı | Dış mekan |
| Montaj Gerekli | Evet |

Image: Various E26 base bulb types compatible with the fixture. Bulbs are not included.
9. Garanti ve Destek
Brightever stands behind the quality of its products. While specific warranty details are not provided in this manual, we encourage customers to contact us directly for any product-related inquiries or support needs.
For assistance, please refer to the contact information provided on the product packaging or visit the official Brightever store online. Your satisfaction is our top concern.
Optional protection plans may be available for purchase separately to extend coverage beyond the manufacturer's standard policy.