
1. Giriş
This manual provides comprehensive instructions for the installation, operation, and maintenance of your PANOEAGLE DS-7608NI-I2/8P 8-Channel 4K Network Video Recorder (NVR). Please read this manual thoroughly before using the product to ensure proper setup and functionality. Retain this manual for future reference.
The PANOEAGLE DS-7608NI-I2/8P is an embedded Plug and Play 4K NVR designed for robust 24/7 surveillance recording. It supports up to 8 cameras simultaneously, offering high-resolution recording up to 12MP and utilizing H.264+/H.264/H.265 video compression for efficient storage. Its Power over Ethernet (PoE) capability simplifies camera installation by providing both power and data through a single cable.
2. Ürün Bittiview
NVR'nizin bileşenleri ve arayüzleri hakkında bilgi edinin.
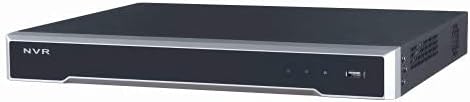
Şekil 2.1: Ön Panel View
This image displays the front panel of the NVR, featuring the 'NVR' branding, status indicators, and a USB port for peripheral connections.

Şekil 2.2: Arka Panel View
This image shows the rear panel of the NVR, highlighting the power input, cooling fan, 8 PoE ports, network port, USB ports, audio input/output, VGA, and HDMI video outputs, and alarm/control terminals.

Şekil 2.3: Açısal Arka View
An angled perspective of the NVR's rear panel, providing a clearer view of the various connectivity options and ventilation.
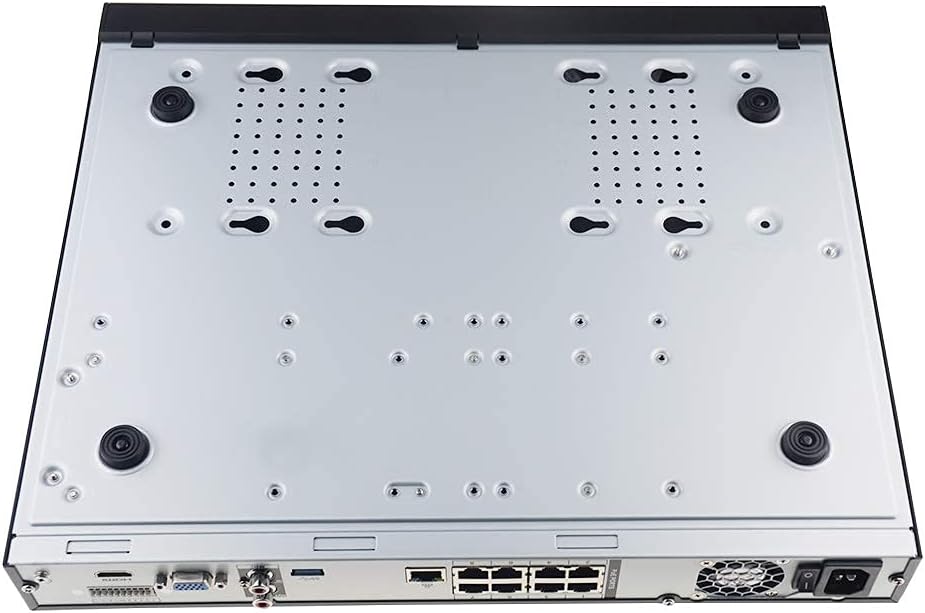
Figure 2.4: Bottom Panel View
This image displays the bottom of the NVR, showing mounting points and ventilation holes, along with rubber feet for stable placement.
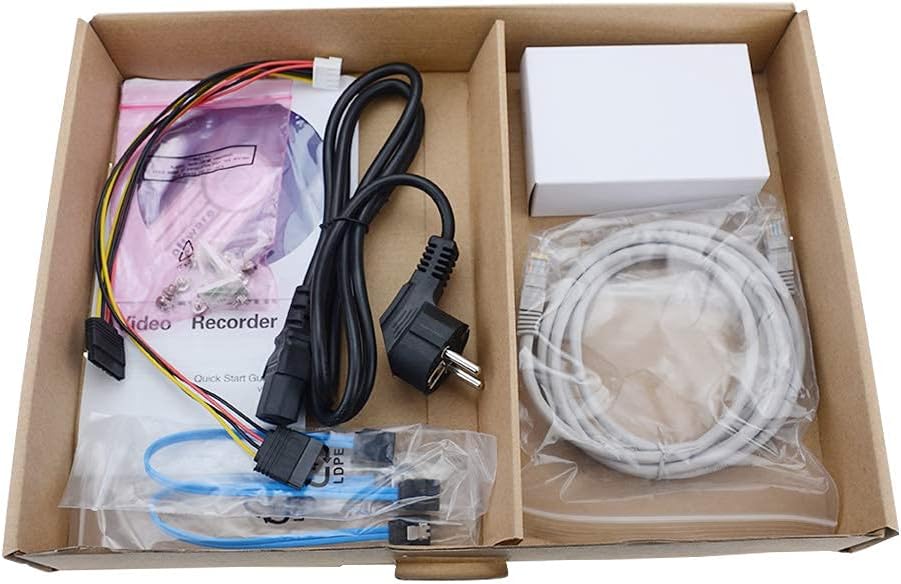
Şekil 2.5: Paket İçeriği
A view of the accessories included with the NVR, typically comprising a power cable, network cable, USB mouse, SATA cables for hard drive installation, and a quick start guide.
3. Temel Özellikler
- 8 Kanallı Kayıt: Supports simultaneous recording from up to 8 IP cameras.
- 4K Çözünürlük Desteği: Capable of recording and displaying video resolutions up to 12MP.
- PoE Easy Setup: Integrated Power over Ethernet (PoE) ports for direct connection and power supply to IP cameras via a single Ethernet cable.
- Gelişmiş Video Sıkıştırma: Utilizes H.264+/H.264/H.265 codecs for efficient storage and bandwidth usage.
- 24/7 Kayıt: Designed for continuous, reliable surveillance monitoring.
- HDMI Çıkışı: High-definition video output for connecting to monitors or TVs.
- SATA Desteği: Features 2 SATA interfaces for internal hard drive installation (HDDs not included).
4. Kurulum Kılavuzu
4.1. Sabit Sürücü Kurulumu (İsteğe bağlı)
NVR cihazınızda önceden takılı bir sabit disk yoksa, şu adımları izleyin:
- NVR cihazını kapatın ve tüm kabloları çıkarın.
- Unscrew and remove the top cover of the NVR chassis.
- Connect the SATA data cable and power cable from the NVR to the hard drive.
- Verilen vidaları kullanarak sabit sürücüyü NVR kasasına sabitleyin.
- Üst kapağı yerine takın ve vidalarla sabitleyin.
4.2. İlk Bağlantılar
- Monitörü bağlayın: Monitörü NVR'ın HDMI veya VGA çıkış portuna bağlayın.
- Fareyi bağlayın: USB fareyi NVR'ın USB bağlantı noktalarından birine takın.
- Ağa bağlan: NVR'nin LAN portunu bir Ethernet kablosu kullanarak yönlendiricinize veya ağ anahtarınıza bağlayın.
- IP Kameraları Bağlayın: Connect your PoE IP cameras to the NVR's PoE ports using Ethernet cables. The NVR will provide power and data to the cameras.
- Güç Açık: Güç adaptörünü NVR'ye bağlayın ve ardından bir elektrik prizine takın. NVR otomatik olarak açılacaktır.
4.3. İlk Yapılandırma
Upon first boot, the NVR will guide you through an initial setup wizard. This typically includes:
- Yönetici parolası oluşturma.
- Configuring network settings (DHCP is usually default).
- Initializing the hard drive (if newly installed).
- Searching for and adding connected IP cameras.
- Tarih ve saat ayarı.
Kurulumu tamamlamak için ekrandaki talimatları izleyin.
5. Kullanım Talimatları
5.1. Canlı View
Giriş yaptıktan sonra, NVR genellikle canlı görüntüyü gösterecektir. view Bağlı tüm kameralar arasında geçiş yapabilirsiniz. viewçoklu kamera ızgarası viewve ekran düzenlerini özelleştirin.
5.2. Kayıt
- Sürekli Kayıt: Records 24/7. Configure schedules in the NVR's menu.
- Hareket Algılama Kaydı: Records only when motion is detected. Sensitivity and detection zones can be adjusted.
- Planlanmış Kayıt: Kayıt için belirli zamanlar belirleyin.
Access recording settings via the NVR's main menu, usually under "Record" or "Storage" settings.
5.3. Oynatma
Yırttıview kaydedilmiş footage:
- Ana menüden "Oynatma"yı seçin.
- Yeniden düzenlemek istediğiniz kamera(lar)ı ve tarih/saat aralığını seçin.view.
- Use the timeline to navigate through recorded events. Options for fast-forward, rewind, and pause are available.
5.4. Uzaktan Erişim
The NVR supports remote viewmobil uygulama aracılığıyla veya web browser. Refer to the NVR's network settings for details on enabling P2P (peer-to-peer) or port forwarding for remote access. Download the official PANOEAGLE mobile application from your device's app store.
6. Bakım
- Düzenli Temizlik: Keep the NVR free from dust. Use a soft, dry cloth for exterior cleaning. Ensure ventilation openings are clear.
- Donanım Yazılımı Güncellemeleri: Periodically check the PANOEAGLE official website for firmware updates. Updates can improve performance, add features, and enhance security. Follow update instructions carefully.
- Sabit Disk Sağlığı: Monitor the health of your hard drive(s) through the NVR's system information. Replace failing drives promptly to avoid data loss.
- Şifre Güvenliği: Regularly change your administrator password and use strong, unique passwords.
7. Sorun Giderme
| Sorun | Olası Neden | Çözüm |
|---|---|---|
| Monitörde video çıkışı yok. | Gevşek kablo bağlantısı, monitörde yanlış giriş kaynağı, NVR açık değil. | HDMI/VGA kablo bağlantılarını kontrol edin. Monitörün doğru girişe ayarlandığından emin olun. NVR gücünü doğrulayın. |
| Kameralar canlı yayında görünmüyor. view. | Camera not powered, network issue, camera not added to NVR, incorrect IP address. | Check camera power and Ethernet cables. Ensure cameras are connected to PoE ports. Use NVR's camera management to search and add cameras. Verify camera IP addresses. |
| Kayıt yok veya kayıp yiyecek yok.tage. | Hard drive not installed/initialized, recording schedule not configured, hard drive full, hard drive failure. | Install and initialize HDD. Configure recording schedules. Check HDD status and capacity. Replace faulty HDD. |
| NVR'ye uzaktan erişilemiyor. | Network configuration issues, P2P disabled, incorrect app settings, firewall blocking. | Ensure NVR has internet access. Enable P2P service. Verify app settings and NVR's network configuration. Check router firewall settings. |
8. Özellikler
| Özellik | Detay |
|---|---|
| Örnek | DS-7608NI-I2/8P |
| Marka | PANOEAGLE (Compatible with Hi-k USA systems) |
| Kanal Sayısı | 8 |
| Max Çözünürlük | 12 MP'ye kadar |
| Video Sıkıştırma | H.264+/H.264/H.265 |
| Video Çıkışı | HDMI, VGA |
| Ses Girişi | RCA |
| SATA Arayüzleri | 2 (for HDD) |
| Bağlantı Teknolojisi | HDMI, Ethernet (PoE) |
| İlk Mevcut Tarih | 28 Temmuz 2021 |
9. Garanti ve Destek
For warranty information, please refer to the warranty card included with your product or visit the official PANOEAGLE website. Technical support may be available through the manufacturer's website üzerinden veya müşteri hizmetleri departmanıyla iletişime geçerek.
Always ensure you are using official channels for support and firmware downloads to maintain product integrity and security.