1. Giriş
Satın aldığınız için teşekkür ederizasing the PRIMO PR501SV Cordless 3-in-1 Stick Vacuum Cleaner. This manual provides essential information for the safe and efficient use, maintenance, and troubleshooting of your appliance. Please read it thoroughly before first use and keep it for future reference.
2. Güvenlik Talimatları
To reduce the risk of fire, electric shock, or injury, always follow basic safety precautions when using an electrical appliance.
- Cihazı kullanmadan önce tüm talimatları okuyun.
- Açık havada veya ıslak zeminlerde kullanmayınız.
- Oyuncak olarak kullanılmasına izin vermeyin. Çocuklar tarafından veya yakınında kullanıldığında yakın ilgi gereklidir.
- Yalnızca bu kılavuzda açıklandığı şekilde kullanın. Yalnızca üreticinin önerdiği ekleri kullanın.
- Hasarlı kablo veya fişle kullanmayın. Cihaz düzgün çalışmıyorsa, düşürüldüyse, hasar gördüyse, dışarıda bırakıldıysa veya suya düştüyse, bir servis merkezine iade edin.
- Kordonu çekmeyin veya taşımayın, kordonu sap olarak kullanmayın, kordonun üzerine kapı kapatmayın veya kordonu keskin kenarlar veya köşelerin etrafından çekmeyin. Cihazı kordonun üzerinden geçirmeyin. Kordonu ısıtılmış yüzeylerden uzak tutun.
- Fişi kablodan çekerek çıkarmayın. Fişi çıkarmak için kabloyu değil fişi tutun.
- Islak elle fişe veya cihaza dokunmayın.
- Açıklıklara herhangi bir nesne koymayın. Herhangi bir açıklığı tıkalı haldeyken kullanmayın; toz, tiftik, saç ve hava akışını azaltabilecek her şeyden uzak tutun.
- Saçınızı, bol giysilerinizi, parmaklarınızı ve vücudunuzun tüm kısımlarını açıklıklardan ve hareketli parçalardan uzak tutun.
- Sigara, kibrit, sıcak kül gibi yanan veya dumanı tüten hiçbir şeyi toplamayın.
- Benzin gibi yanıcı veya parlayıcı sıvıları almak için veya bunların bulunabileceği alanlarda kullanmayın.
- Zehirli maddeleri (örneğin; çamaşır suyu, amonyaklı temizleyici, lavabo açıcı) toplamayın.
- Toz kabı ve/veya filtreler yerinde olmadan kullanmayın.
- Fişi çekmeden önce tüm kontrolleri kapatın.
- Merdiven temizliğinde ekstra özen gösterin.
- Cam, çivi, vida, bozuk para vb. gibi sert ve keskin nesneleri toplamak için kullanmayınız.
- İstem dışı çalıştırmayı önleyin. Pil paketine bağlamadan, cihazı kaldırmadan veya taşımadan önce anahtarın kapalı konumda olduğundan emin olun.
- Yalnızca üretici tarafından belirtilen şarj cihazıyla şarj edin. Bir pil takımı türü için uygun olan bir şarj cihazı, başka bir pil takımıyla kullanıldığında yangın riski oluşturabilir.
- Kötü kullanım koşulları altında, pilden sıvı fışkırabilir; temastan kaçının. Kazara temas olursa, suyla yıkayın. Sıvı gözlerle temas ederse, ayrıca tıbbi yardım alın. Pilden fışkırmış sıvı tahrişe veya yanıklara neden olabilir.
3. Paket İçeriği
Carefully unpack your PRIMO PR501SV and ensure all components are present and in good condition. Refer to the image below for identification.

Şekil 3.1: Dahil Edilen Bileşenler
This image displays the main components of the PRIMO PR501SV vacuum cleaner: the motor unit with integrated dust reservoir, the long lightweight metallic tube, the motorized floor brush, a crevice tool for narrow spaces, a dusting brush for delicate surfaces, the power adapter for charging, and a wall mount for convenient storage.
- Motor Unit with Dust Reservoir (0.6 L capacity)
- Lightweight Metallic Tube
- Motorlu Zemin Fırçası
- Yarık Açma Aleti
- Toz Alma Fırçası
- Güç Adaptörü
- Vidalarla birlikte duvara monte aparatı
4. Ürün Bittiview
The PRIMO PR501SV is a versatile 3-in-1 cordless vacuum cleaner designed for various cleaning tasks. It can be configured as a stick vacuum, a handheld vacuum, or a crumb collector.

Figure 4.1: 3-in-1 Configurations
This image illustrates the three primary modes of the PR501SV: as a complete stick vacuum for floor cleaning, as a handheld unit equipped with the crevice tool for tight spots, and as a handheld unit with the dusting brush for upholstery or delicate surfaces. The wall mount is also visible, indicating a storage solution.
5. Kurulum ve Montaj
Elektrikli süpürgenizi monte etmek için şu adımları izleyin:
- Çubuk tipi elektrikli süpürgeyi monte edin: Insert the metallic tube into the main motor unit until it clicks into place. Then, attach the motorized floor brush to the other end of the metallic tube, ensuring it is securely fastened.
- Elde Taşınabilir Yapılandırma: To use as a handheld vacuum, detach the metallic tube and motorized floor brush from the motor unit. Attach either the crevice tool or the dusting brush directly to the motor unit's suction opening.
- Duvara Montaj Kurulumu: Choose a suitable location near a power outlet. Use the provided screws to securely attach the wall mount to the wall. Ensure it is at a height that allows the vacuum to hang freely.

Figure 5.1: Wall Mount Storage
This image shows a user placing the assembled stick vacuum onto the wall mount, demonstrating how the appliance can be conveniently stored and charged when not in use.
6. Pilin Şarj Edilmesi
The PRIMO PR501SV is powered by an 18.5V Lithium-ion battery. Before first use, fully charge the battery.
- Connect the power adapter to the charging port on the motor unit.
- Adaptörü bir duvar prizine takın.
- The battery indicator lights will illuminate during charging. A full charge typically takes 4-5 hours.
- Once fully charged, the indicator lights will show a full battery level. Disconnect the charger.

Figure 6.1: Battery Indicator and Runtime
This close-up image displays the battery charge indicator on the vacuum cleaner. It shows two modes: 'MAX-R' (Max Power) offering approximately 20 minutes of runtime, and 'ECO-G' (Eco Mode) providing around 40 minutes of runtime, indicating the battery's endurance based on the selected power setting.
7. Kullanım Talimatları
Your vacuum cleaner offers two speed settings and multiple configurations for versatile cleaning.
7.1. Power On/Off and Speed Settings
- Press the power button once to turn on the vacuum in ECO mode.
- Press the power button a second time to switch to MAX power mode.
- Elektrikli süpürgeyi kapatmak için güç düğmesine üçüncü kez basın.
7.2. Çubuklu Elektrikli Süpürge Modu
Use this mode for cleaning floors, carpets, and larger areas.
- Ensure the metallic tube and motorized floor brush are securely attached to the motor unit.
- Select the desired power mode (ECO or MAX).
- Guide the vacuum over the surface to be cleaned. The motorized brush helps agitate dirt for effective cleaning.

Figure 7.1: Agile and Flexible Cleaning
This image highlights the vacuum's maneuverability, showing it easily reaching under furniture like a sofa. The design allows for a 180-degree swivel, making it agile and flexible for cleaning hard-to-reach areas.
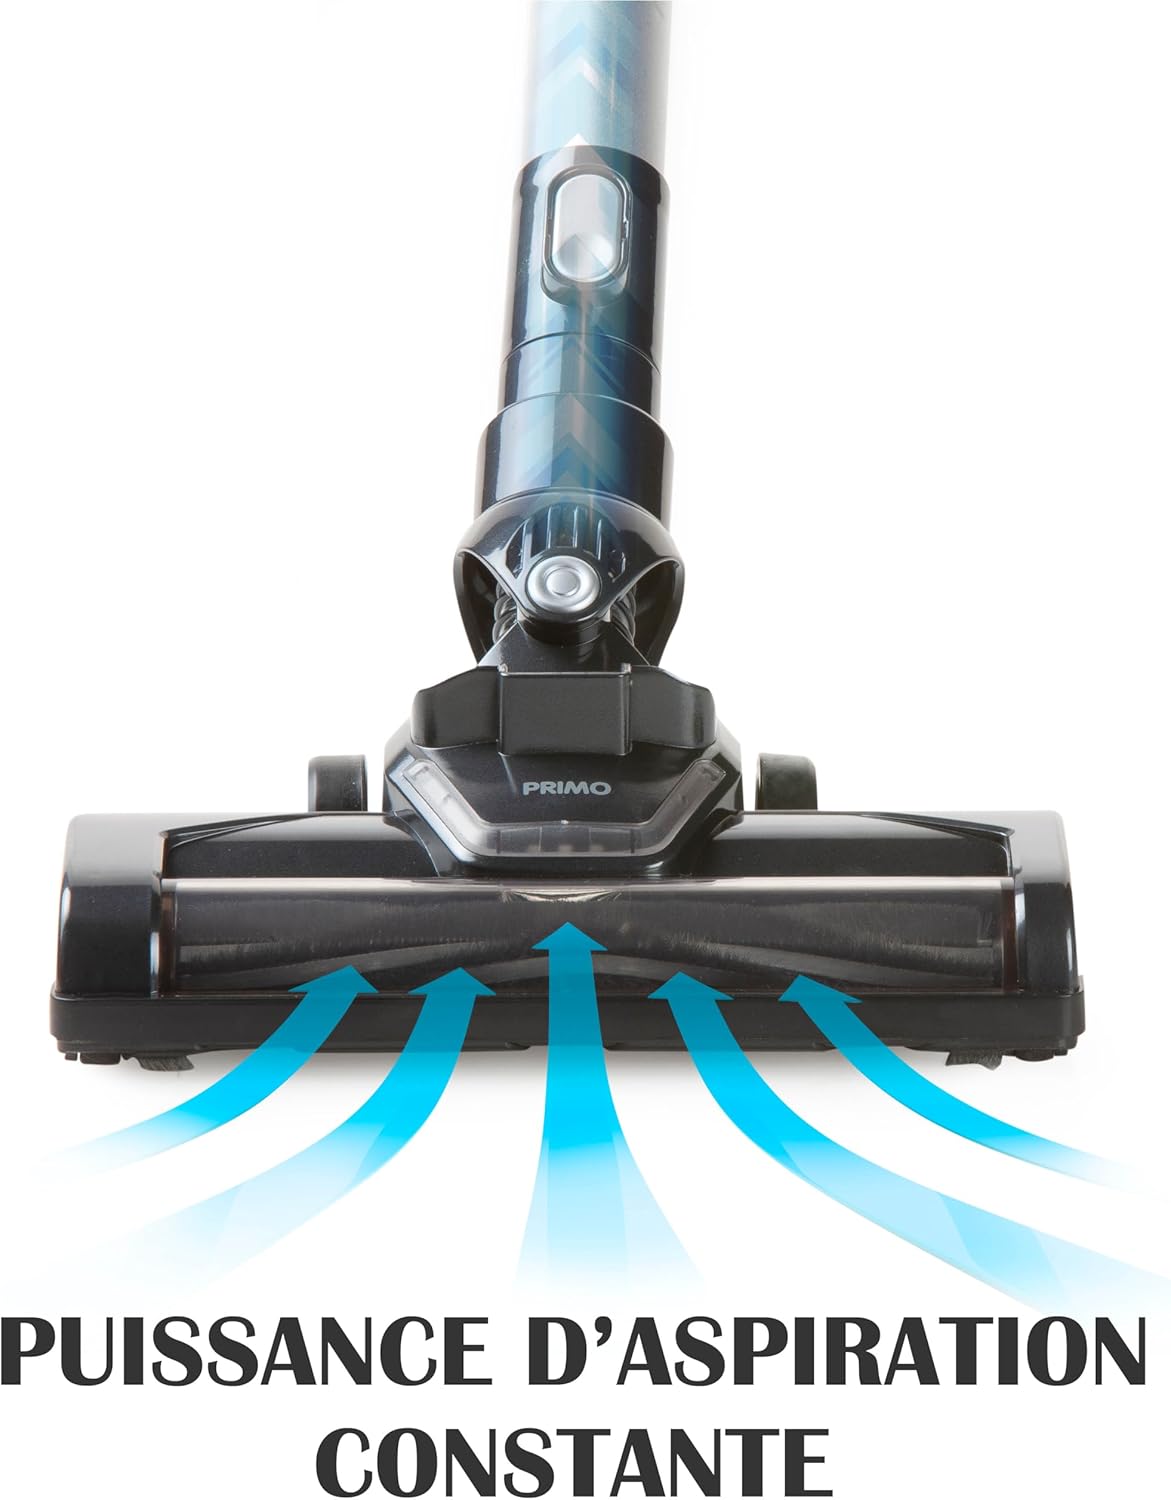
Figure 7.2: Constant Suction Power
This graphic illustrates the consistent and powerful suction generated by the vacuum's floor brush. Blue arrows depict the airflow, demonstrating how dirt and debris are effectively drawn into the vacuum head for thorough cleaning.
7.3. El Tipi Vakum Modu
Ideal for cleaning upholstery, car interiors, stairs, and small spills.
- Detach the metallic tube and motorized floor brush from the motor unit.
- Attach the crevice tool for narrow gaps or the dusting brush for surfaces like curtains or keyboards.
- Turn on the vacuum and clean the desired area.

Figure 7.3: Handheld Cleaning on Upholstery
This image shows the PRIMO PR501SV being used as a handheld vacuum to clean a sofa. It highlights the convenience and effectiveness of this mode for cleaning furniture and other elevated surfaces.
8. Bakım
Düzenli bakım, elektrikli süpürgenizin optimum performansını sağlar ve ömrünü uzatır.
8.1. Emptying the Dust Reservoir
Empty the 0.6 L dust reservoir regularly, especially when it reaches the 'MAX' line.
- Vakumun kapalı olduğundan emin olun.
- Press the release button on the dust reservoir to detach it from the motor unit.
- Hold the dust reservoir over a trash bin and open the bottom flap to empty the contents.
- Close the flap and reattach the dust reservoir to the motor unit until it clicks securely.

Figure 8.1: Easy Dust Reservoir Emptying
This image illustrates the simple process of detaching the 0.6-liter dust reservoir from the main unit for emptying. The design allows for quick and hygienic disposal of collected debris.
8.2. HEPA Filtresini Temizleme
The HEPA 13 filter retains 99.95% of dust particles. Clean it regularly to maintain suction power.
- Remove the dust reservoir as described above.
- Carefully remove the HEPA filter from inside the dust reservoir.
- Filtreyi hafifçe bir çöp kutusunun üzerine vurarak gevşek tozları temizleyin.
- If heavily soiled, rinse the filter under running water. Ensure it is completely dry before reinserting. Do not use detergents or hot water.
- Reinsert the dry HEPA filter into the dust reservoir and reattach the reservoir to the motor unit.
8.3. Cleaning the Motorized Floor Brush
Hair and debris can get tangled in the brush roll, affecting performance.
- Ensure the vacuum is turned off and disconnected from the metallic tube.
- Locate the release mechanism on the side of the motorized brush head.
- Remove the brush roll from the housing.
- Use scissors or a brush to remove any tangled hair or debris from the brush roll.
- Reinsert the clean brush roll and secure it in place.
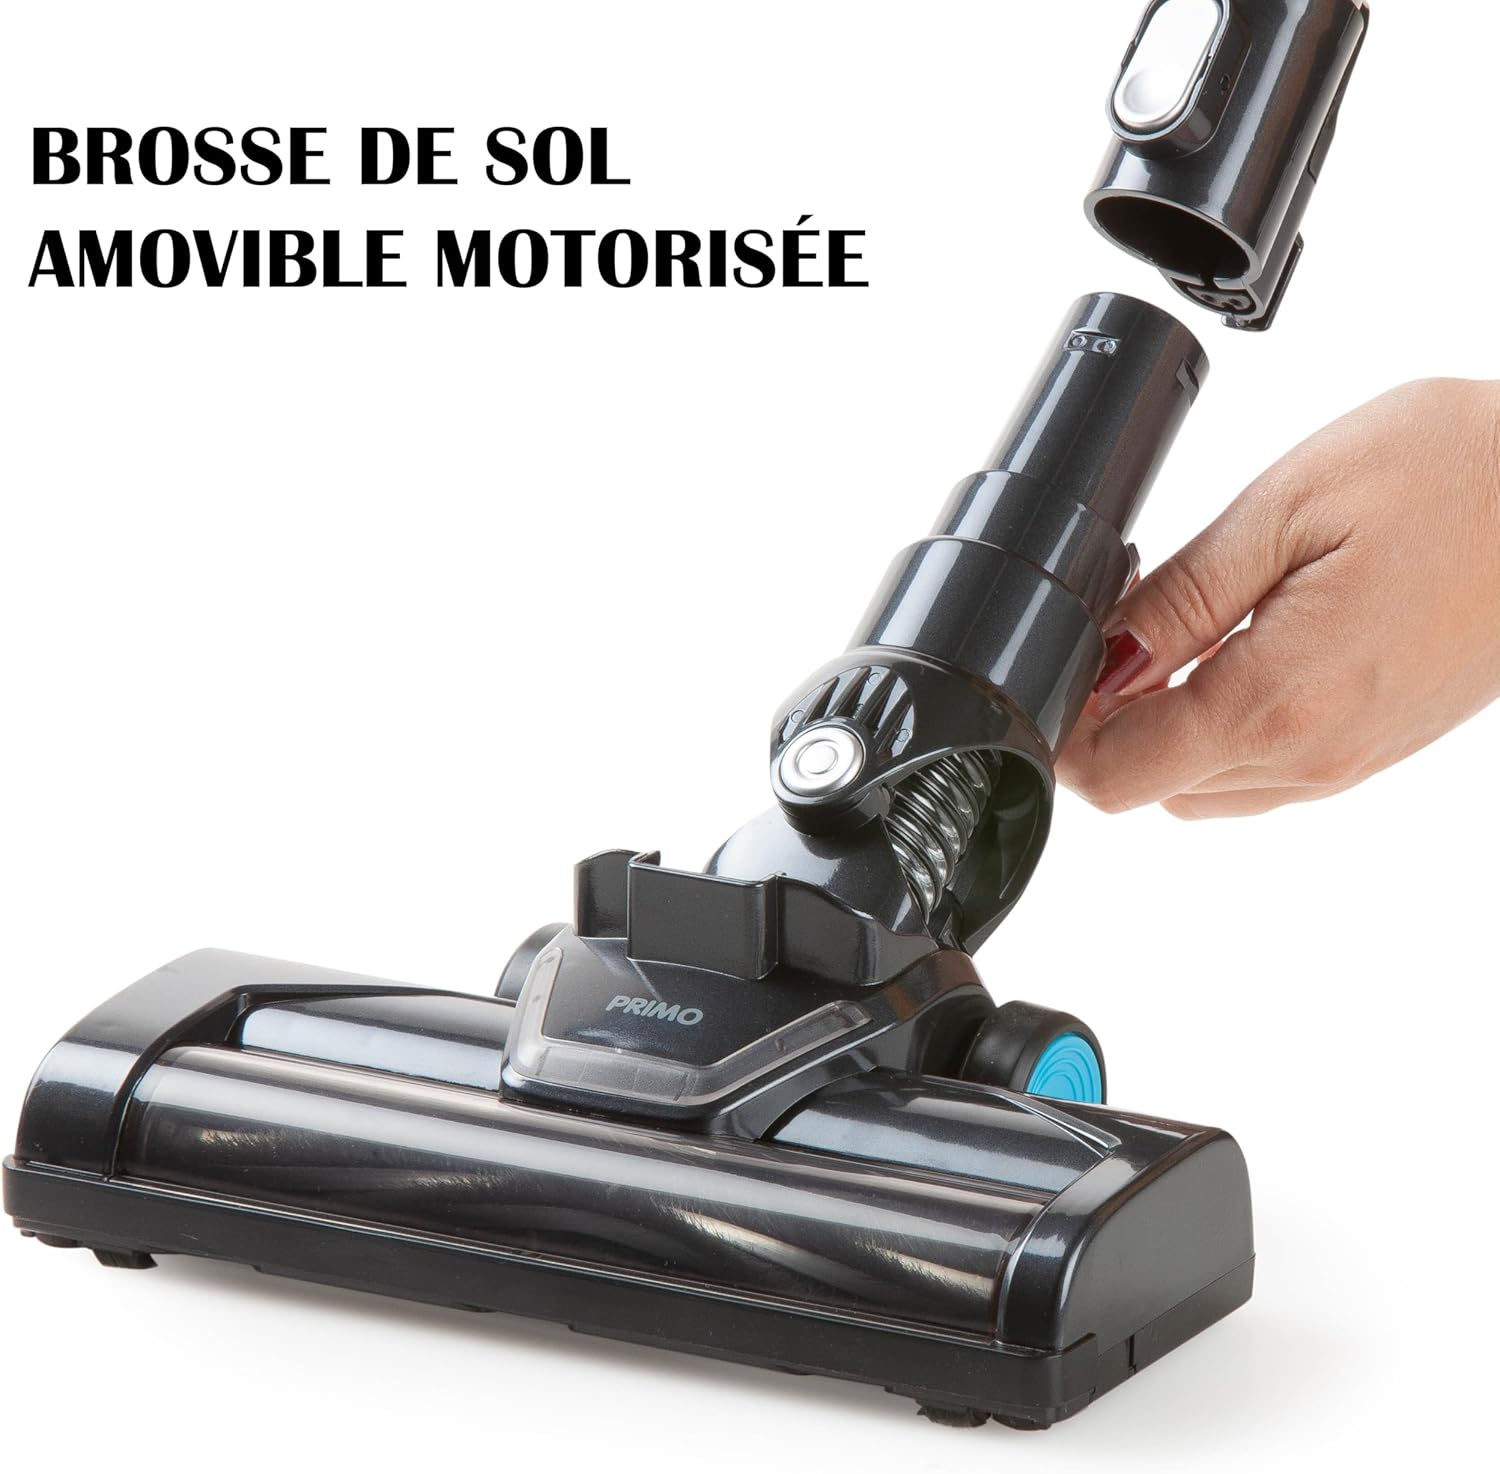
Figure 8.2: Removable Motorized Floor Brush
This image shows the motorized floor brush being detached from the vacuum's main body. This feature allows for easy access to the brush roll for cleaning tangled hair and debris, ensuring consistent performance.
9. Sorun Giderme
If you encounter issues with your PRIMO PR501SV, refer to the following common problems and solutions:
| Sorun | Olası Neden | Çözüm |
|---|---|---|
| Vakum açılmıyor | Pil boşaldı Güç düğmesine doğru şekilde basılmadı | Pili tamamen şarj edin Güç düğmesine sıkıca basın |
| Düşük emiş gücü | Dust reservoir is full Filtre tıkalı Fırça rulosu birbirine dolanmış. Nozzle/tube is blocked | Empty the dust reservoir HEPA filtresini temizleyin Clean the motorized brush roll Meme veya borudaki tıkanıklıkları kontrol edin ve giderin. |
| Motorlu fırça dönmüyor | Fırça rulosu birbirine dolanmış. Connection to main unit is loose | Fırça rulosunu temizleyin Ensure the brush head is securely attached to the tube or motor unit |
| Kısa pil ömrü | Pil tam şarjlı değil Using MAX power mode continuously Pil bozulması | Pil tamamen şarj olduğundan emin olun (4-5 saat). Use ECO mode for longer runtime Pil ömrü zamanla önemli ölçüde azalırsa müşteri desteğiyle iletişime geçin. |
Bu çözümleri denedikten sonra sorun devam ederse lütfen müşteri desteğiyle iletişime geçin.
10. Özellikler
| Özellik | Şartname |
|---|---|
| Model Numarası | PR501SV |
| Marka | İLK |
| Tip | Akülü 3'si 1 Arada Çubuk Elektrikli Süpürge |
| Pil | 18.5V Lityum-iyon |
| Şarj Süresi | 4-5 saat |
| Runtime (ECO mode) | Yaklaşık 40 dakika |
| Runtime (MAX power) | Yaklaşık 20 dakika |
| Dust Reservoir Capacity | 0.6 Litre |
| Filtre Türü | HEPA13 |
| Hız Sayısı | 2 |
| Gürültü Seviyesi | 75 dB |
| Ağırlık | 2 Kilogram |
| Boyutlar (U x G x Y) | 16x23x113 cm |
| Önerilen Yüzey | Sert zeminler |
| Dahil Bileşenler | Motor unit, metallic tube, motorized floor brush, crevice tool, dusting brush, power adapter, wall mount |
11. Garanti ve Destek
For warranty information and customer support, please refer to the warranty card included with your purchase or visit the official PRIMO webSite. Satın alma belgenizi herhangi bir garanti talebi için saklayın.