giriiş
The Pioneer DJ DJM-V10-LF is a professional 6-channel DJ mixer designed for creative mixing and precise control. This model features extended channel faders with optimized curves, allowing for smooth and accurate volume adjustments across all six channels. The unit incorporates studio-quality audio processing, including 64-bit mixing and dithering, along with high-quality A/D and D/A converters, ensuring a warm and energetic sound output. This manual provides essential information for setting up, operating, and maintaining your DJM-V10-LF mixer.
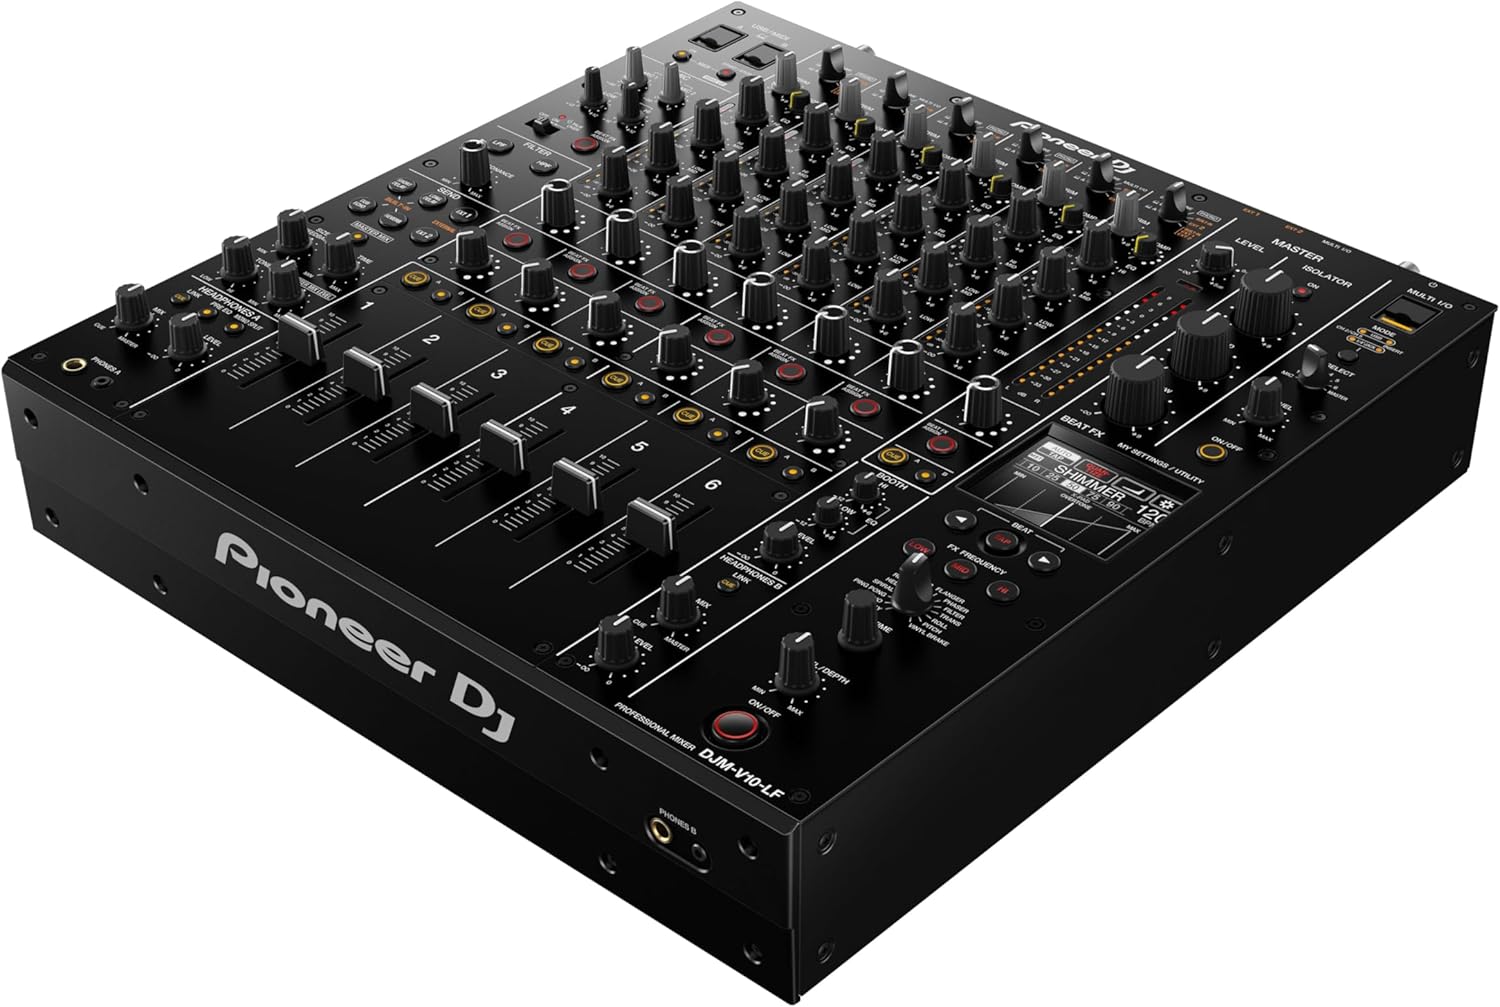
Figure 1: Pioneer DJM-V10-LF mixer from an angled perspective, highlighting its six channels, long faders, and various controls.
Temel Özellikler
- Gelişmiş Ses İşleme: Equipped with studio-quality 64-bit mixing and dithering processing, 32-bit high-quality A/D and D/A converters, and a low-jitter clock circuit for superior sound fidelity.
- Six Versatile Channels: Offers six channels with a variety of input types, allowing for flexible and comprehensive setup configurations.
- Enhanced 4-Band EQ: Features a newly developed 4-band EQ and built-in compressor for precise adjustment and shaping of your audio tracks.
- Creative Effects Section: Includes an expanded send/return section, enabling the integration of external effects or combination with built-in effects for unique sound manipulation.
- Long Fader Design: Incorporates 60mm shaft slide faders with optimized curves and a new custom-designed curve preset for smooth, accurate, and extended range volume control.

Şekil 2: Ayrıntılı view of the DJM-V10-LF's extended channel faders, designed for precise volume control and smooth mixing.
Kurmak
- Güç Bağlantısı: Connect the supplied power cord to the AC IN terminal on the rear panel of the mixer and then to a suitable power outlet.
- Ses Giriş Bağlantıları: Connect your audio sources (turntables, CDJs, media players) to the PHONO or LINE input jacks for each channel (CH 1-6) on the rear panel. Ensure proper grounding for turntables using the SIGNAL GND terminal.
- Mikrofon Bağlantıları: Connect microphones to the MIC 1 or MIC 2 input jacks.
- Ses Çıkış Bağlantıları: Connect your main sound system to the MASTER 1 (XLR) or MASTER 2 (RCA) output jacks. Connect your booth monitors to the BOOTH output jacks.
- Digital and Send/Return Connections: Utilize the DIGITAL IN/OUT for digital audio connections and the SEND/RETURN jacks for connecting external effects units.
- USB Bağlantısı: Connect the mixer to your computer via the USB port for audio interface functionality and MIDI control.

Şekil 3: Arka kısım view of the DJM-V10-LF, detailing the various audio input (Phono/Line, Mic) and output (Master, Booth, Digital, Send/Return) ports, along with power and USB connections.
Kullanım Talimatları
This section outlines the basic operation of the DJM-V10-LF mixer. For detailed functions and advanced settings, please refer to the comprehensive user manual available on the Pioneer DJ webalan.
- Güç Açma/Kapatma: Press the POWER button on the rear panel to turn the unit on or off.
- Channel Input Selection: Use the input selector switches above each channel fader to choose between PHONO, LINE, or DIGITAL inputs.
- Gain Adjustment (TRIM): Adjust the TRIM knob for each channel to set the input level, ensuring the channel level meter does not peak into the red.
- Kanal Kısıcıları: Utilize the long channel faders to control the volume of each individual channel. The extended length allows for fine-tuned adjustments.
- 4-Bant EQ: Use the HIGH, HIGH-MID, LOW-MID, and LOW knobs on each channel to adjust the frequency response of your audio.
- Filtre Bölümü: Apply high-pass or low-pass filters to individual channels using the FILTER knob.
- Send/Return Effects: Engage the SEND buttons to route audio to the internal or external effects units. Adjust the RETURN level to blend the effects into your mix.
- Ana Çıkış: Control the overall volume of your mix using the MASTER LEVEL knob. Monitor the master output level using the master level meters.
- Kulaklıklar: Connect headphones to the PHONES A or PHONES B jacks and use the CUE buttons to monitor individual channels or the master output.
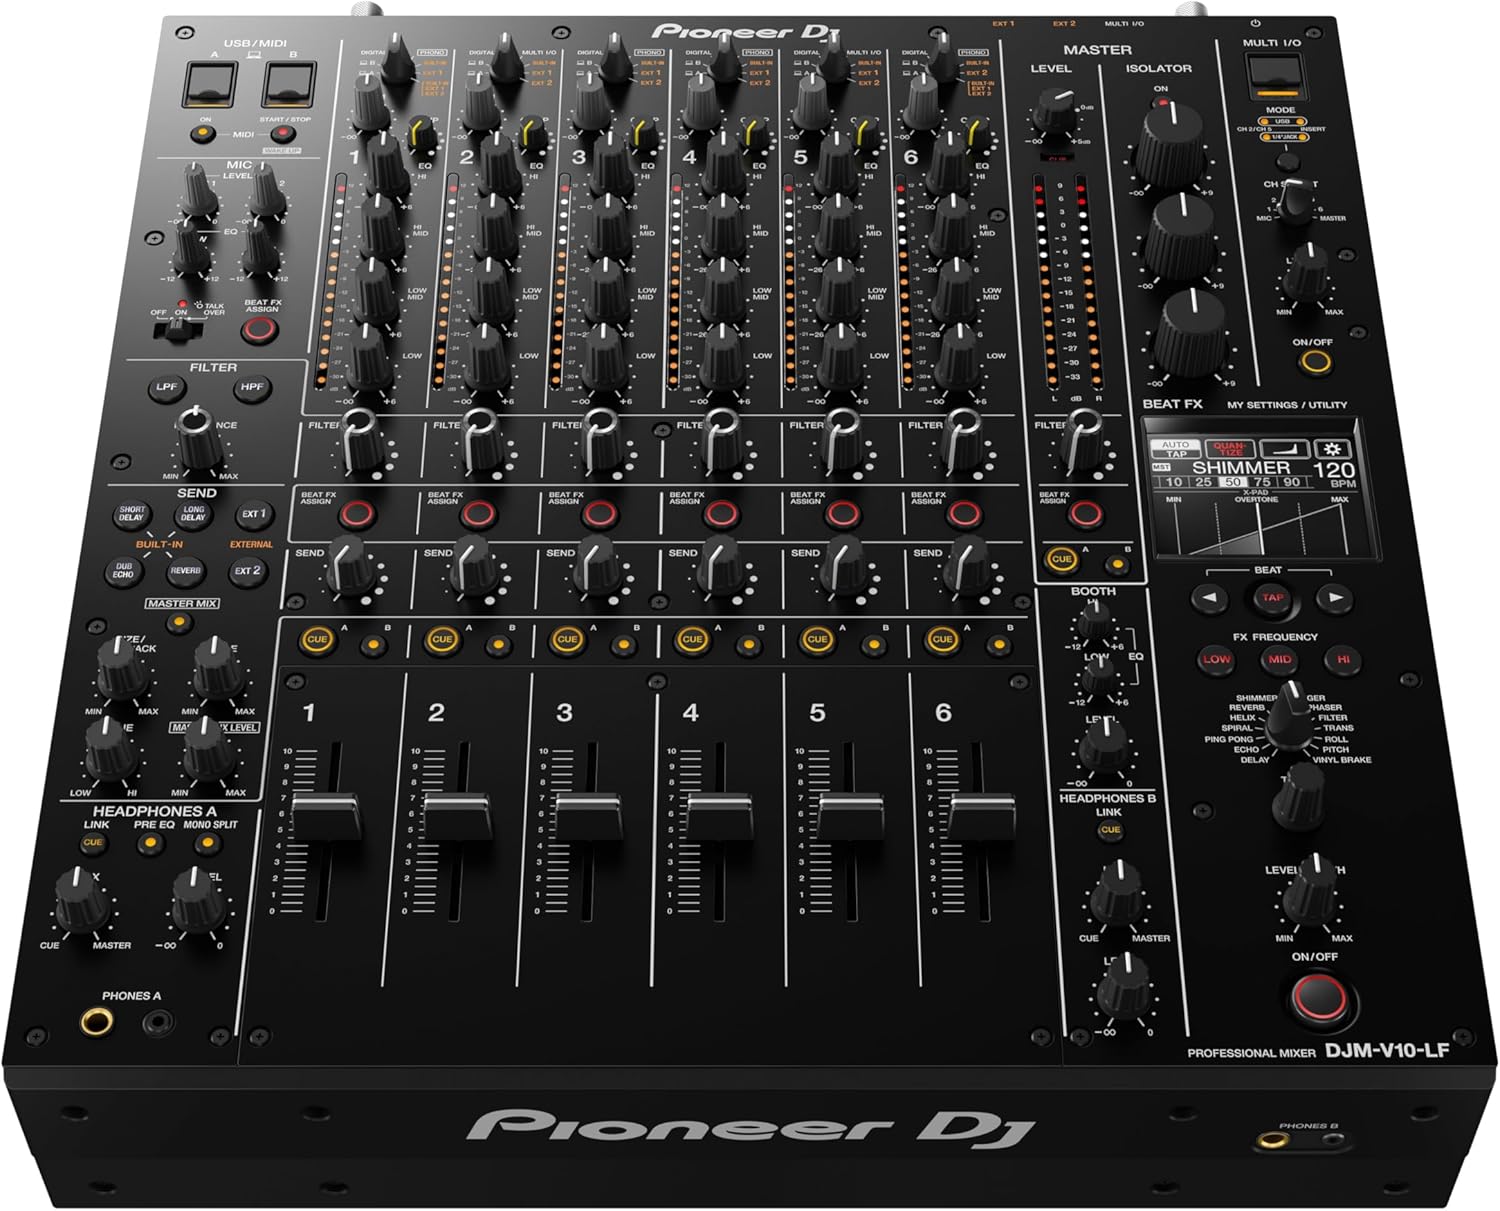
Şekil 4: Kapsamlı view of the mixer's top panel, illustrating the layout of its six channels, 4-band EQs, send/return effects section, and master controls.
Bakım
- Temizlik: Regularly wipe the mixer's surface with a soft, dry cloth. For stubborn dirt, use a slightly damp Bir bezle silin ve ardından iyice kurulayın. Aşındırıcı temizleyicilerden veya çözücülerden kaçının.
- Toz Koruması: When not in use, cover the mixer with a dust cover to prevent dust and debris from entering the faders and knobs.
- Depolamak: Mikseri serin, kuru ve doğrudan güneş ışığından, aşırı sıcaklıklardan ve yüksek nemden uzak bir yerde saklayın.
- Fader Bakımı: Avoid spilling liquids on the faders. If faders become stiff or noisy, consult a qualified service technician.
Sorun giderme
If you encounter issues with your DJM-V10-LF, please refer to the following basic troubleshooting steps before contacting support:
- Güç Yok: Ensure the power cord is securely connected to both the mixer and the power outlet. Check if the power outlet is functional.
- Ses Çıkışı Yok: Verify that all audio cables are correctly connected. Check the MASTER LEVEL knob and individual channel faders are raised. Ensure input selectors are set correctly for your audio sources.
- Bozuk Ses: Reduce the TRIM level for channels that are clipping (peaking into red on the level meters). Check that your audio sources are not outputting a distorted signal.
- Uğultulu ses: Ensure all ground wires from turntables are properly connected to the SIGNAL GND terminal. Check for loose cable connections.
Özellikler
| Özellik | Şartname |
|---|---|
| Model Numarası | DJM-V10-LF |
| Marka | Öncü DJ |
| Kanal Sayısı | 6 |
| Ürün Ağırlığı | 14.1 Kilogram (31 pound) |
| Ürün Boyutları (D x Y) | 16.04" x 4.25" (40.74 cm x 10.8 cm) |
| Bağlantı Teknolojisi | USB |
| Güç Kaynağı | Kablolu Elektrik |
| İlk Mevcut Tarih | 24 Kasım 2020 |
Garanti ve Destek
For detailed warranty information, please refer to the warranty card included with your product or visit the official Pioneer DJ website. If you require technical assistance, product support, or service, please contact Pioneer DJ customer support through their official channels. Keep your purchase receipt and product serial number readily available when contacting support.
Note: Protection plans may be available for purchase separately. Refer to your retailer for details.


