
giriiş
This manual provides detailed instructions for the setup, operation, and maintenance of your groov e Atlas Radio Alarm Clock with Wireless Charger. Please read this manual thoroughly before using the device to ensure proper function and to maximize your user experience. Keep this manual for future reference.
Paket İçeriği
Paketin içinde tüm öğelerin mevcut olduğundan emin olun:
- groov e Atlas Radio Alarm Clock
- Güç Adaptörü
- Kullanıcı Kılavuzu
Ürün Özellikleri
- Kablosuz Şarj (5W): Conveniently charge compatible smartphones by placing them on the top surface.
- FM Radyo: Tune into your favorite FM stations.
- LED ekran: Clear digital time display.
- Güç Kaynağı: Reliable power supply for continuous operation.
- USB Şarj İstasyonu: Additional USB port for charging other devices.
- Çift Alarm: Farklı uyandırma saatleri için iki bağımsız alarm kurun.
- Ekran Karartıcı: Adjust the brightness of the LED display.
Kurmak
- Gücü bağlayın: Insert the power adapter into the 'DC IN' port on the back of the alarm clock, then plug the adapter into a wall outlet. The display will light up.
- Zaman Ayarı:
- Press and hold the 'TIME SET' button located on the back of the unit.
- Use the 'TUN-' or 'TUN+' buttons on the top panel to adjust the hour.
- Press 'TIME SET' again to confirm the hour and move to minutes.
- Use 'TUN-' or 'TUN+' to adjust the minutes.
- Press 'TIME SET' once more to confirm and exit time setting.
- To switch between 12-hour and 24-hour format, press the '12/24H' button on the back.

Resim: Arka view of the groov e Atlas alarm clock, highlighting the DC IN power input and the USB charging port. The '12/24H TIME SET' and 'SLEEP' buttons are also visible.
Kullanım Talimatları
Setting Alarms (ALM1 / ALM2)
- Press the 'ALM1' or 'ALM2' button to select the alarm you wish to set. The alarm icon will flash on the display.
- Use the 'TUN-' or 'TUN+' buttons to adjust the alarm hour.
- Press the 'ALM1' or 'ALM2' button again to confirm the hour and move to minutes.
- Use 'TUN-' or 'TUN+' to adjust the alarm minutes.
- Press the 'ALM1' or 'ALM2' button a third time to confirm the alarm time. The alarm icon will remain lit, indicating the alarm is active.
- To deactivate an alarm, press the corresponding 'ALM1' or 'ALM2' button until the alarm icon disappears from the display.
FM Radyo İşlemi
- Açma/Kapatma: Press the 'ON/OFF' button to turn the radio on or off.
- Otomatik tarama: Press the 'SCAN' button to automatically scan and save available FM stations.
- Manuel Ayarlama: Use the 'TUN-' or 'TUN+' buttons to manually adjust the frequency. Press and hold for faster tuning.
- Önceden Ayarlanmış İstasyonlar: Use 'MEM-' or 'MEM+' to cycle through saved preset stations.
- Sesi Ayarla: Use the 'VOL-' or 'VOL+' buttons to control the radio volume.
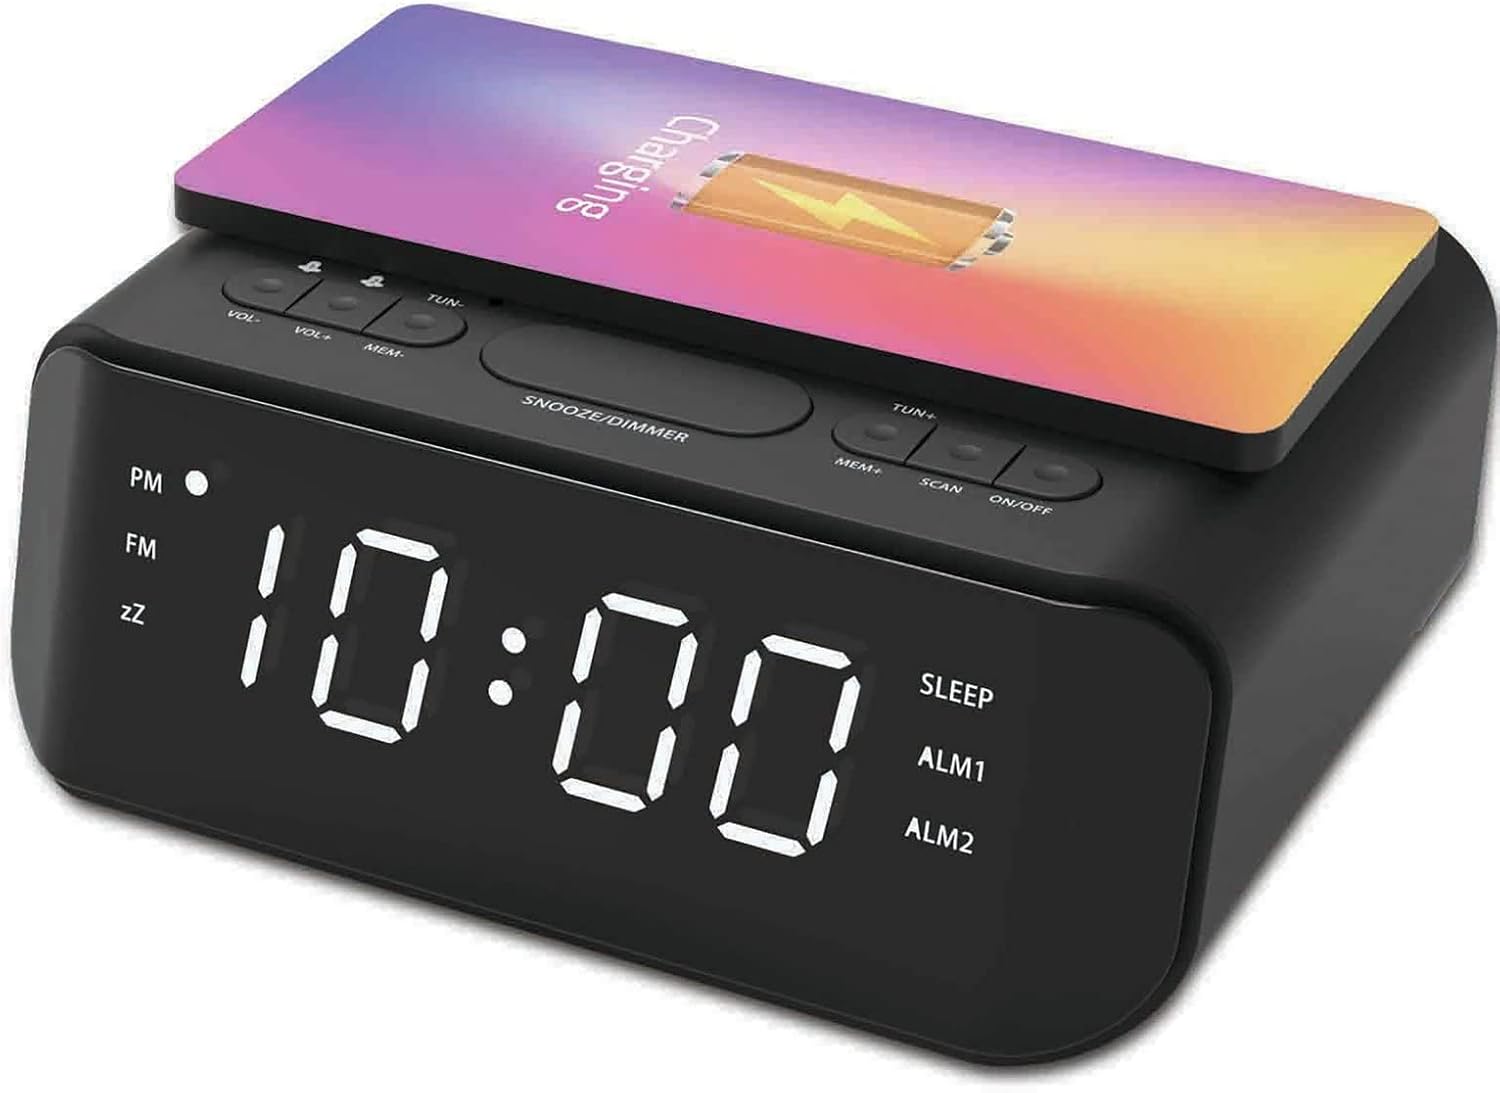
Resim: Üst view of the groov e Atlas alarm clock, illustrating the layout of the control buttons for volume, tuning, memory, scan, and power.
Kablosuz Şarj
- Ensure your smartphone is compatible with 5W Qi wireless charging.
- Place your compatible smartphone centrally on the wireless charging pad located on the top surface of the alarm clock.
- The phone's display should indicate that charging has begun. If not, adjust the phone's position.

Image: A smartphone placed on the groov e Atlas alarm clock's top surface, showing the charging indicator on the phone's screen, confirming wireless charging is active.
USB Şarj
- Connect a USB charging cable (not included) to the USB port on the back of the alarm clock.
- Kablonun diğer ucunu cihazınıza bağlayın.
- Cihazınız şarj olmaya başlayacaktır.
Dimmer Ekranı
Press the 'SNOOZE/DIMMER' button to cycle through different brightness levels for the LED display. This allows you to adjust the display to your preferred visibility, especially in dark environments.
Bakım
- Temizlik: Çalar saatin yüzeyini temizlemek için yumuşak, kuru bir bez kullanın. Sıvı temizleyiciler veya aşındırıcı malzemeler kullanmayın.
- Depolamak: Uzun süre kullanılmayacaksa, cihazın fişini çekin ve serin ve kuru bir yerde saklayın.
- Emniyet: Do not expose the device to water, high humidity, or extreme temperatures. Avoid dropping or subjecting the device to strong impacts.
Sorun giderme
| Sorun | Olası Neden | Çözüm |
|---|---|---|
| Cihaz açılmıyor. | Güç adaptörü bağlı değil veya priz arızalı. | Güç adaptörünün cihaza ve çalışan bir duvar prizine güvenli bir şekilde takılı olduğundan emin olun. Farklı bir priz deneyin. |
| Kablosuz şarj çalışmıyor. | Phone not Qi-compatible or not positioned correctly. | Verify your phone supports Qi wireless charging. Reposition the phone centrally on the charging pad. Remove any thick phone cases. |
| Alarm çalmıyor. | Alarm etkinleştirilmedi veya ses seviyesi çok düşük. | Check if the alarm icon is lit on the display. Increase the alarm volume using the 'VOL+' button. |
| Radyo alımı zayıf. | Zayıf sinyal veya anten konumu. | Extend and adjust the position of the FM antenna wire on the back of the unit for better reception. |
Özellikler
- Model Numarası: GVWC06BK
- Marka: groov e
- Renk: Siyah
- Görüntüleme Türü: Dijital LED
- Güç Kaynağı: Mains Powered (AC Adapter included)
- Kablosuz Şarj Çıkışı: 5W
- USB Şarj Çıkışı: 5V/1A
- Alarm Özellikleri: Dual Alarm, Snooze
- Radyo: FM
- Malzeme: Akrilonitril Bütadien Stiren (ABS)
- Şekil: Dikdörtgen
- Montaj Tipi: Masa Montajı
- Hareket Türü: Kuvars
- Piller: Not included (requires 1 battery for backup, type not specified in data)
Garanti ve Destek
Your groov e Atlas Radio Alarm Clock GVWC06BK comes with a standard manufacturer's warranty. Please refer to the warranty card included in your package for specific terms and conditions, including the warranty period and coverage details.
For technical support, troubleshooting assistance, or warranty claims, please contact groov e customer service through their official webLütfen web sitemizi veya garanti kartınızda belirtilen iletişim bilgilerini kullanın.
Lütfen garantiyle ilgili sorularınız için satın alma belgenizi saklayın.