
1. Giriş
The Supermicro SYS-1019C-FHTN8 is a 1U rackmount server designed for demanding applications such as network security, uCPE network appliances, and virtualization. It supports Intel Xeon E-2100 Series Processors and features a front I/O design, accommodating two hot-swappable 2.5-inch drives and an additional two internal 2.5-inch drives. This server is equipped with eight Gigabit Ethernet LAN ports and a dedicated IPMI port for comprehensive remote management.
2. Kurulum ve Kurulum
2.1 Paketin Açılması ve Muayene
Carefully remove the server from its packaging. Inspect the server for any signs of damage that may have occurred during shipping. Retain all packaging materials for future use or return if necessary.
2.2 Raf Montajı
The SYS-1019C-FHTN8 is a 1U rackmount server. Install the server into a standard 19-inch server rack using appropriate rack rails (sold separately or included). Ensure proper ventilation and cable management within the rack.
2.3 Bileşen Kurulumu
Before powering on the server, ensure all necessary components are installed. Refer to the following for guidance:
2.3.1 Sürücü Kurulumu
The server supports two hot-swappable 2.5-inch drives accessible from the front panel and two additional internal 2.5-inch drives. For hot-swappable drives, slide the drive into the bay until it clicks into place. For internal drives, secure them within the chassis using the provided mounting hardware.

Şekil 1: Ön view of the SYS-1019C-FHTN8 server, highlighting the two hot-swappable 2.5-inch drive bays.
2.3.2 Bellek Kurulumu
The server features four DDR4 DIMM slots, supporting up to 128GB ECC UDIMM. Align the memory module with the slot key and press firmly until the retaining clips snap into place on both sides.
2.3.3 M.2 Kurulum
The server includes two M.2 22110 slots. Install M.2 storage devices by inserting them into the slot and securing them with the provided screw.
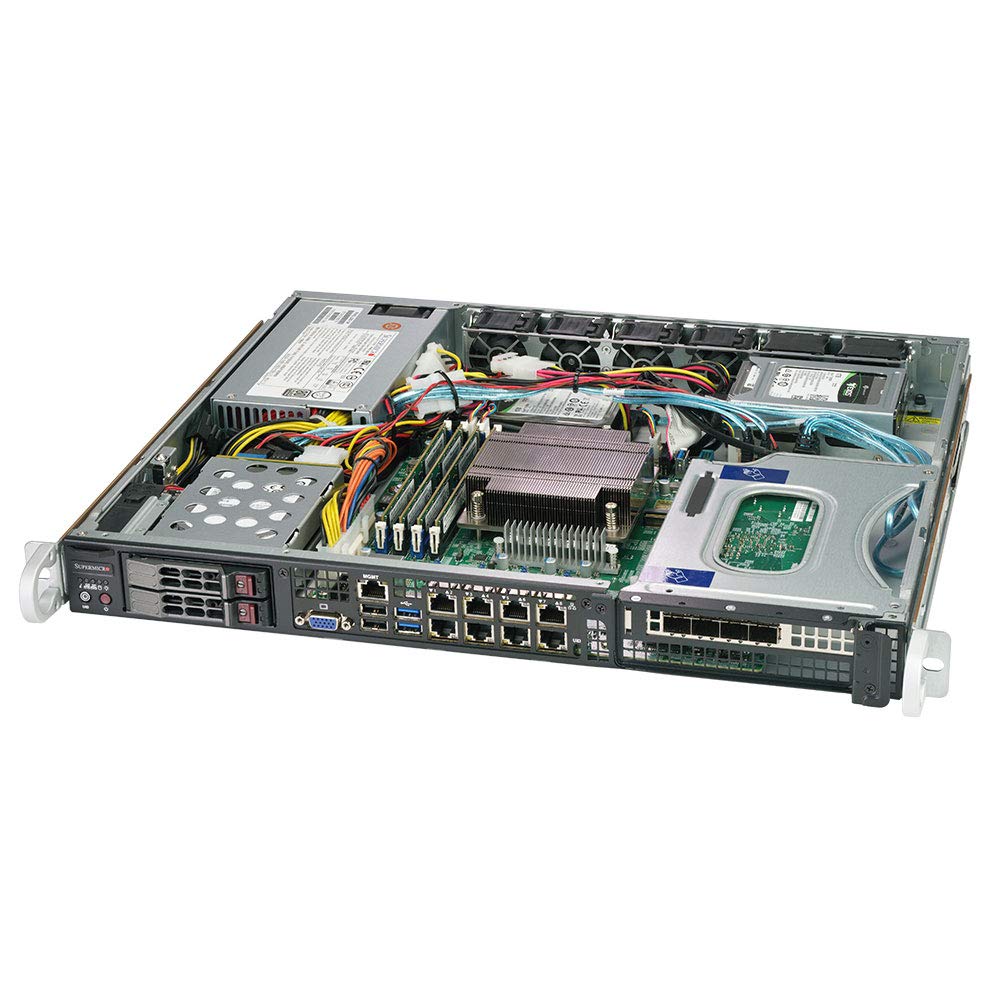
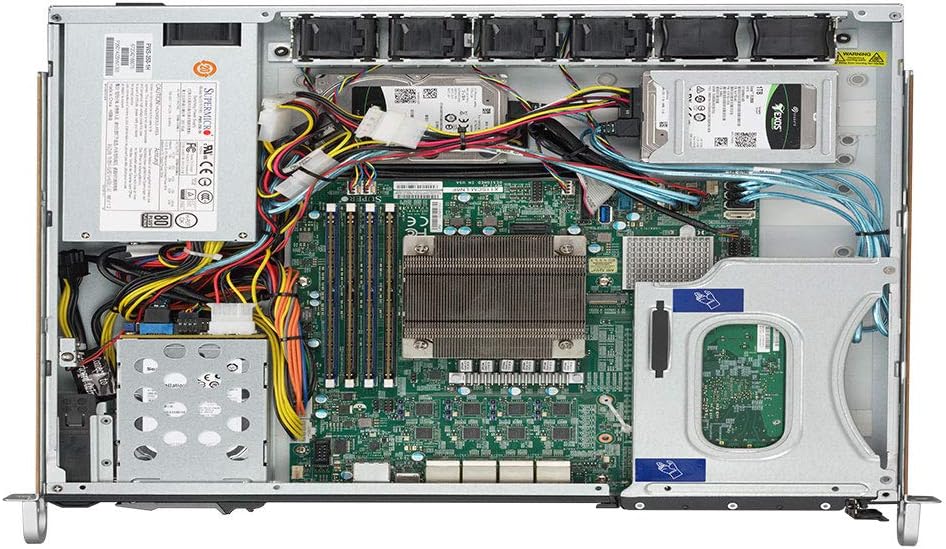
Şekil 2: Dahili view of the SYS-1019C-FHTN8 server, showing the motherboard layout, DIMM slots, and internal drive mounting points.
2.4 Çevre Birimlerini Bağlama
Connect the power cable to the server's power supply unit and a suitable power source. Connect network cables to the desired Gigabit Ethernet LAN ports. If local access is required, connect a display, keyboard, and mouse to the appropriate ports.
Şekil 3: Arka view of the SYS-1019C-FHTN8 server, illustrating the eight Intel i210-AT GbE LAN ports, USB ports, VGA port, and the dedicated IPMI port.
2.5 İlk Güç Açma
Press the power button on the front panel. Observe the system's boot process. Access the BIOS/UEFI setup utility by pressing the designated key (usually DEL or F2) during startup to configure boot options or other system settings.
3. Kullanım Talimatları
3.1 İşletim Sistemi Kurulumu
Install your preferred operating system (e.g., Windows Server, Linux distribution, VMware ESXi) using a bootable USB drive, optical drive (if connected), or network installation via PXE boot.
3.2 Ağ Yapılandırması
Configure the eight Intel i210-AT GbE LAN ports according to your network requirements. This may involve setting static IP addresses, configuring VLANs, or bonding interfaces for redundancy and increased throughput.
3.3 Remote Management (IPMI)
The dedicated IPMI port allows for out-of-band management of the server. Connect the IPMI port to your management network. Access the IPMI web bir arayüz aracılığıyla web browser using the assigned IP address to monitor system health, manage power, and perform remote KVM functions.
4. Bakım
4.1 Düzenli Temizlik
Periodically clean the server's exterior and internal components to prevent dust buildup, which can impede airflow and lead to overheating. Use compressed air to clear dust from fans and heatsinks. Ensure the server is powered off and disconnected from the power source before cleaning.
4.2 Firmware Güncellemesi
Regularly check the Supermicro website for updated BIOS, IPMI, and driver firmware. Keeping firmware up-to-date ensures optimal performance, stability, and security. Follow the manufacturer's instructions carefully when performing firmware updates.
4.3 Bileşen Değişimi
When replacing components such as drives, memory, or fans, ensure the server is powered off and properly grounded. Refer to the specific component's installation guide for detailed instructions. For hot-swappable drives, follow the operating system's procedure for safe removal and insertion.
4.4 Çevresel Hususlar
Operate the server within its specified environmental limits (temperature, humidity). Ensure adequate airflow around and through the server to prevent thermal issues. Avoid placing the server in direct sunlight or near heat sources.
5. Sorun Giderme
5.1 Güç Yok
- Verify the power cable is securely connected to both the server and the power outlet.
- Check the power supply unit (PSU) status LEDs.
- Prizi başka bir cihazla deneyin.
5.2 No Boot/Display
- Monitörün bağlı ve açık olduğundan emin olun.
- Check memory modules are properly seated.
- Listen for POST (Power-On Self-Test) beep codes, which can indicate specific hardware issues.
- If using IPMI, check the remote console for boot messages.
5.3 Ağ Bağlantı Sorunları
- Verify network cables are securely connected to the correct LAN ports.
- Check network adapter status LEDs on the server and the switch.
- Confirm network configuration (IP address, subnet mask, gateway) in the operating system.
- Ping other devices on the network to isolate the issue.
5.4 IPMI Access Problems
- Ensure the dedicated IPMI port is connected to the network.
- Verify the IPMI IP address and network settings are correctly configured.
- Check for firewall rules that might be blocking access to the IPMI port.
6. Özellikler
| Özellik | Şartname |
|---|---|
| İşlemci Desteği | Intel Xeon E-2100 Series Processor, LGA 1151 |
| Yonga seti | Intel C246 |
| Hafıza | 4 x DDR4 DIMM slots; Up to 128GB ECC UDIMM |
| Sürücü bölmeleri | 2 x Hot-swap 2.5" Drive Bays (front), 2 x Internal 2.5" Drive Bays |
| M.2 Yuvaları | 2 x M.2 22110 slots |
| LAN Bağlantı Noktaları | 8 x Intel i210-AT GbE LAN Ports |
| Yönetim Bağlantı Noktası | 1 x Dedicated IPMI LAN Port |
| USB Bağlantı Noktaları | 2 x USB 2.0 Ports (rear) |
| Form Faktörü | 1U Raf Montajı |
| Boyutlar (Y x G x D) | 43 x 437 x 381 mm (1.7" x 17.2" x 15.0") |
| Ağırlık | Yaklaşık 25 pound |
| Donanım Platformu | PC |
| Malzeme | Metal |
7. Garanti ve Destek
7.1 Üretici Garantisi
This Supermicro server is covered by a manufacturer's warranty. Please refer to the warranty documentation provided with your purchase or visit the official Supermicro webGaranti kapsamı, süresi ve servis prosedürleri ile ilgili detaylı şartlar ve koşullar için siteyi ziyaret edin.
7.2 Teknik Destek
For technical assistance, troubleshooting beyond this manual, or warranty claims, please contact Supermicro technical support. Have your server's model number (SYS-1019C-FHTN8) and serial number ready when contacting support to expedite service.
- Supermicro Desteği Webalan: www.supermicro.com/support
- İletişim Bilgileri: Destek bölümüne bakın. webBölgesel iletişim numaraları ve e-posta adresleri için site.