
1. Giriş
Satın aldığınız için teşekkür ederizasing the DBPOWER RD810 Portable Mini Projector. This manual provides essential information for the safe and optimal use of your projector. Please read it thoroughly before operating the device and retain it for future reference.
This projector is designed for home entertainment, offering a portable solution for displaying videos, photos, and presentations. Ensure all safety guidelines are followed to prevent damage to the device or personal injury.
2. Paket İçeriği
Please verify that all components are present in your package. If any items are missing or damaged, contact DBPOWER customer support.
- DBPOWER RD810 Portable Mini Projector
- Uzaktan kumanda
- Güç kablosu
- HDMI Kablosu
- AV Kablosu
- Kullanıcı Kılavuzu
3. Ürün Bittiview
Familiarize yourself with the various parts of your DBPOWER RD810 projector.

Şekil 3.1: Ön view of the DBPOWER RD810 Projector, showing the lens and ventilation.
Şekil 3.2: Yan view of the projector, illustrating input ports such as HDMI, USB, and VGA.
Temel Bileşenler:
- Mercek: Görüntüyü ekrana yansıtır.
- Odak Halkası: Görüntü netliğini ayarlar.
- Keystone Correction Knob: Görüntüdeki yamuk bozulmayı düzeltir.
- Kontrol Paneli: On-device buttons for basic navigation and settings.
- Giriş Bağlantı Noktaları: HDMI, USB, VGA for connecting various devices.
- Güç girişi: Güç kablosunu bağlamak için.
- Havalandırma Izgaraları: Isı dağılımı için gereklidir. Engellemeyin.
4. Kurulum
4.1 Yerleştirme
- Place the projector on a stable, flat surface (Tabletop Mount).
- Ensure there is adequate space around the projector for proper ventilation.
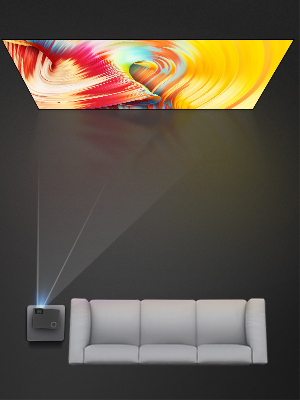
- Position the projector perpendicular to the projection surface for the best image quality.
4.2 Güç Bağlantısı
- Güç kablosunu projektörün güç girişine bağlayın.
- Güç kablosunun diğer ucunu elektrik prizine takın.
- Projeksiyon cihazındaki güç gösterge ışığı yanmalıdır.
4.3 Giriş Aygıtlarının Bağlanması
The projector supports HDMI, USB, and VGA connectivity.
- HDMI: Connect an HDMI cable from your source device (e.g., laptop, DVD player, game console) to the HDMI port on the projector.
- USB BAĞLANTI: Medya dosyalarını oynatmak için USB sürücüsünü USB bağlantı noktasına takın. files directly. Note: The USB port is primarily for media playback and charging, not for direct computer connection for display.
- VGA: Connect a VGA cable from your computer to the VGA port on the projector.
- Ses Çıkışı: If desired, connect external speakers to the projector's audio output port for enhanced sound.
5. Kullanım Talimatları
5.1 Açma/Kapatma
- Güç Açık: Projeksiyon cihazındaki veya uzaktan kumandadaki güç düğmesine basın. Projeksiyon cihazı kapanacaktır.amp açılacak.
- Kapat: Press the power button again. The projector will initiate a shutdown sequence. Do not unplug the power cable until the fan has stopped and the projector has fully cooled down.
5.2 Odak ve Trapez Düzeltme
- Odak: Rotate the focus ring located around the lens until the projected image appears sharp and clear.
- Keystone Düzeltmesi: If the image appears trapezoidal (wider at the top or bottom), adjust the keystone correction knob until the image is rectangular.
5.3 Giriş Kaynağının Seçilmesi
After connecting your input device, you need to select the correct source:
- Uzaktan kumandadaki veya projektörün kontrol panelindeki 'Kaynak' düğmesine basın.
- Use the arrow keys to navigate through the input options (HDMI, USB, VGA).
- Seçiminizi onaylamak için 'Tamam' veya 'Enter' tuşuna basın.
5.4 Menü Navigasyonu
Use the 'Menu' button on the remote or projector to access settings. Navigate with arrow keys and confirm with 'OK' or 'Enter'. Common settings include Picture Mode, Aspect Ratio, Sound Settings, and Time Settings.
6. Bakım
6.1 Lens Temizliği
Use a soft, lint-free cloth or lens cleaning paper to gently wipe the lens. Avoid using abrasive cleaners or excessive force, which can scratch the lens surface.
6.2 Havalandırma Temizliği
Regularly check and clean the ventilation grilles to prevent dust buildup, which can lead to overheating. Use a soft brush or a vacuum cleaner with a brush attachment to remove dust from the vents.
6.3 Depolama
Projeksiyon cihazını uzun süre kullanılmadığı zamanlarda serin, kuru ve tozsuz bir ortamda saklayın. Hasarı önlemek için orijinal ambalajını veya koruyucu bir kılıfı kullanın.
7. Sorun Giderme
| Sorun | Olası Neden | Çözüm |
|---|---|---|
| Güç Yok | Power cable not connected; Power outlet faulty; Projector overheated. | Ensure power cable is securely connected; Test power outlet; Allow projector to cool down. |
| Resim yok | Incorrect input source selected; Input cable loose or faulty; Source device not outputting signal. | Select correct input source; Check cable connections; Ensure source device is on and configured to output. |
| Bulanık Görüntü | Focus not adjusted; Keystone not adjusted; Projector too far/close to screen. | Adjust focus ring; Adjust keystone correction knob; Reposition projector. |
| Ses Yok | Volume too low; Mute enabled; External speakers not connected/configured; Source device audio settings. | Increase volume; Disable mute; Connect external speakers if desired; Check audio settings on source device. |
| Uzaktan Kumanda Çalışmıyor | Batteries depleted; Obstruction between remote and projector; Remote sensor blocked. | Replace batteries; Remove obstructions; Ensure remote sensor on projector is clear. |
8. Özellikler
| Özellik | Şartname |
|---|---|
| Marka | DBPOWER |
| Model Adı | RD810 |
| Model Numarası | 810X |
| Bağlantı Teknolojisi | HDMI, USB, VGA |
| Yerli Ekran Çözünürlüğü | 800x480 |
| Maksimum Ekran Çözünürlüğü | 1920x1080 |
| Görüntü Türü | LCD |
| Kontrast Oranı | 1000:1 |
| Işık Kaynağı Çalışma Ömrü | 30,000 Saat |
| Netage | 24 watt |
| Kontrol Yöntemi | Uzaktan Kumanda, Düğme Kontrolü |
| Montaj Tipi | Masa Üstü Montaj |
| Form Faktörü | Taşınabilir |
9. Garanti ve Destek
DBPOWER products are designed and manufactured to the highest quality standards. For information regarding warranty coverage, technical support, or service inquiries, please refer to the warranty card included with your product or visit the official DBPOWER website. Please have your model number (RD810 / 810X) and purchase details ready when contacting support.