
1. Giriş
Thank you for choosing the AVANTEK CW-11 Wireless Doorbell. This manual provides essential information for the proper installation, operation, and maintenance of your new doorbell system. Please read these instructions carefully before use and retain them for future reference.

Image 1.1: AVANTEK CW-11 Wireless Doorbell system, showing the compact transmitter and receiver units.
2. Güvenlik Bilgileri
- Cihazı aşırı sıcaklıklara veya doğrudan güneş ışığına maruz bırakmayın.
- Keep the device away from water and high humidity. The transmitter is IP55 waterproof, but the receiver is for indoor use only.
- Cihazı kendiniz sökmeye veya onarmaya çalışmayın. Yardım için müşteri desteğine başvurun.
- Pilleri çocukların erişemeyeceği yerde saklayın. Kullanılmış pilleri uygun şekilde atın.
3. Paket İçeriği
- 1 x Wireless Transmitter (Doorbell Button)
- 1 x Plug-in Receiver (Chime Unit)
- 1 adet CR2 pil (vericiye önceden takılı)
- 2 x Vida
- 2 x Çapa
- 1 x Çift Taraflı Yapışkan Bant
- 1 x Tornavida
4. Ürün Bittiview
The AVANTEK CW-11 Wireless Doorbell system consists of a battery-powered transmitter (doorbell button) and a plug-in receiver (chime unit). The receiver features 52 selectable melodies, 5 adjustable volume levels, and an LED indicator for visual alerts.

Image 4.1: The receiver unit, illustrating its features including 52 chimes, 5 volume levels, and an LED indicator.
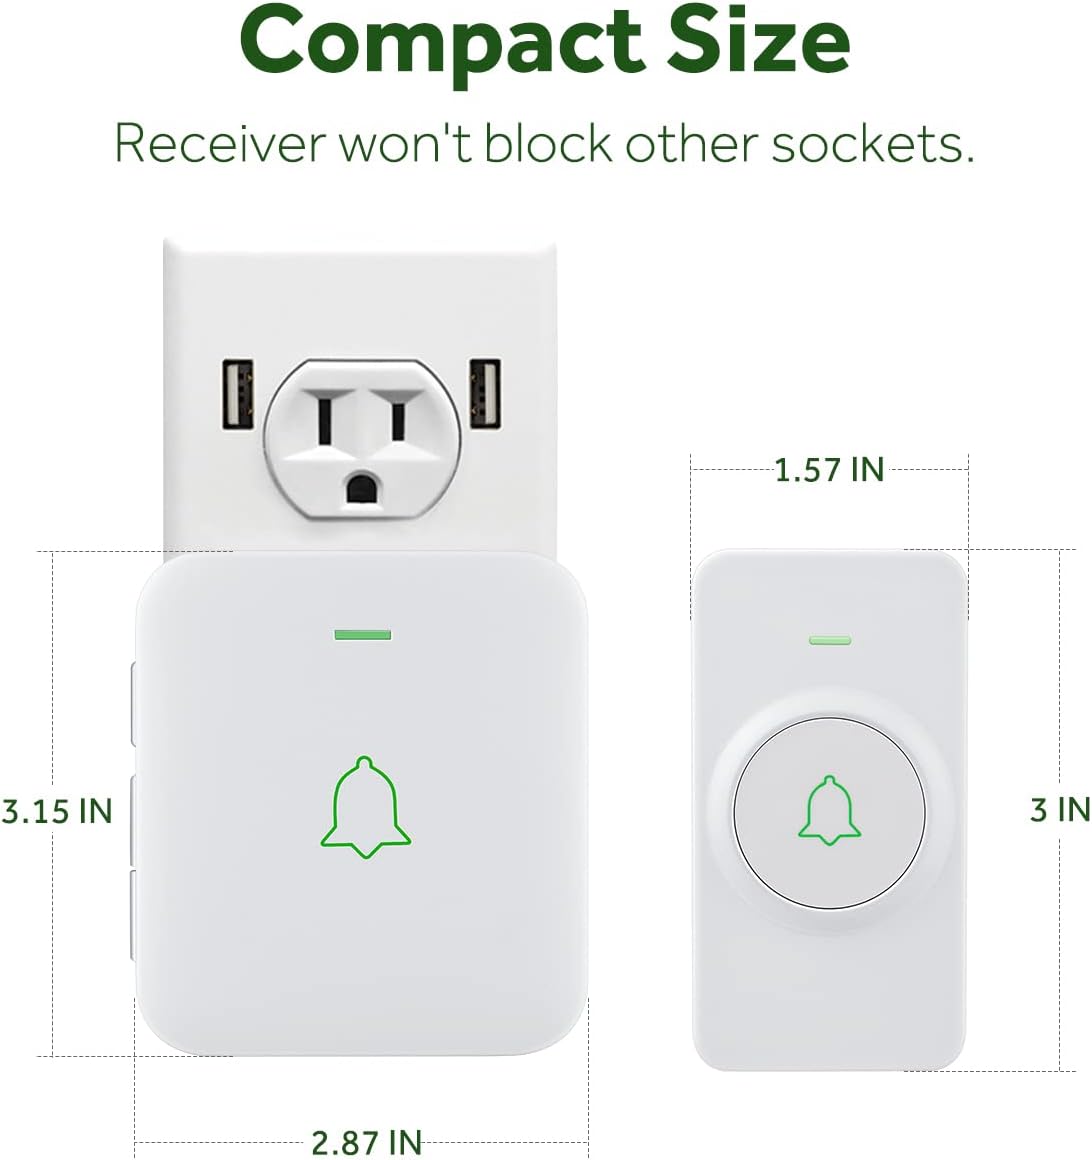
Image 4.2: The compact size of both the transmitter and receiver, designed to not obstruct adjacent power sockets.
5. Kurulum Talimatları
5.1 Vericinin Kurulumu
The transmitter can be installed using either the provided double-sided adhesive tape or screws and anchor plugs.

Image 5.1: Visual guide for installing the transmitter using either adhesive tape or screws and anchor plugs.
Yöntem A: Çift Taraflı Yapışkan Bant Kullanımı
- Montaj yapılacak yüzeyi toz ve nemden tamamen arındırmak için iyice temizleyin.
- Çift taraflı yapışkan bandın koruyucu filminin bir tarafını soyun ve vericinin arkasına yapıştırın.
- Peel off the other side of the protective film and firmly press the transmitter onto the cleaned surface for at least 30 seconds.
Method B: Using Screws and Anchor Plugs
- Mark the desired mounting points for the transmitter on the wall.
- İşaretli noktalara iki delik açın.
- Insert the anchor plugs into the drilled holes.
- Align the transmitter's mounting holes with the anchor plugs and secure it with the provided screws.
Önemli: To prevent signal interference, do not install the transmitter close to or on metal surfaces such as metal door frames or mailboxes.
5.2 Plugging in the Receiver
Plug the receiver into a standard electrical outlet in a location where the chime can be easily heard. The LED on the receiver will flash upon initial power-up.
5.3 Pairing the Doorbell System
The transmitter and receiver are pre-paired at the factory. If re-pairing is needed or if you add additional transmitters/receivers, follow these steps:
- Alıcıyı bir elektrik prizine takın.
- To enter pairing mode, hold down the Volume button on the receiver for 3 seconds. The LED on the receiver will flash.
- Remove the battery insulating film from the transmitter (if not already done).
- Press the Push button on the transmitter. Its LED will flash.
- After successful pairing, the receiver will chime once, and the LEDs on both the receiver and transmitter will flash simultaneously.
Video 5.2: Official AVANTEK video demonstrating how to install the wireless doorbell transmitter.
Video 5.3: Official AVANTEK video demonstrating how to pair the wireless doorbell system.
6. Kullanım Talimatları
6.1 Melodilerin Değişimi
The receiver offers 52 different melodies. Use the 'Next' and 'Previous' buttons on the side of the receiver to cycle through the available tunes. Press the doorbell button to preview the selected melody.

Image 6.1: The receiver offers a wide selection of melodies for personalization.
6.2 Sesi Ayarlama
There are 5 adjustable volume levels, with a maximum setting of 115 dB. Use the 'Volume' button on the side of the receiver to increase or decrease the sound level.
6.3 Sessiz Modu
To activate mute mode (0 dB), repeatedly press the 'Volume' button until the sound is off. In this mode, only the LED indicator will flash when the doorbell is pressed, providing a silent visual alert.

Image 6.2: The mute mode feature allows for silent notifications, ideal for quiet environments.
7. Bakım
7.1 Temizlik
Cihazları yumuşak, kuru bir bezle silin. Aşındırıcı temizleyiciler veya çözücüler kullanmayın.
7.2 Pil Değişimi (Verici)
The transmitter uses a CR2 battery with an estimated lifespan of 3 years. When the battery is low, the transmitter's LED may not light up or the signal range may decrease. To replace the battery:
- Vericiyi dikkatlice açın.asing using the provided screwdriver or a small flat-head screwdriver.
- Eski CR2 pili çıkarın.
- Yeni bir CR2 pil takın ve kutupların doğru olduğundan (+/-) emin olun.
- c'yi kapatasing güvenli bir şekilde.
8. Sorun Giderme
- Doorbell not chiming: Ensure the receiver is plugged in and powered. Check the transmitter battery. Re-pair the devices if necessary (refer to Section 5.3).
- Short signal range: Ensure the transmitter is not installed on or near metal surfaces. Relocate the receiver to a more central position. Replace the transmitter battery.
- Parazit yapmak: The doorbell operates on a frequency that minimizes interference with other household devices. If interference occurs, try changing the melody or relocating the receiver.
- Hafıza Fonksiyonu: The device remembers your last melody and volume level after a power outage, so no need to reset settings.
9. Özellikler
| Özellik | Şartname |
|---|---|
| Model Numarası | CW-11 |
| kablosuz Menzil | 1000 feet'e (300 metre) kadar |
| Melodiler | 52 |
| Ses Seviyeleri | 5 (115 dB'ye kadar) |
| Verici Pil | 1 x CR2 (dahil) |
| Verici Pil Ömrü | Yaklaşık 3 yıl |
| Su Geçirmezlik Derecesi | IP55 (Verici) |
| Çalışma Sıcaklığı | -4 °F ila 140 °F (-20 °C ila 60 °C) |
| Güç Kaynağı | AC ve Pil |
| Ürün Boyutları | Receiver: 2.8 x 0.6 x 3.1 inches; Transmitter: 3.15 x 1.57 x 0.79 inches (approx.) |
10. Garanti ve Destek
For warranty information or technical support, please refer to the contact details provided with your product packaging or visit the official AVANTEK webSite. Satın alma belgeniz olarak satın alma fişinizi saklayın.