
Unknown Yu-nls419
User Manual: 315M Wireless Smart Switch
Model: Yu-nls419 | Brand: Unknown
giriiş
This manual provides detailed instructions for the installation, operation, and maintenance of the 315M Wireless Smart Switch. This device is designed for remote control applications, offering flexible control modes for various electrical loads. Please read this manual thoroughly before installation and use to ensure proper functionality and safety.
Ürün Bittiview
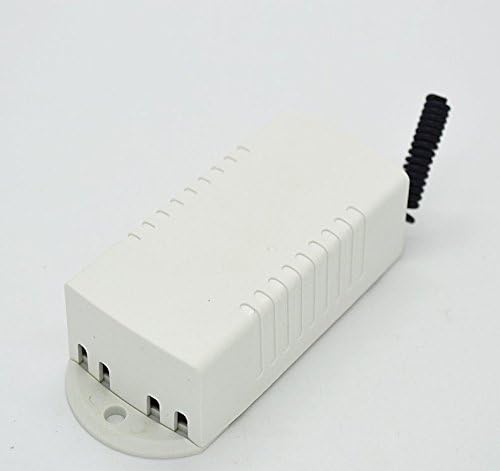
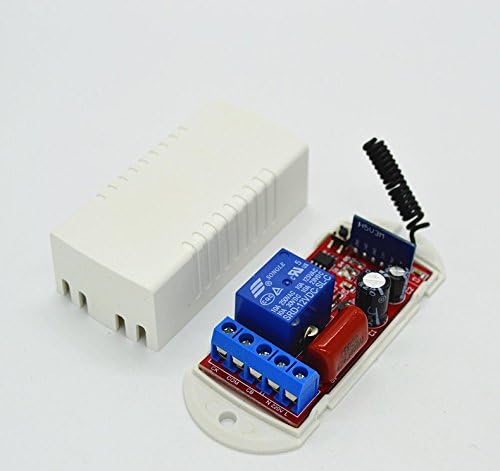
The 315M Wireless Smart Switch operates on AC110~220V and supports a load power of up to 10A. It features a learning function to pair with 315M wireless remote controls and offers Jog, Self-locking, and Interlocking work modes. The output is passive, suitable for switch applications.

Özellikler
| Parametre | Değer |
|---|---|
| Çalışma Hacmitage | AC110 ~ 220V |
| Yük Gücü | 10A |
| Kodlama | Learning (supports common 315M wireless remote controls) |
| Çalışma Modları | Jog, Self-locking, Interlocking (user configurable) |
| Çıktı Türü | Passive output (no output voltage, for switch use) |
| Alıcı Frekansı | 315MHZ |
| Uzaktan Kumanda Mesafesi | 10-100 meters (through walls) |
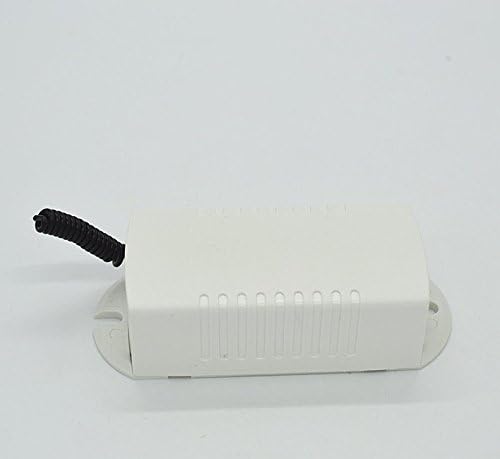
| Module Size (including shell) | 67*33*23mm |
| Ürün Ağırlığı | 1.1 pound |
| Bağlantı Protokolü | Wifi |
| Kontrol Yöntemi | Uzak |
Kurulum ve Yükleme
Güvenlik Önlemi: Before beginning installation, ensure that the main power supply to the circuit is turned off at the breaker to prevent electrical shock.
- Modülün Kablolanması:
- Connect the 220V FireWire to the terminal marked L.
- Connect the 220V Zero Line to the terminal marked N.
- The output terminals are passive. Connect your load (e.g., light, fan) to the appropriate output terminals (typically marked NO, COM, NC for Normally Open, Common, Normally Closed) based on your desired switching behavior. Refer to the wiring diagram provided with your specific unit if available.
- Learning Remote Controls:
The module supports learning commonly used 315M wireless remote controls. The D1 indicator serves as both a receive indicator and a learning indicator.
- Press the learning button on the module (usually a small button near the D1 indicator). The D1 indicator will light up or flash, indicating it's in learning mode.
- While the indicator is active, press any button on your 315M remote control that you wish to pair.
- The D1 indicator will flash a few times and then turn off, indicating successful pairing.
- Repeat for additional remote control buttons if desired, or for multiple remote controls.
- Setting Work Modes (Jog, Self-locking, Interlocking):
The work mode is typically set by jumpers or a dedicated button on the module. Consult the specific markings on your module for exact configuration.
- Jog Mode (Momentary): The relay activates only while the remote button is pressed and deactivates when released.
- Otomatik Kilitleme Modu (Geçiş): Press the remote button once to activate the relay, press it again to deactivate.
- Interlocking Mode (Latched): Used with multiple buttons on a remote. Pressing one button activates its corresponding relay and deactivates any other active relays in the group.
Note: The exact method for setting these modes varies by module version. Look for jumpers (e.g., JP1, JP2) or a mode selection button.
Kullanım Talimatları
Once the module is wired and remote controls are paired, operation is straightforward:
- Güç Açık: Restore power to the circuit. The module should be ready for operation.
- Uzaktan Kumanda Kullanımı:
- Press the paired button on your 315M remote control.
- The D1 indicator on the module will light up briefly, confirming reception of the signal.
- The connected load will respond according to the set work mode (Jog, Self-locking, or Interlocking).
- Menzil: The remote control distance is typically 10-100 meters, depending on environmental factors and obstacles (e.g., walls).
Bakım
The 315M Wireless Smart Switch is designed for low maintenance. Follow these guidelines to ensure longevity:
- Temizlik: Use a dry, soft cloth to clean the exterior of the module. Do not use liquid cleaners or solvents.
- Çevre: Ensure the module is installed in a dry environment, away from excessive heat, humidity, and direct sunlight.
- Güç Kaynağı: Giriş hacmini sağlayıntage remains within the specified AC110~220V range.
- Yük Kapasitesi: Do not exceed the maximum load power of 10A to prevent damage to the module.
Sorun giderme
| Sorun | Olası Neden | Çözüm |
|---|---|---|
| Module does not respond to remote control. |
|
|
| Load does not turn on/off correctly. |
|
|
| D1 indicator does not light up during learning. |
|
|
Garanti ve Destek
Specific warranty information for this product is not provided in the available documentation. For technical support or warranty inquiries, please contact your retailer or the manufacturer directly using the contact information provided at the point of purchase.
Ask a question about this manual
Ask about setup, troubleshooting, compatibility, parts, safety, or missing instructions. Manuals+ will review the question and use this page’s manual context to help answer it.