
benimDokunmatikAkıllı 26745
myTouchSmart Digital Bar Outlet Timer (Model 26745) Instruction Manual
Modeli: 26745
giriiş
This manual provides instructions for the setup, operation, and maintenance of your myTouchSmart Digital Bar Outlet Timer, Model 26745. Please read these instructions carefully before use and retain them for future reference.
The myTouchSmart Digital Bar Outlet Timer is designed to automate the ON/OFF cycles of indoor lights, lamps, small appliances, and electronics. It features a space-saving design, a digital display, and two programmable custom ON/OFF times.
Önemli Güvenlik Talimatları
- Sadece iç mekanda kullanıma uygundur.
- Do not exceed electrical ratings: 125V AC, 60Hz, 15A (1875W) General Purpose/Resistive, 5A (625W) Tungsten, 1/2 HP.
- Do not use with appliances that have heating elements, such as coffee makers, toasters, or heaters, as this may create a fire hazard.
- Ensure the timer is fully inserted into the outlet.
- Do not immerse in water or use in wet locations.
- Çocukları zamanlayıcıdan uzak tutun.
- Cihazı sökmeyin. İçinde kullanıcı tarafından onarılabilecek hiçbir parça bulunmamaktadır.
Ürün Özellikleri
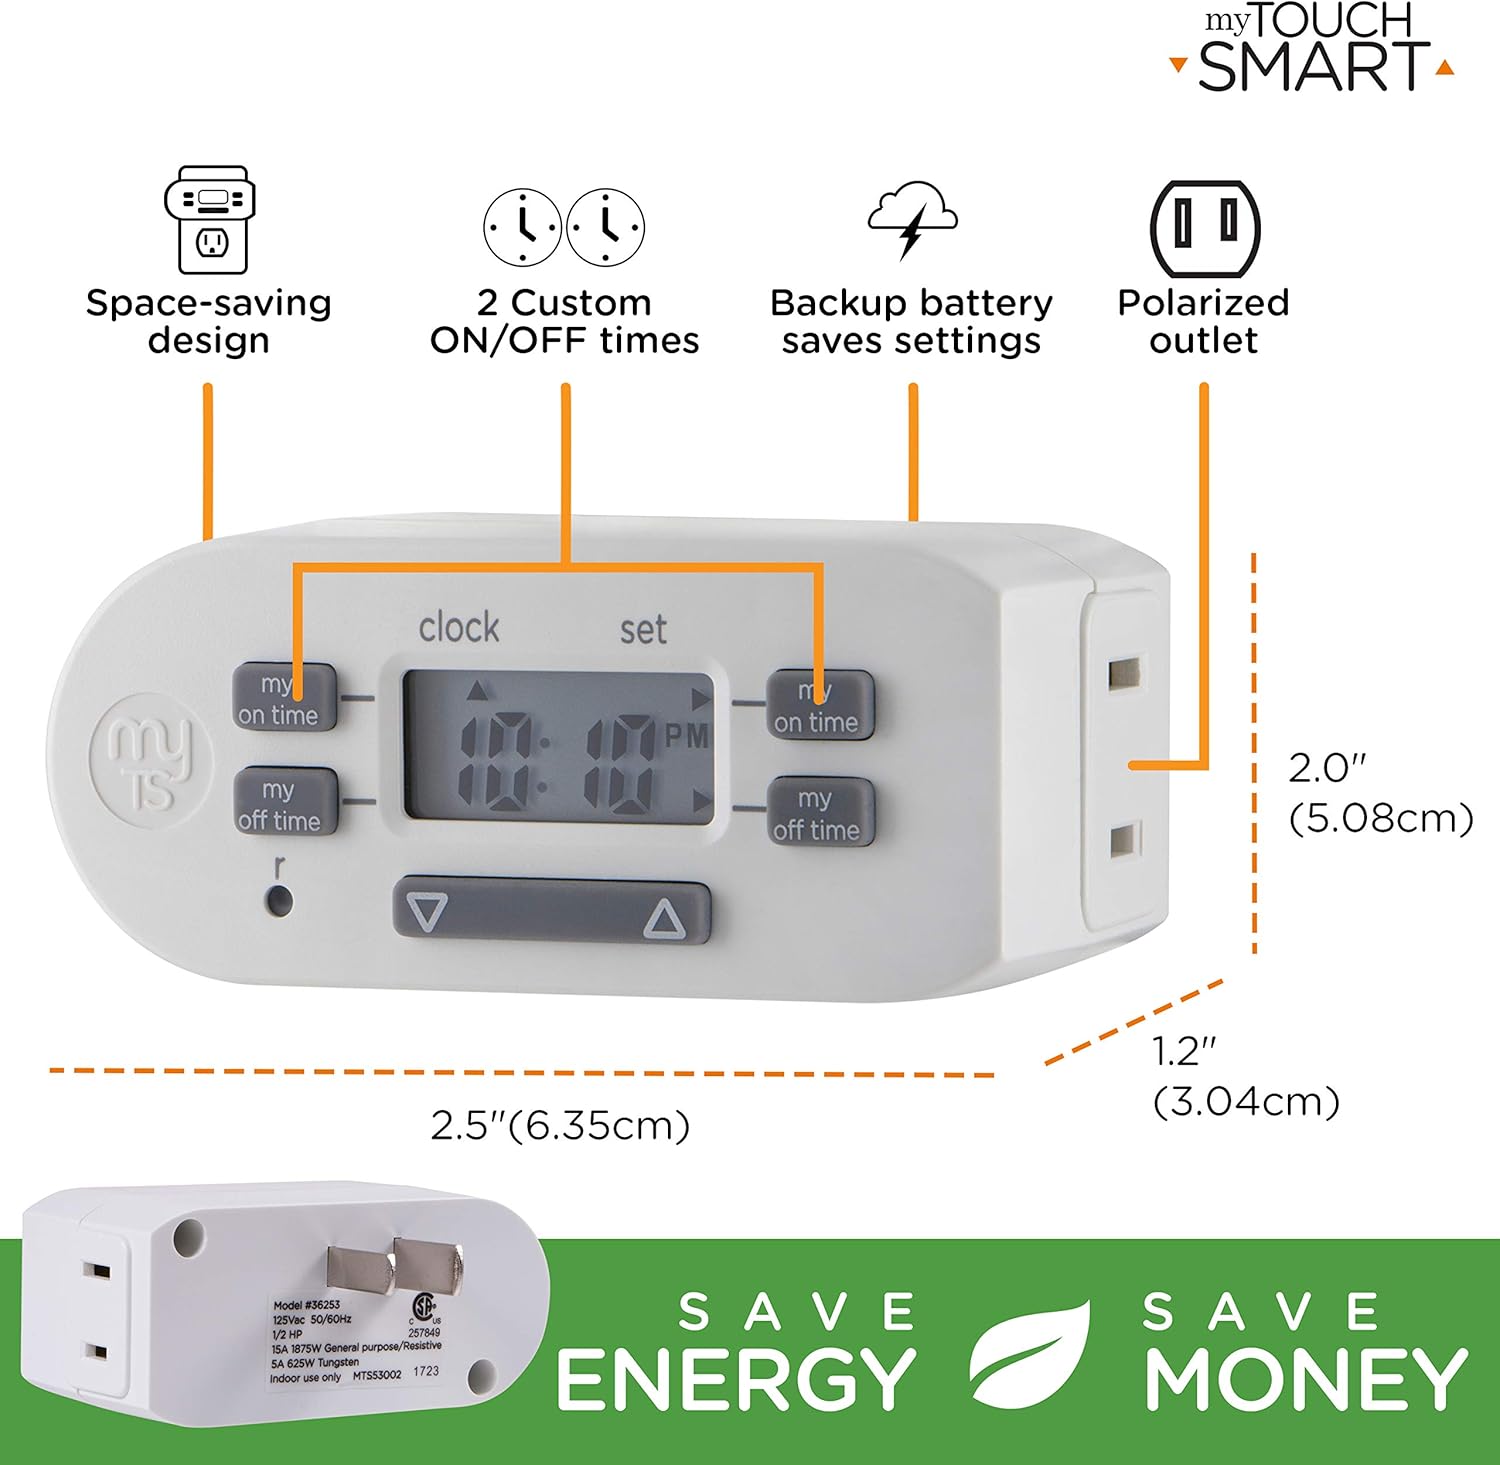
- Space-saving slim bar design.
- One (1) polarized outlet.
- Digital display for easy programming.
- Two custom daily ON/OFF times.
- Backup battery to save settings during power outagee.
- Compatible with CFL, LED, incandescent, and halogen light sources.
Resim Açıklaması: A detailed diagram of the myTouchSmart Digital Bar Outlet Timer, highlighting its components such as the custom ON/OFF time buttons, clock/set mode indicator, active program indicator, AM/PM indicator, and scroll buttons. This image helps users identify the different parts of the timer for programming.
Kurulum ve İlk Yapılandırma
1. Charging the Backup Battery
Before initial use, plug the timer into a live electrical outlet for at least 30 minutes to charge the internal backup battery. This battery retains your settings during power outages or when the timer is unplugged.
2. Geçerli Saati Ayarlama
- Basılı tutun SAAT düğme.
- Tutarken SAAT, tuşuna basın ▲ (yukarı) veya ▼ (down) button to adjust the hour. The AM/PM indicator will change accordingly.
- Serbest bırak SAAT button when the correct hour is set.
- Basılı tutun SAAT Tekrar düğmeye basın.
- Tutarken SAAT, tuşuna basın ▲ (yukarı) veya ▼ (down) button to adjust the minutes.
- Serbest bırak SAAT button when the correct minute is set.

Resim Açıklaması: This image illustrates the "Simple Setup" process for the timer. It shows the digital display and buttons, with arrows pointing to the scroll buttons for setting the current time and the "my on time" and "my off time" buttons for custom programming. The image emphasizes the ease of setting up the device.
Kullanım Talimatları
Programming Custom ON/OFF Times
The timer allows for two custom daily ON/OFF programs. Follow these steps to set your desired schedules:
1 Programı:
- Basın ZAMANINDA GELDİM button (left side) once. The display will show "1 ON".
- Basın ▲ (yukarı) veya ▼ (down) button to adjust the desired ON hour for Program 1.
- Basın ZAMANINDA GELDİM Saati onaylamak ve dakikaya geçmek için tekrar düğmeye basın.
- Basın ▲ (yukarı) veya ▼ (down) button to adjust the desired ON minutes for Program 1.
- Basın ZAMANINDA GELDİM button again to save the ON time.
- Basın BOŞ ZAMANLARIM button (left side) once. The display will show "1 OFF".
- Basın ▲ (yukarı) veya ▼ (down) button to adjust the desired OFF hour for Program 1.
- Basın BOŞ ZAMANLARIM Saati onaylamak ve dakikaya geçmek için tekrar düğmeye basın.
- Basın ▲ (yukarı) veya ▼ (down) button to adjust the desired OFF minutes for Program 1.
- Basın BOŞ ZAMANLARIM button again to save the OFF time.
2 Programı:
Repeat the steps above using the ZAMANINDA GELDİM Ve BOŞ ZAMANLARIM üzerindeki düğmeler sağ taraf of the timer. The display will show "2 ON" and "2 OFF" respectively.
Resim Açıklaması: This image displays two examples of how to program the timer. Program 1 is set to turn ON at 6:00 A.M. and OFF at 9:00 A.M. Program 2 is set to turn ON at 4:00 P.M. and OFF at 10:00 P.M. This visual guide helps users understand how to set their own custom schedules.
Connecting an Appliance
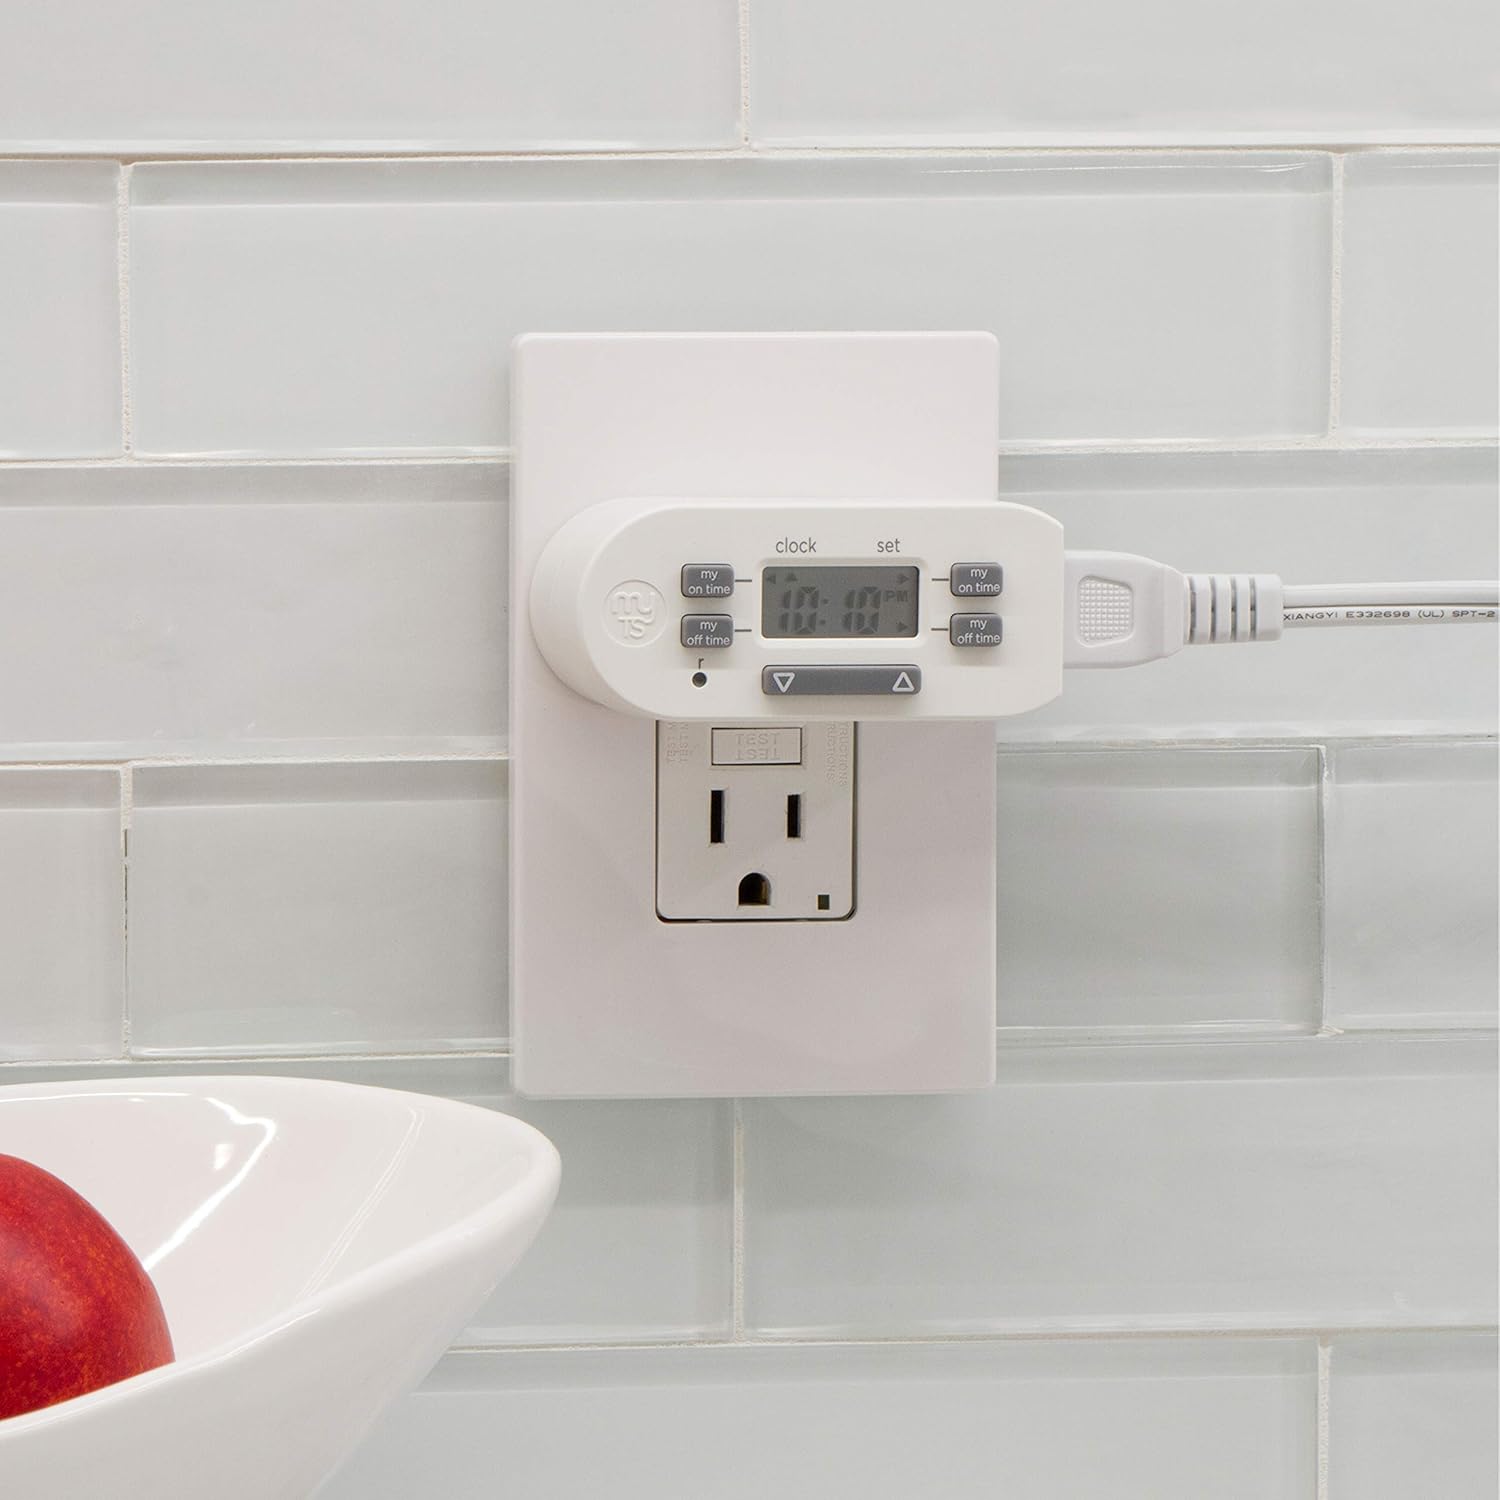
Once programmed, plug the appliance or light you wish to control into the polarized outlet on the side of the timer. Ensure the appliance's power switch is in the ON position for the timer to control its power cycle.

Resim Açıklaması: The image shows the myTouchSmart Digital Bar Outlet Timer plugged into a standard wall outlet. A lamp's power cord is then plugged into the polarized outlet on the side of the timer, demonstrating how to connect a device for timed operation. The slim design of the timer is visible, not obstructing the second wall outlet.
Bakım
- Temizlik: Disconnect the timer from the power outlet before cleaning. Wipe with a dry, soft cloth. Do not use liquid or abrasive cleaners.
- Pil: The internal backup battery is not user-replaceable. If the display becomes dim or settings are not retained after charging, the unit may need replacement.
- Depolamak: Zamanlayıcıyı kullanılmadığı zaman serin ve kuru bir yerde saklayın.
Sorun giderme
| Sorun | Olası Neden | Çözüm |
|---|---|---|
| Cihaz programlanan saatlerde açılıp kapanmıyor. |
|
|
| Ekran soluk veya boş. |
|
|
| Ayarlar güç kesildikten sonra kayboluyortage or unplugging. | Backup battery is not sufficiently charged or has reached end of life. | Plug the timer into a live outlet for at least 30 minutes. If the issue persists, the internal battery may need replacement (unit replacement). |
Özellikler
- Modeli: 26745
- Elektriksel değerlendirme: 125V ac, 60Hz
- Maksimum Yük: 15A (1875W) General Purpose/Resistive
- Tungsten Load: 5A (625W)
- Motor Yükü: 1 / 2 HP
- Satış Noktaları: 1 Polarized
- Boyutlar: Yaklaşık 2 x 2.5 x 1.25 inç
- Sertifikasyon: CSA
Garanti ve Destek
This product is backed by a one-year limited warranty. For warranty claims or technical support, please contact myTouchSmart customer service. Refer to the product packaging or the manufacturer's webiletişim bilgileri için site.
Üretici: Jasco Ürünleri Şirketi, LLC
Ask a question about this manual
Ask about setup, troubleshooting, compatibility, parts, safety, or missing instructions. Manuals+ will review the question and use this page’s manual context to help answer it.