giriiş
Thank you for choosing the Ferm TDM1025 Bench Pillar Corded Electric Drill. This manual provides essential information for the safe and efficient operation, maintenance, and troubleshooting of your new drill. Please read these instructions carefully before use and keep them for future reference.
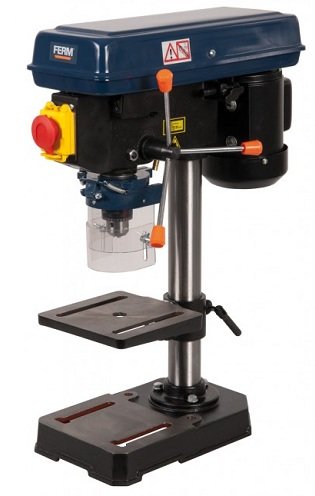
Image: Ferm TDM1025 Bench Pillar Corded Electric Drill. This image shows the complete drill press assembly, including the base, column, motor head, and work table.
Güvenlik Talimatları
Elektrikli aletleri çalıştırırken yangın, elektrik çarpması ve kişisel yaralanma riskini azaltmak için her zaman temel güvenlik önlemlerine uyun.
Genel Güvenlik Kuralları:
- Çalışma Alanı Güvenliği: Çalışma alanınızı temiz ve iyi aydınlatılmış tutun. Dağınık veya karanlık alanlar kazalara davetiye çıkarır.
- Elektriksel Güvenlik: Elektrikli aletleri yağmura veya ıslak koşullara maruz bırakmayın. Topraklanmış veya topraklanmış yüzeylerle vücut temasından kaçının.
- Kişisel Güvenlik: Stay alert, watch what you are doing, and use common sense. Do not operate tools while tired or under the influence of drugs, alcohol, or medication.
- Kişisel Koruyucu Donanım: Always wear eye protection. Use dust masks, non-skid safety shoes, hard hats, or hearing protection as appropriate for the conditions.
- Alet Kullanımı ve Bakımı: Elektrikli aleti zorlamayın. Uygulamanız için doğru elektrikli aleti kullanın. Herhangi bir ayarlama yapmadan, aksesuar değiştirmeden veya elektrikli aletleri saklamadan önce fişi prizden çekin.
- İş Parçasını Güvenli Hale Getirin: Her zaman clamp or secure the workpiece to prevent movement during drilling.
- Guard Usage: Ensure the transparent guard is always in place and properly adjusted for safe working.
Kurmak
Paketin açılması:
Carefully remove all components from the packaging. Inspect for any damage that may have occurred during transit. Retain packaging materials for future transport or storage.
Toplantı:
- Taban ve Sütun: Securely attach the column to the cast iron base using the provided fasteners. Ensure it is stable and upright.
- Drill Head: Mount the drill head assembly onto the top of the column. Tighten all securing bolts.
- İş masası: Slide the work table onto the column and secure it at a comfortable working height. Ensure the table locking mechanism functions correctly.
- Mandren Montajı: Insert the chuck into the spindle taper. Tap it firmly with a soft mallet to ensure a secure fit.
- Guard Attachment: Attach the transparent guard to the drill head, ensuring it can be easily adjusted and provides adequate protection.
Güç Bağlantısı:
Connect the drill to a standard 230V AC power outlet. Ensure the power switch is in the "OFF" position before plugging in the tool.
Kullanım Talimatları
Installing Drill Bits:
- Ensure the drill is unplugged.
- Mandren anahtarını kullanarak mandren çenelerini açın.
- Matkap ucunu mandrene yerleştirin, ortalanmış ve tam olarak yerine oturduğundan emin olun.
- Mandren çenelerini mandren anahtarıyla sıkıca sıkın. Sıkma işleminden hemen sonra mandren anahtarını çıkarın.
Adjusting Work Table:
- Yükseklik Ayarı: Loosen the table locking handle, adjust the table to the desired height, and then firmly tighten the handle.
- Açı Ayarı: The table can be tilted from 0 to 45 degrees. Loosen the tilt locking bolt, set the desired angle, and re-tighten the bolt.
Hız Ayarları:
The drill features 5 speed settings (580-2650 RPM) for optimal performance across various materials. Adjust the belt position on the pulleys inside the drill head to change the speed. Refer to the speed chart inside the pulley cover for recommended settings.
Laser Guidance:
Activate the cross laser guidance system for precise drilling alignment. The laser projects a crosshair onto the workpiece, indicating the exact drilling point.
Drilling Procedure:
- Secure the workpiece firmly to the work table using clamps.
- Adjust the table height and angle as needed.
- Select the appropriate drilling speed.
- Turn on the drill.
- Slowly lower the drill bit into the workpiece using the feed handle, applying steady, even pressure.
- Once drilling is complete, retract the drill bit from the workpiece before turning off the drill.
Bakım
Düzenli bakım, matkabınızın uzun ömürlü olmasını ve güvenli çalışmasını sağlar.
- Temizlik: After each use, clean the drill thoroughly to remove dust, chips, and debris. Use a soft brush or compressed air. Do not use solvents that may damage plastic parts.
- Yağlama: Periodically apply a light machine oil to moving parts, such as the column and spindle, to ensure smooth operation.
- Kordon Muayenesi: Güç kablosunu hasar, kesik veya yıpranma belirtileri açısından düzenli olarak kontrol edin. Hasarlı kabloları derhal değiştirin.
- Chuck Bakımı: Keep the chuck jaws clean and free of debris to ensure proper grip on drill bits.
- Kemer gerginliği: Check the drive belt tension periodically. Adjust if necessary to prevent slippage and ensure consistent speed.
Sorun giderme
| Sorun | Olası Neden | Çözüm |
|---|---|---|
| Matkap başlamıyor. | Güç kaynağı yok. Güç anahtarı kapalı. Hasarlı güç kablosu. | Elektrik prizini ve devre kesiciyi kontrol edin. Güç anahtarını "AÇIK" konumuna getirin. Inspect and replace power cord if damaged. |
| Çalışma sırasında aşırı titreşim. | Loose drill bit. Unbalanced workpiece. Gevşek montaj cıvataları. | Ensure drill bit is securely tightened in chuck. Secure workpiece firmly. Tüm montaj cıvatalarını kontrol edin ve sıkın. |
| Poor drilling performance or burning wood. | Kör matkap ucu. Hatalı hız ayarı. Insufficient feed pressure. | Replace or sharpen drill bit. Adjust speed according to material. Apply steady, appropriate feed pressure. |
| Laser guidance not working. | Laser switch off. Batteries (if applicable) depleted. | Ensure laser switch is on. Pilleri kontrol edin ve gerekirse değiştirin. |
Özellikler
| Model Numarası | TDM1025 |
| Marka | Fermantasyon |
| Güç Kaynağı | Kablolu Elektrik |
| Cilttage | 230V |
| Ampöfke | 6 Amps |
| Yüksüz Hız | 580-2650 RPM (5 settings) |
| Chuck Kapasitesi | 13 mm |
| Özel Özellik | Variable Speed, Laser Guidance |
| Work Table Adjustment | Height adjustable, 0-45 degree angle adjustment |
Garanti ve Destek
Garanti Bilgileri:
Ferm products are manufactured to high quality standards and are guaranteed against defects in materials and workmanship. Please refer to the warranty card included with your product for specific terms and conditions, including warranty period and coverage details. Keep your purchase receipt as proof of purchase.
Müşteri Desteği:
For technical assistance, spare parts, or warranty claims, please contact your local Ferm dealer or authorized service center. You can also visit the official Ferm webDaha fazla bilgi ve destek kaynakları için siteyi ziyaret edin.
Note: Specific contact details are not provided in this manual. Please refer to your product packaging or the manufacturer's webEn güncel destek bilgileri için siteyi ziyaret edin.