
giriiş
The NAXA NDC-405 is a rugged, waterproof HD action camera designed to capture your adventures in high definition. This manual provides essential information on how to set up, operate, maintain, and troubleshoot your device, ensuring optimal performance and longevity. Please read this manual thoroughly before using your camera.
Ürün Bittiview
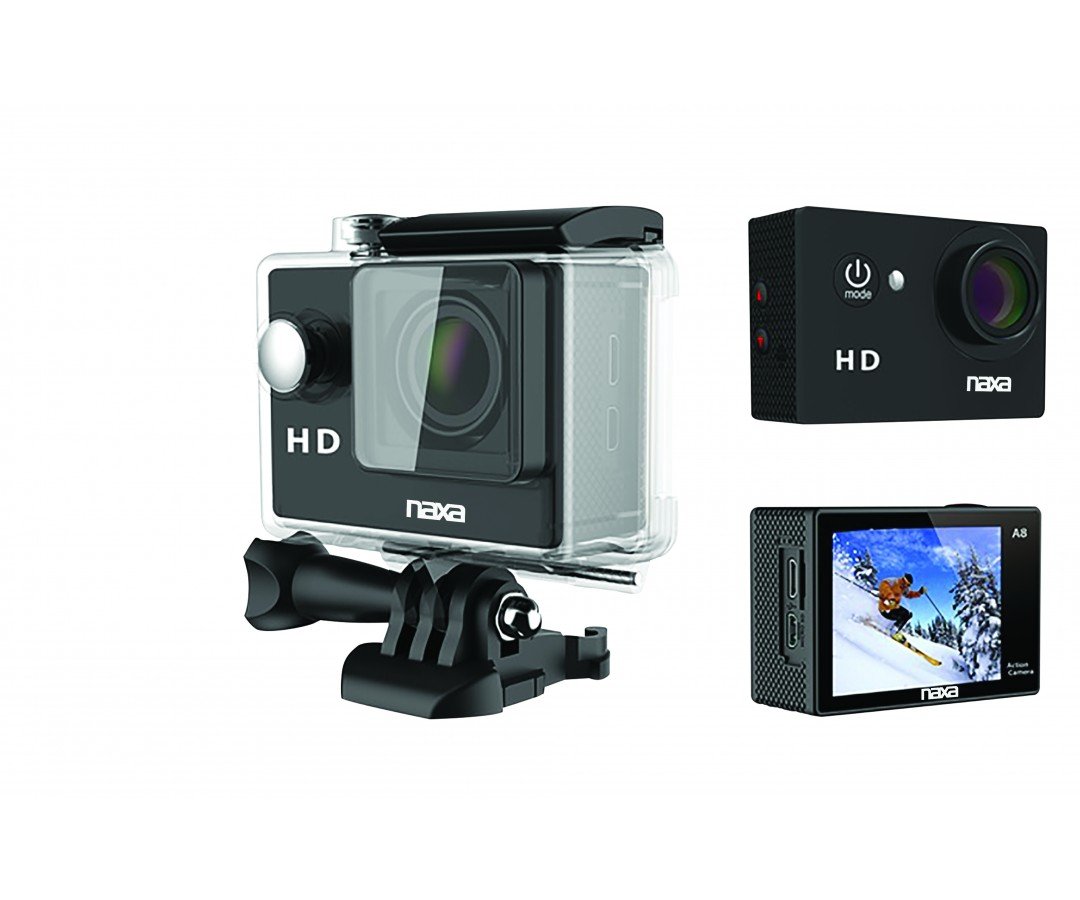
Resim 1: Ön view of the NAXA NDC-405 Waterproof HD Action Camera. This image displays the camera's compact design, lens, and front-facing controls, highlighting its readiness for action.
Kameranın Parçaları
A detailed diagram illustrating the various components of the NDC-405 camera, including the lens, power button, mode button, shutter/record button, 2-inch LCD screen, microphone, speaker, USB port, and microSD card slot, would typically be placed here. This visual aid helps users identify each part for easier operation.
Paket İçeriği
Paketin içinde tüm öğelerin mevcut olduğundan emin olun:
- NAXA NDC-405 Action Camera
- USB Şarj Kablosu
- Assorted Mounting Accessories (e.g., helmet mount, bicycle mount, adhesive mounts)
- Kullanıcı Kılavuzu
Kurmak
Pilin Şarj Edilmesi
The camera is equipped with a built-in 900mAh rechargeable battery. Before first use, fully charge the battery.
- Connect the small end of the USB charging cable to the camera's USB port.
- USB kablosunun büyük ucunu bir USB güç adaptörüne (dahil değildir) veya bilgisayarın USB portuna bağlayın.
- The charging indicator light will illuminate during charging and turn off once fully charged. Charging typically takes 2-3 hours.
Inserting and Removing the MicroSD Card
A microSD or microSDHC card (up to 32GB, Class 10 recommended) is required to store photos and videos. The card is not included.
- Eklemek için: Locate the microSD card slot on the side of the camera. Gently push the microSD card into the slot with the gold contacts facing the back of the camera until it clicks into place.
- Kaldırmak için: Gently push the microSD card inward until it clicks, then release. The card will spring out slightly, allowing you to pull it out.
Note: Ensure the camera is powered off before inserting or removing the microSD card to prevent data corruption.
Attaching Mounts and Accessories
The NDC-405 comes with various mounting accessories to suit different activities. Refer to the specific accessory instructions for proper attachment. Generally, mounts attach to the camera via a standard tripod screw thread or a clip-on mechanism. Ensure all connections are secure before use.
Kameranın Çalıştırılması
Açma ve Kapatma
- Açmak İçin: Press and hold the Power/Mode button for approximately 3 seconds until the LCD screen illuminates.
- Kapatmak İçin: Press and hold the Power/Mode button for approximately 3 seconds until the LCD screen turns off.
Modları Değiştirme
After powering on, repeatedly press the Power/Mode button to cycle through the available modes: Video Recording, Photo Capture, and Playback. The current mode icon will be displayed on the LCD screen.
Video Kaydı
- Ensure the camera is in Video Recording mode (indicated by a video camera icon).
- Press the Shutter/Record button once to start recording. A red dot or timer will appear on the screen, indicating recording is in progress.
- Press the Shutter/Record button again to stop recording. The video file microSD karta kaydedilecektir.
Fotoğraf Çekmek
- Ensure the camera is in Photo Capture mode (indicated by a camera icon).
- Frame your shot using the 2-inch LCD viewbulucu.
- Press the Shutter/Record button once to take a photo. The photo will be saved to the microSD card.
Playback
- Switch the camera to Playback mode (indicated by a play icon).
- Use the navigation buttons (if available, or cycle through with Mode button) to browse through your recorded videos and photos.
- Press the Shutter/Record button to play a selected video or view bir fotoğraf.
Bir Bilgisayara Bağlanma
Aktarmak için files, connect the camera to your computer using the provided USB cable. The camera will appear as a removable disk drive, allowing you to access and copy your photos and videos.
Waterproof Usage Guidelines
The NDC-405 is designed to be waterproof up to 30 meters (IP68 rated) without additional housing. Ensure all ports (USB, microSD slot) are securely closed before submerging the camera in water. After use in saltwater, rinse the camera with fresh water and dry thoroughly.
Bakım
Kamerayı Temizleme
- Kamera gövdesini temizlemek için yumuşak, tiftiksiz bir bez kullanın.
- Lens için özel bir lens temizleme bezi ve solüsyonu kullanın. Aşındırıcı malzemelerden kaçının.
- Do not use strong chemical cleaners, as they may damage the camera's finish or seals.
Depolamak
When not in use, store the camera in a cool, dry place away from direct sunlight and extreme temperatures. Remove the microSD card if storing for extended periods.
Sorun giderme
| Sorun | Olası Çözüm |
|---|---|
| Kamera açılmıyor. | Pilinizin tamamen dolu olduğundan emin olun. Bir güç kaynağına bağlayın ve tekrar deneyin. |
| Video kaydı yapılamaz veya fotoğraf çekilemez. | Check if a microSD card is inserted and has sufficient free space. Ensure the card is formatted correctly (FAT32). |
| Video kalitesi düşük. | Ensure the lens is clean. Check lighting conditions. Use a high-speed microSD card (Class 10 or higher). |
| Kamera donuyor veya tepkisizleşiyor. | Press and hold the Power/Mode button for 10 seconds to force a shutdown. Restart the camera. |
| Files not recognized on computer. | Ensure the USB cable is properly connected. Try a different USB port or computer. The camera saves files in standard formats (e.g., JPEG, AVI). |
Özellikler
| Özellik | Detay |
|---|---|
| Örnek | NDC-405 |
| Video Çözünürlüğü | 720 fps'de 30p |
| Hareketsiz Görüntü Çözünürlüğü | 12 MP |
| Optik Sensör | CMOS 720p 1/4" |
| Viewbulucu | 2 inç LCD |
| Su Geçirmezlik Derecesi | IP68 (30 metreye kadar) |
| Pil | 900mAh Şarj Edilebilir |
| Depolamak | Micro SD/SDHC up to 32GB |
| Alanı View | 120 derece |
| Boyutlar | 5.92x2.87x4.09 cm |
| Ağırlık | 127.01 gr |
Garanti ve Destek
For warranty information and technical support, please refer to the warranty card included with your product or visit the official NAXA Electronics website. Keep your purchase receipt as proof of purchase for any warranty claims. Do not attempt to repair the device yourself, as this may void the warranty.