
1. Giriş
This manual provides detailed instructions for the assembly, operation, and maintenance of your Palram - Canopia Balance 8x8 Greenhouse. This 8 ft. x 8 ft. polycarbonate greenhouse is designed to provide an optimal environment for outdoor gardening, featuring 4mm clear polycarbonate panels that ensure plants receive appropriate sunlight while being UV protected. Its durable construction is wind and weather-resistant, making it a reliable addition to your garden.

Image 1.1: The Palram - Canopia Balance 8x8 Greenhouse installed in a garden.
2. Güvenlik Bilgileri
Please read and understand all safety warnings and instructions before beginning assembly or using the greenhouse. Failure to follow these instructions may result in injury or damage to the product.
- Site Seçimi: Choose a level, stable surface for installation. Ensure the area is clear of overhead obstructions like power lines or tree branches.
- Demirleme: Securely anchor the greenhouse to the ground or a concrete base immediately after assembly to prevent wind damage.
- Toplantı: Assembly requires at least two people. Wear appropriate personal protective equipment, including gloves and eye protection. Be cautious when handling panels and aluminum profiles to avoid cuts or pinches.
- Aletler: Montaj için sadece önerilen aletleri kullanın.
- Çocuklar ve Evcil Hayvanlar: Çocukları ve evcil hayvanları montaj alanından uzak tutun. Sera içinde gözetimsiz oynamalarına izin vermeyin.
- Havalandırma: Özellikle sıcak havalarda seranın aşırı ısınmasını önlemek için yeterli havalandırma sağlayın.
- Kar Yükü: In areas with heavy snowfall, regularly clear snow from the roof to prevent structural damage. Refer to specifications for snow load capacity.
3. Kurulum ve Montaj
The assembly of the Palram - Canopia Balance Greenhouse requires careful attention to detail. It is highly recommended to review all instructions and identify all parts before beginning. A level and square base is crucial for proper structure integrity.
3.1 Montaj Öncesi Kontrol Listesi
- Paketleme listesindeki tüm parçaların eksiksiz olduğunu doğrulayın.
- Ensure the chosen installation site is level and prepared.
- Gather necessary tools (e.g., screwdriver, wrench, measuring tape, level).
3.2 Temel İnşaatı
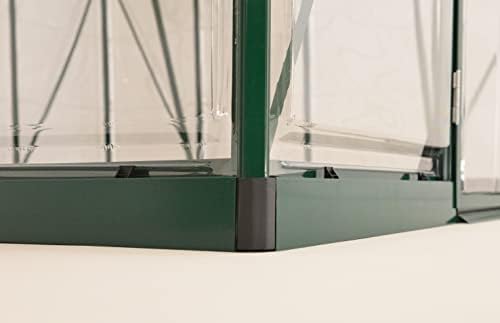
Begin by assembling the base frame. Ensure it is perfectly square and level before proceeding. This step is fundamental for the stability and alignment of the entire greenhouse structure.
Image 3.1: Detail of the greenhouse base and recommended ground anchoring.
3.3 Çerçeve Montajı
Follow the step-by-step diagrams provided in your physical manual to connect the aluminum profiles. Pay close attention to the orientation of each piece, as similar-looking parts may have subtle differences. The frame provides the structural support for the panels.
Resim 3.2: Örn.ample of a corner joint during frame assembly.
3.4 Panel Kurulumu
The polycarbonate panels slide into the aluminum profiles. Ensure the UV-protected side of the panels faces outwards. The roof panels are twin-wall glazing for insulation, while wall panels are clear glazing for maximum light transmission.
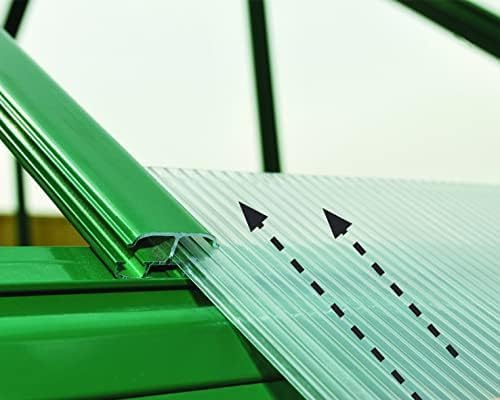
Image 3.3: Illustrates how polycarbonate panels are inserted into the frame profiles.
3.5 Kapı ve Havalandırma Montajı
Install the two doors and any roof vents according to the diagrams. Ensure doors operate smoothly and latches engage securely. Roof vents are crucial for temperature regulation.

Image 3.4: Detail of the door latch for secure closure.
3.6 Montaj Videosu Kılavuzu
For a visual guide on the assembly process, please refer to the official Palram assembly video:
Video 3.1: Detailed assembly instructions for the Palram greenhouse (5:28 duration).
4. Operating Your Greenhouse
Proper operation ensures optimal growing conditions for your plants.
4.1 Havalandırma
The greenhouse is equipped with roof vents to regulate internal temperature and humidity. Open the vents during warm periods to allow hot air to escape and fresh air to circulate. Consider an automatic roof vent opener for hands-free temperature control.
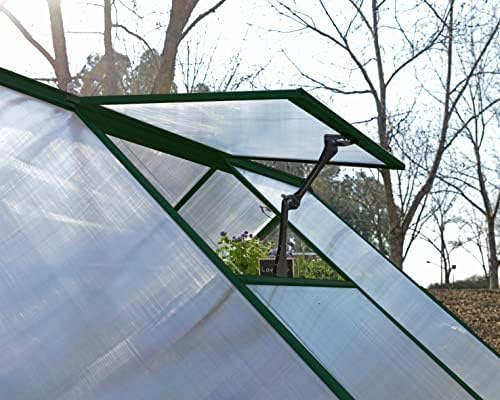
Image 4.1: The manual roof vent mechanism for temperature regulation.
4.2 Sunlight Transmission
The clear polycarbonate panels provide 90% light transmission for wall panels and 82% for twin-wall roof panels, ensuring your plants receive ample sunlight while being protected from harmful UV rays.

Resim 4.2: İç mekan view showing light transmission through the roof panels.
5. Bakım
The Palram - Canopia Balance Greenhouse is designed for low maintenance. Regular checks and simple cleaning will ensure its longevity and optimal performance.
- Temizlik: Clean the polycarbonate panels periodically with mild soap and water using a soft cloth or sponge. Avoid abrasive cleaners or brushes that could scratch the panels.
- Structural Checks: Annually inspect the frame for any loose bolts or connections. Tighten as necessary.
- Panel Bütünlüğü: Check panels for any signs of damage or displacement, especially after strong winds. Ensure all panels are securely in place.
- Kış Hazırlığı: In regions with heavy snow, gently remove accumulated snow from the roof to prevent excessive load on the structure.

Resim 5.1: Örn.ample of a greenhouse during winter, highlighting the need for snow removal.
6. Sorun Giderme
Bu bölümde seranızda karşılaşabileceğiniz yaygın sorunlar ele alınmaktadır.
- Panels Dislodging in Wind: Ensure the greenhouse is properly anchored to a solid foundation. Verify all panel retaining clips and profiles are securely fastened. Consider additional anchoring methods if your area experiences exceptionally high winds.
- Montaj Sırasında Yaşanan Zorluklar: Review the instruction manual diagrams carefully. Ensure all parts are correctly identified and oriented. If a part seems incorrect, double-check its part number against the manual. Assembly often requires patience and a second person.
- Eksik veya Hasarlı Parçalar: If you discover missing or damaged components upon unboxing, contact Palram customer support immediately with your product model number and a description of the missing/damaged part.
- Yetersiz Havalandırma/Aşırı Isınma: Ensure roof vents are open during warm periods. Consider installing an automatic vent opener for consistent temperature control.
7. Özellikler
Key specifications for the Palram - Canopia Balance 8x8 Greenhouse (Model HG6108G):
| Özellik | Şartname |
|---|---|
| Model Numarası | HG6108G |
| Ürün Boyutları (U x G x Y) | 96" x 96" x 91" (8' x 8' x 7'7") |
| Ürün Ağırlığı | 135 kilo |
| Çerçeve Malzemesi | Alüminyum |
| Kapak Malzemesi | Polikarbonat (PC) |
| Nominal Duvar Kalınlığı | 4 milimetre |
| Kapı Sayısı | 2 |
| Roof Panel Light Transmission | 82% (Twin Wall Glazing) |
| Wall Panel Light Transmission | 90% (Clear Glazing) |
| Wind Resistance (8ft Series) | Up to 90 km/hr (56 mph) |
| Snow Load (8ft Series) | Up to 70 kg/m² (14.3 lb/ft²) |

Image 7.1: Dimensional diagram of the Palram - Canopia Balance 8x8 Greenhouse.
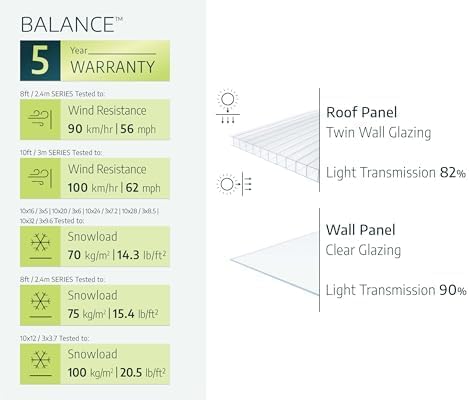
Image 7.2: Detailed specifications for wind resistance, snow load, and panel light transmission.
8. Garanti
The Palram - Canopia Balance 8x8 Greenhouse comes with a 5 yıllık sınırlı garanti. This warranty covers defects in materials and workmanship under normal use and service. Please retain your proof of purchase for warranty claims. For full warranty terms and conditions, refer to the documentation included with your product or visit the official Palram webalan.
9. Müşteri Desteği
For assistance with assembly, missing parts, or any other inquiries regarding your Palram - Canopia Balance Greenhouse, please contact Palram customer support:
- Telefon: 877-627-8476
- Webalan: Visit the official Palram webSSS ve destek kaynakları için site.