
1. Giriş
This user manual provides essential information for the safe and efficient installation, operation, and maintenance of your Supermicro YM-5201D ATX & EPS12V Power Supply. Please read this manual thoroughly before using the product to ensure proper functionality and to prevent damage.

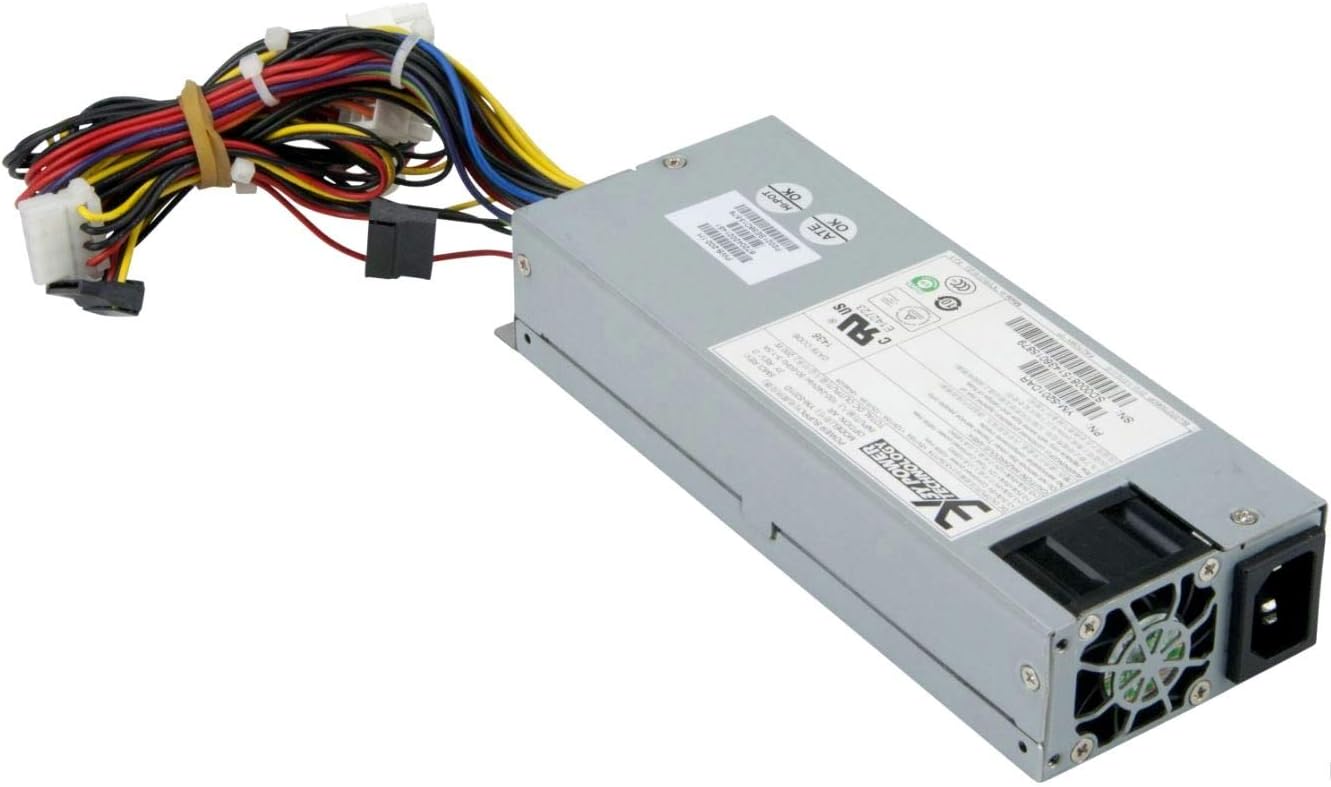
Figure 1: Supermicro YM-5201D ATX & EPS12V Power Supply, showing the main unit and attached power cables.
2. Güvenlik Bilgileri
Yaralanmaları veya güç kaynağına ve bağlı bileşenlere zarar gelmesini önlemek için her zaman aşağıdaki güvenlik önlemlerine uyun:
- Ensure the power supply is disconnected from the AC outlet before installation or removal.
- Güç kaynağını açmayınasing. There are no user-serviceable parts inside, and opening it voids the warranty and exposes you to dangerous voltagee.
- Aşırı ısınmayı önlemek için güç kaynağını iyi havalandırılan bir alana yerleştirin.
- Use only the cables provided or approved by Supermicro for this power supply.
- Güç kaynağının neme veya aşırı sıcaklıklara maruz kalmasından kaçının.
- Ensure proper grounding of the computer system.
3. Paket İçeriği
Paketin içinde tüm öğelerin mevcut olduğundan emin olun:
- Supermicro YM-5201D ATX & EPS12V Power Supply
- AC Güç Kablosu (bölgeye özel)
- Montaj Vidaları
- Kullanım Kılavuzu (bu belge)
4. Kurulum ve Kurulum
Follow these steps to install the power supply into your computer chassis:
- Sistemi Hazırlayın: Disconnect the computer from the AC power outlet. Open the computer case according to its manufacturer's instructions.
- Eski güç kaynağını çıkarın (varsa): Unscrew and remove the existing power supply. Disconnect all power cables from the motherboard, graphics card, drives, and other components.
- Install New Power Supply: Carefully slide the Supermicro YM-5201D power supply into the designated power supply bay in your chassis. Ensure the fan is oriented correctly for optimal airflow (typically facing downwards or towards the rear vent).
- Secure the Power Supply: Align the screw holes on the power supply with those on the chassis. Secure the power supply using the provided mounting screws.
- Kabloları Bağlayın:
- 24 pinli ATX Anakart Bağlantı Konnektörü: Connect the large 24-pin connector to the corresponding port on your motherboard. Ensure it clicks into place.
- 8-pin (4+4) EPS12V CPU Connector: Connect the 8-pin or split 4+4-pin connector to the CPU power port on your motherboard.
- PCIe Connectors (if applicable): If your graphics card requires additional power, connect the appropriate 6-pin or 8-pin PCIe power connectors.
- SATA Güç Bağlantıları: Connect SATA power cables to your hard drives, SSDs, and optical drives.
- Molex Connectors (if applicable): Connect Molex power cables to any legacy devices or case fans that require them.
- Kablo yönetimi: Route cables neatly to improve airflow and aesthetics within the case.
- Şasiyi Kapat: Once all connections are secure, close the computer case.
- AC Gücünü Bağlayın: Connect the AC power cord to the power supply's inlet and then to a grounded wall outlet or surge protector.
Şekil 2: Arka view of the Supermicro YM-5201D Power Supply, highlighting the cooling fan and AC power input.
5. Kullanım Talimatları
After successful installation, operating the power supply is straightforward:
- Güç Açık: Ensure the power switch on the rear of the power supply (if present) is in the 'ON' (I) position. Then, press the power button on your computer case.
- Kapat: Shut down your computer through the operating system. Once the system is off, you can flip the power switch on the power supply to the 'OFF' (O) position for complete power disconnection.
- Normal Çalışma: The power supply will automatically regulate power delivery to your components based on demand. Ensure adequate ventilation around your computer to prevent heat buildup.
6. Bakım
Regular maintenance helps prolong the life of your power supply:
- Toz Giderimi: Periodically (e.g., every 3-6 months), disconnect the power supply from the AC outlet and use compressed air to gently blow dust out of the power supply's fan and vents. Do not open the casing.
- Kablo Denetimi: Occasionally check all power cables for any signs of wear, fraying, or loose connections.
- Havalandırma: Ensure that the computer case's ventilation openings are not obstructed.
7. Sorun Giderme
Sorunlarla karşılaşırsanız aşağıdaki yaygın sorunlara ve çözümlere bakın:
| Sorun | Olası Neden | Çözüm |
|---|---|---|
| Bilgisayar açılmıyor. | Power cable loose; Power switch off; Faulty component; Insufficient power. | Check AC power cord connection. Ensure power supply switch is ON. Verify all internal power connections (24-pin, 8-pin CPU). Test with minimal components. |
| Sistem açılıyor ancak hemen kapanıyor. | Aşırı yüklenme; Aşırı ısınma; Kısa devre. | Toplam vat miktarı sağlayıntage draw is within PSU limits. Check for proper ventilation. Inspect for any loose screws or components that might be causing a short. |
| Güç kaynağı ünitesinden yüksek fan sesi geliyor. | Dust buildup; Fan bearing issue; High load. | Clean dust from fan and vents using compressed air. If noise persists and is excessive, consider professional inspection. |
If troubleshooting steps do not resolve the issue, contact Supermicro technical support.
8. Özellikler
Key technical specifications for the Supermicro YM-5201D Power Supply:
| Özellik | Detay |
|---|---|
| Model Adı | YM-5201D |
| Ürün Model Numarası | PWS-202-1H |
| Marka | Süpermikro |
| Form Faktörü | 1U |
| Çıkış Watttage | 200 Watt |
| Bağlayıcı Türü | ATX |
| Uyumlu Cihazlar | Desktop Computers, Servers, Desktop Components |
| Soğutma Yöntemi | Hava |
| Ürün Boyutları (U x G x Y) | 1.1 x 9.7 x 6.5 inç |
| Ürün Ağırlığı | 6.6 pound |
| İlk Mevcut Tarih | 14 Kasım 2012 |
9. Garanti ve Destek
For warranty information and technical support, please refer to the official Supermicro webSite üzerinden satın alabilir veya doğrudan müşteri hizmetleriyle iletişime geçebilirsiniz. Satın alma belgenizi garanti talepleriniz için saklayın.
Supermicro Official Webalan: www.supermicro.com