
Mastech MS8260A
Mastech MS8260A Dijital Multimetre Kullanım Kılavuzu
1. Giriş
This manual provides detailed instructions for the safe and effective operation of the Mastech MS8260A Digital Multimeter. The MS8260A is a versatile instrument designed for various electrical measurements, including AC/DC voltage, AC/DC current, resistance, diode check, continuity test, and transistor check. It also features a non-contact voltage algılama işlevi.
Key features of the MS8260A include:
- Temassız hacimtage algılama
- Automatic power-off function to conserve battery life
- Düşük pil göstergesi
2. Güvenlik Bilgileri
To ensure safe operation and service of the meter, please read all instructions carefully before use. Failure to observe safety warnings can result in electric shock, fire, or damage to the meter.
- Always disconnect test leads from the circuit before changing functions.
- Nominal hacimden fazlasını uygulamayıntage, terminaller arasında veya herhangi bir terminal ile topraklama arasında sayaç üzerinde işaretlendiği gibi.
- Vol ile çalışırken dikkatli oluntag30V AC RMS, 42V tepe veya 60V DC'nin üzerinde. Bu hacimtagşok tehlikesi yaratabilir.
- Before measuring current, ensure the meter's fuses are intact and the test leads are connected correctly.
- Doğru okumalar sağlamak için düşük pil göstergesi göründüğünde pili hemen değiştirin.
- Hasarlı görünüyorsa veya kutusu açıksa sayacı çalıştırmayın.
- Yerel ve ulusal güvenlik kurallarına uyun.
3. Ürün Bileşenleri
The Mastech MS8260A Digital Multimeter consists of the main unit and essential accessories.
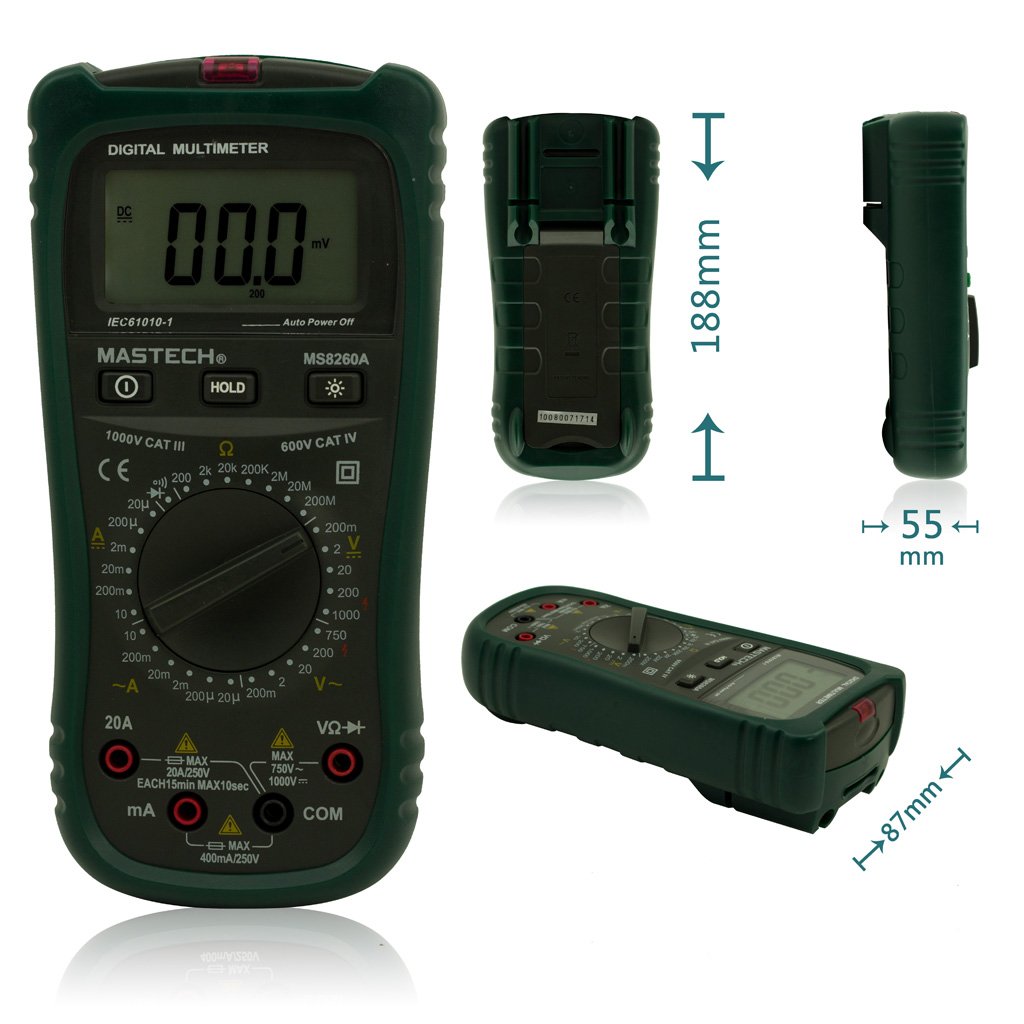
Şekil 1: Ön View of Mastech MS8260A Digital Multimeter with Dimensions
This image displays the Mastech MS8260A Digital Multimeter from the front, highlighting its LCD screen, rotary function switch, and input terminals. Key dimensions are indicated: 188mm height, 87mm depth, and 55mm width. The display shows '00.0 mV' and 'Auto Power Off' text. The rotary switch is set to 'mV' range. The input jacks are labeled 'VΩHz', 'mA', and 'COM'.
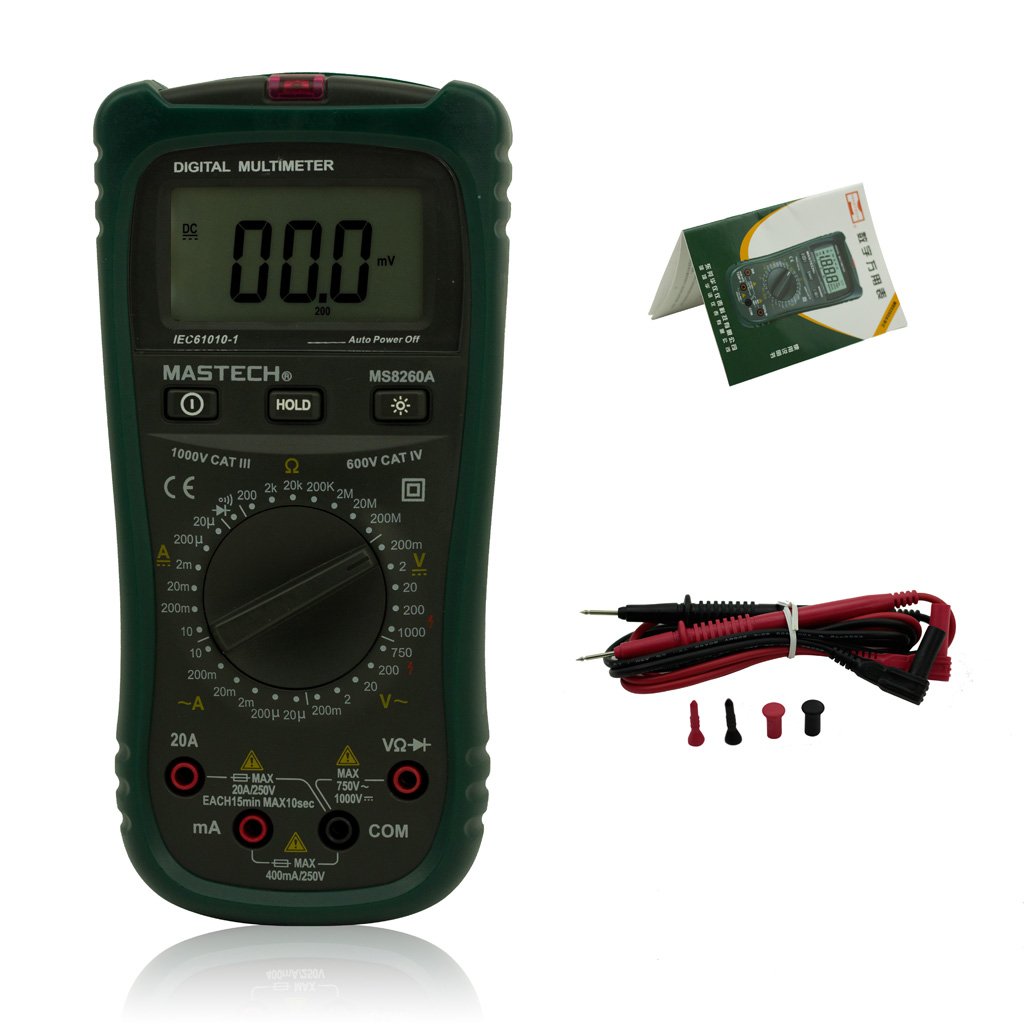
Figure 2: Mastech MS8260A Digital Multimeter and Accessories
This image shows the Mastech MS8260A Digital Multimeter accompanied by its standard accessories. These include a pair of red and black test leads with protective caps, and a printed user manual. The multimeter itself is shown from the front, similar to the main product view.
3.1 Ana Ünite Özellikleri
- LCD Ekran: Ölçüm değerlerini, birimleri ve fonksiyon göstergelerini gösterir.
- Döner anahtar: Selects the desired measurement function and range.
- Giriş Jakları: Terminals for connecting test leads (VΩHz, mA, COM).
- TUTMA Düğmesi: Mevcut ekran okumasını dondurur.
- Arka Işık Düğmesi: Activates the display backlight for improved visibility in low light.
- Temassız Hacimtage (NCV) Sensor: AC hacmini algılartage doğrudan temas olmaksızın.
3.2 Dahil Aksesuarlar
- Test Kabloları (Kırmızı ve Siyah)
- Kullanıcı Kılavuzu
4. İlk Kurulum
4.1 Pil Kurulumu
The Mastech MS8260A Digital Multimeter requires one 9V 6F22 battery for operation. Batteries are not included with the product.
- Ensure the multimeter is turned off and disconnect any test leads.
- Ünitenin arkasındaki pil bölmesi kapağını bulun.
- Pil kapağını sabitleyen vidayı çıkarmak için bir tornavida kullanın.
- Kapağı dikkatlice çıkarın.
- Connect a new 9V 6F22 battery to the battery clips, observing correct polarity.
- Pili bölmeye yerleştirin.
- Pil bölmesi kapağını yerine takın ve vidayla sabitleyin.
5. Kullanım Talimatları
Before taking any measurements, ensure the test leads are properly connected to the meter and the circuit under test.
5.1 Test Uçlarının Bağlanması
- her zaman bağlayın siyah test sonucu şuna yol açtı Bİlgİ (ortak) giriş jakı.
- cilt içintage, resistance, diode, continuity, and transistor measurements, connect the kırmızı test sonucu şuna yol açtı VΩHz Giriş jakı.
- For current measurements (mA or 20A), connect the kırmızı test lead to the appropriate current input jack (mA or 20A).
5.2 Fonksiyon Seçimi
Turn the rotary switch to the desired measurement function and range. The meter will display the reading on the LCD.
5.2.1 DC Hacmitage Ölçümü (V–)
- Döner anahtarı istenen DC Vol değerine ayarlayıntage aralığı (örneğin, 200mV, 2V, 20V, 200V, 1000V).
- Test uçlarını ölçülecek devreye veya bileşene paralel olarak bağlayın.
- Cildi okutagEkrandaki e değeri.
5.2.2 AC Hacmitage Ölçümü (V∼)
- Döner anahtarı istenen AC Vol değerine ayarlayıntage aralığı (örneğin, 2V, 20V, 200V, 750V).
- Test uçlarını AC voltajına paralel olarak bağlayıntage kaynak.
- Cildi okutagEkrandaki e değeri.
5.2.3 DC Akım Ölçümü (A–)
- Döner anahtarı istenilen DC Akım aralığına ayarlayın (örneğin, 20µA, 200µA, 2mA, 20mA, 200mA, 20A).
- Önemli: Disconnect power to the circuit. Break the circuit and connect the meter in series with the load.
- Devreye güç verin.
- Ekrandaki mevcut değeri okuyun.
5.2.4 AC Akım Ölçümü (A∼)
- Döner anahtarı istediğiniz AC Akım aralığına ayarlayın (örneğin, 20µA, 200µA, 2mA, 20mA, 200mA, 20A).
- Önemli: Disconnect power to the circuit. Break the circuit and connect the meter in series with the load.
- Devreye güç verin.
- Ekrandaki mevcut değeri okuyun.
5.2.5 Direnç Ölçümü (Ω)
- Döner anahtarı istediğiniz Direnç aralığına ayarlayın (örneğin, 200Ω, 2kΩ, 20kΩ, 200kΩ, 2MΩ, 20MΩ).
- Direnci ölçmeden önce devrenin enerjisinin kesildiğinden emin olun.
- Ölçümü yapılacak bileşenin üzerine test uçlarını bağlayın.
- Ekrandaki direnç değerini okuyun.
5.2.6 Diyot Testi (→|)
- Döner anahtarı Diyot Testi konumuna getirin.
- Kırmızı test ucunu diyotun anoduna, siyah test ucunu ise diyotun katoduna bağlayın.
- Ekranda ileri volüm gösterilecektirtage drop. Bağlantıları ters çevirin; iyi bir diyot için ekranda 'OL' (Açık Döngü) yazısı görünmelidir.
5.2.7 Süreklilik Testi (♫)
- Döner anahtarı Süreklilik Testi konumuna getirin.
- Test uçlarını devreye veya bileşene bağlayın.
- Direnç yaklaşık 50Ω'un altındaysa, sürekliliği gösteren bir buzzer sesi duyulur.
5.2.8 Transistör Testi (hFE)
- Döner anahtarı hFE konumuna getirin.
- Insert the transistor's emitter, base, and collector leads into the appropriate sockets on the meter's hFE test socket.
- The display will show the hFE value (DC current gain).
5.2.9 Temassız Hacimtage (NCV) Tespiti
- Döner anahtarı NCV konumuna getirin.
- Move the top front part of the meter (where the NCV sensor is located) close to the conductor suspected of having AC voltage.
- AC hacmi isetage greater than 110V is detected, the meter will emit an audible beep and the NCV indicator light will illuminate.
6. Bakım
6.1 Temizlik
Davayı reklamla silinamp Bez ve hafif deterjan kullanın. Aşındırıcı veya çözücü maddeler kullanmayın. Kullanmadan önce ölçüm cihazının tamamen kuru olduğundan emin olun.
6.2 Pil Değişimi
When the low battery indicator appears on the display, replace the 9V 6F22 battery as described in Section 4.1. Prompt battery replacement ensures accurate measurements and proper meter function.
6.3 Sigorta Değişimi
Eğer ölçüm cihazı akımı ölçemiyorsa, sigorta atmış olabilir. Doğru sigorta tipi ve değeri için teknik özelliklere bakın. Sigorta değişimi yalnızca yetkili personel tarafından yapılmalıdır.
7. Sorun Giderme
- Ekranda görüntü yok veya çok silik görüntü var: Pilin kurulumunu kontrol edin ve gerekiyorsa değiştirin.
- Yanlış okumalar: Ensure test leads are properly connected, the correct function/range is selected, and the battery is not low.
- Mevcut ölçüm yok: Check the fuse. Ensure the meter is connected in series with the circuit.
- 'OL' (Aşırı Yük) görüntülendi: Ölçülen değer seçilen aralığı aşıyor. Daha yüksek bir aralık seçin.
8. Özellikler
| Şartname | Değer |
|---|---|
| Marka | Mastech |
| Model Numarası | MS8260A |
| Ölçüm Türü | Dijital Multimetre |
| Güç Kaynağı | 9V 6F22 Battery |
| Ürün Ağırlığı | 454 gr |
| Sertifikasyon | CE |
| Piller Dahil | HAYIR |
9. Garanti Bilgileri
Please refer to the warranty card included with your product or contact Mastech customer support for detailed warranty terms and conditions. Warranty coverage typically applies to defects in materials and workmanship under normal use.
10. Müşteri Desteği
For technical assistance, troubleshooting, or service inquiries, please contact Mastech customer support. Refer to the official Mastech webEn güncel iletişim bilgileri için lütfen web sitesini veya ürün ambalajını inceleyin.
Ziyaret edebilirsiniz Amazon'daki Mastech Mağazası Daha fazla ürün bilgisi için.
İlgili belgelerMS8260A


Ask a question about this manual
Ask about setup, troubleshooting, compatibility, parts, safety, or missing instructions. Manuals+ will review the question and use this page’s manual context to help answer it.