
1. Giriş
Satın aldığınız için teşekkür ederizasing the Hello Kitty KT2064 AM/FM Projection Alarm Clock Radio. This device combines a digital alarm clock with an AM/FM radio and a unique projection feature, allowing you to display the time on your ceiling or wall. Please read this manual carefully to ensure proper operation and to fully utilize all features of your new alarm clock radio.

Resim 1.1: Ön view of the Hello Kitty KT2064 Projection Alarm Clock Radio, showing the digital display and the Hello Kitty design.
2. Özellikler
- Projeksiyon Özelliği: Projects the time onto your ceiling or wall with adjustable focus and up to 120-degree pivot angle.
- Dual Alarm Options: Wake up to either a buzzer alarm or your favorite radio station.
- AM/FM Radyo: Integrated radio tuner for listening to broadcast stations.
- Erteleme İşlevi: Allows for an additional 9 minutes of sleep before the alarm sounds again.
- Sleep to Radio: Set a timer (up to 2 hours) for the radio to play before automatically turning off.
- Pil Yedekleme: Elektrik kesintisi sırasında zaman ve alarm ayarlarını korur.tages (requires 3 CR2025 button cell batteries, not included).
- LED Time Display: Clear red LED display for current time.
3. Paket İçeriği
Lütfen paketi aşağıdaki öğeler açısından kontrol edin:
- Hello Kitty KT2064 Projection Alarm Clock Radio Unit
- AC Güç Adaptörü
- Kullanım Kılavuzu (bu belge)
Note: 3 CR2025 button cell batteries for backup are not included and must be purchased separately.
4. Kurulum
4.1 Güç Bağlantısı
- Unpack the alarm clock radio and its accessories.
- Connect the AC power adapter to the DC input jack located on the back of the unit.
- Plug the other end of the AC power adapter into a standard wall outlet. The unit will power on, and the LED display will light up.
4.2 Installing Backup Batteries
Installing backup batteries ensures that your time and alarm settings are retained during a power outage.
- Cihazın alt veya arka tarafında bulunan pil bölmesini bulun.
- Pil bölmesinin kapağını açın.
- Insert 3 CR2025 button cell batteries, observing the correct polarity (+ and - markings).
- Pil bölmesi kapağını sıkıca kapatın.

Resim 4.2: Arka view of the alarm clock radio, showing control buttons and potential location for battery compartment.
5. Kullanım Talimatları
5.1 Saati Ayarlama
- Basılı tutun SAAT AYARI button (or similar button, refer to unit markings) for approximately 3 seconds until the hour digits begin to flash.
- Kullanın SAAT or + / - Saati ayarlamak için düğmeler bulunur. AM/PM göstergesine dikkat edin.
- Basın SAAT AYARI Tekrar düğmeye basın. Dakika rakamları yanıp sönecektir.
- Kullanın DAKİKA or + / - Dakikaları ayarlamak için düğmeler.
- Basın SAAT AYARI Onaylamak ve zaman ayarlama modundan çıkmak için bir kez daha düğmeye basın.
5.2 Alarmın Ayarlanması (Alarm 1 ve Alarm 2)
This unit supports two independent alarms.
- Basılı tutun AL1 SET düğme (Alarm 1 için) veya AL2 SET button (for Alarm 2) for approximately 3 seconds until the hour digits of the alarm time begin to flash.
- Kullanın SAAT or + / - alarm saatini ayarlamak için düğmeler.
- İlgili düğmeye basın. AL SET Tekrar düğmeye basın. Dakika rakamları yanıp sönecektir.
- Kullanın DAKİKA or + / - Alarm dakikalarını ayarlamak için düğmeler.
- Basın AL SET button again to select the alarm source: Zil or RADYO. Kullanın + / - buttons to toggle.
- Basın AL SET Alarm ayar modundan çıkmak için bir kez daha düğmeye basın.
- Alarmı etkinleştirmek/devre dışı bırakmak için tuşuna basın. AL1 ON/OFF or AL2 ON/OFF button (or similar) repeatedly until the alarm indicator appears/disappears on the display.
5.3 Using the Radio
- Basın RADYO AÇIK/KAPALI radyoyu açmak için düğmeye basın.
- Basın Sabah/FM AM ve FM frekans bantları arasında geçiş yapmak için kullanılan düğme.
- Kullanın DÜZENLE+ Ve AYAR- buttons to manually tune to a desired station.
- For automatic scanning, press and hold DÜZENLE+ or AYAR- for a few seconds until the radio finds the next clear station.
- kullanarak ses seviyesini ayarlayın. SES + Ve HACİM - düğmeler.
- Radyoyu kapatmak için tuşuna basın. RADYO AÇIK/KAPALI Tekrar düğmeye basın.
5.4 Projeksiyon Özelliği
- Cihazın üst kısmında bulunan projektör merceğini bulun.
- Basın PROJEKTÖR AÇIK/KAPALI button to activate the time projection.
- Adjust the angle of the projector head (up to 120 degrees) to direct the time display onto your ceiling or wall.
- Döndür ODAK ring around the projector lens to achieve a clear image.
- To turn off the projection, press the PROJEKTÖR AÇIK/KAPALI Tekrar düğmeye basın.

Image 5.4: The alarm clock radio actively projecting the time and Hello Kitty logo onto a surface.
5.5 Erteleme İşlevi
Alarm çaldığında, büyük düğmeye basın. UYUKLAMA button (usually located on top of the unit). The alarm will pause for approximately 9 minutes and then sound again.
5.6 Sleep to Radio Function
This feature allows you to fall asleep to the radio, which will automatically turn off after a set period.
- Radyoyu açın ve istediğiniz istasyona ayarlayın.
- Basın UYUMAK button repeatedly to cycle through the available sleep timer durations (e.g., 120, 90, 60, 30, 15 minutes, or OFF). The selected duration will appear on the display.
- The radio will play for the chosen duration and then automatically turn off.
6. Bakım
- Temizlik: Üniteyi yumuşak ve kuru bir bezle silin. Aşındırıcı temizleyiciler veya çözücüler kullanmayın.
- Suya Maruz Kalma: Cihazı sudan veya aşırı nemden uzak tutun.
- Sıcaklık: Cihazı aşırı sıcaklıklara veya doğrudan güneş ışığına maruz bırakmaktan kaçının.
- Pil Değişimi: Replace backup batteries annually or when the low battery indicator appears to ensure continuous functionality during power outagee.
7. Sorun Giderme
| Sorun | Olası Neden | Çözüm |
|---|---|---|
| Ünite açılmıyor. | Güç adaptörü bağlı değil veya priz arızalı. | Güç adaptörünün cihaza ve çalışan bir duvar prizine güvenli bir şekilde takılı olduğundan emin olun. Prizin çalışıp çalışmadığını başka bir cihazla test edin. |
| Time/alarm settings are lost after power outage. | Yedek bataryalar bitmiş veya takılı değil. | Install new CR2025 button cell batteries or replace existing ones. |
| Projeksiyon bulanık. | Focus is not adjusted correctly. | Döndür ODAK ring around the projector lens until the image is clear. |
| Radyo alımı zayıf. | Anten uzatılmamış veya parazit var. | Extend the FM wire antenna fully. For AM, try repositioning the unit. Avoid placing near electronic devices that may cause interference. |
| Alarm çalmıyor. | Alarm aktif değil veya yanlış ayarlanmış. | Ensure the alarm is set and activated (alarm indicator visible). Check alarm volume if set to radio. |
8. Özellikler
| Marka | Merhaba kedi |
| Model Numarası | KT2064P |
| Görüntü Türü | Dijital LED |
| Güç Kaynağı | AC Güç Adaptörü |
| Yedek Pil | 3 x CR2025 Button Cell (not included) |
| Radyo frekansı | AM/FM (FM up to 108 MHz) |
| Ürün Boyutları (U x G x Y) | 14.5 x 11.9 x 17.3 cm (yaklaşık 5.7 x 4.7 x 6.8 inç) |
| Ürün Ağırlığı | 885 g (yaklaşık 1.95 lbs) |
| Projeksiyon Açısı | 120 dereceye kadar |
| Erteleme süresi | 9 dakikadır. |
| Uyku Zamanlayıcısı | 2 saate kadar |
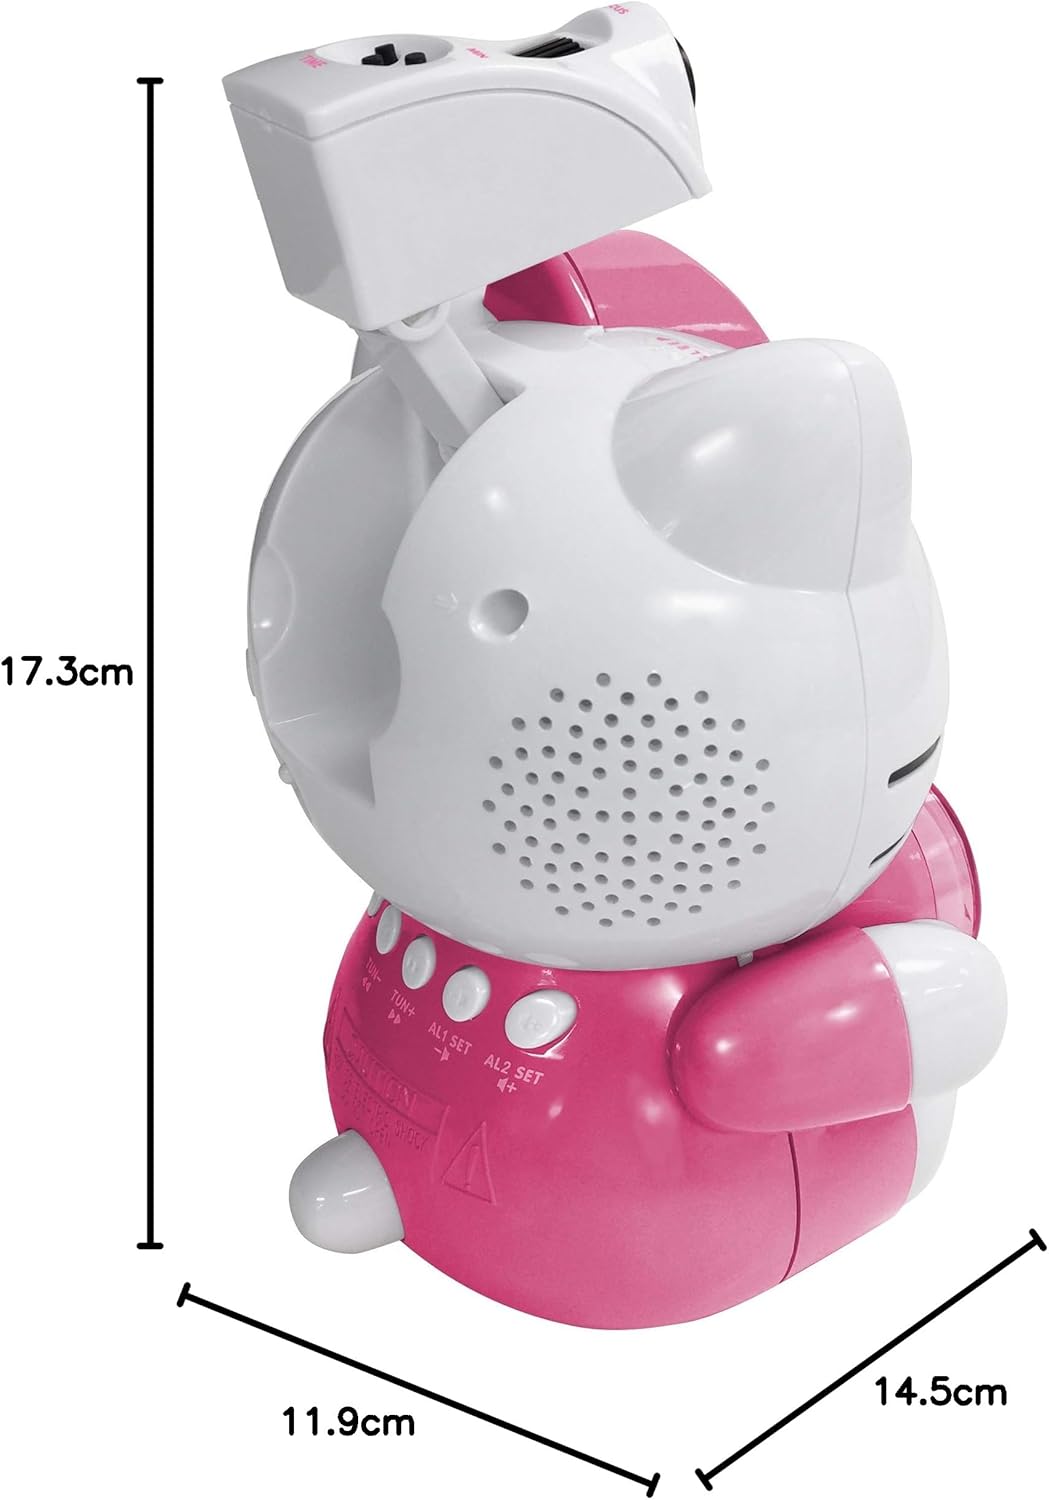
Image 8.1: Dimensions of the Hello Kitty KT2064 Projection Alarm Clock Radio.
9. Garanti ve Destek
This product comes with a standard manufacturer's warranty. For specific warranty details, please refer to the documentation provided at the time of purchase or contact your retailer. If you encounter any issues not covered in the troubleshooting section, please contact customer support for assistance.
For support inquiries, please visit the official Hello Kitty product support websiteyi ziyaret edin veya yerel distribütörünüzle iletişime geçin.