1. Giriş
This manual provides essential information for the safe and efficient operation of your Technaxx Wireless CarPlay & Android Car Monitor TX-361. Please read this manual thoroughly before using the device and retain it for future reference. The TX-361 is designed to integrate modern smartphone connectivity, including Apple CarPlay and Android Auto, into your vehicle without requiring a complex car radio replacement. It also features an integrated DAB digital radio for enhanced audio experience.
2. Güvenlik Bilgileri
- Cihazı her zaman sorumluluk bilinciyle ve yerel trafik kurallarına uygun olarak kullanın. Dikkatsiz sürüş kazalara yol açabilir.
- Cihazı sökmeye veya üzerinde değişiklik yapmaya çalışmayın. Bu, garantiyi geçersiz kılabilir ve güvenlik riskleri oluşturabilir.
- Cihazı aşırı sıcaklıklardan, doğrudan güneş ışığından ve nemden uzak tutun.
- Cihazın güvenli bir şekilde monte edildiğinden ve görüşünüzü engellemediğinden emin olun. view veya araç kontrollerine müdahale etmeyin.
- Yalnızca ürünle birlikte verilen güç kablosunu ve aksesuarları kullanın.
- If the device malfunctions, disconnect it from the power source and contact customer support.
3. Paket İçeriği
Aşağıda listelenen tüm öğelerin paketinizde bulunduğunu doğrulayın:
- DAB 7-inch CarPlay with Touch Screen TX-361
- Power Supply (USB-A to USB-C, 1.5m cable)
- AUX Kablosu (1m)
- DAB Anteni
- Holder (Mounting Bracket)
- Kullanıcı Kılavuzu
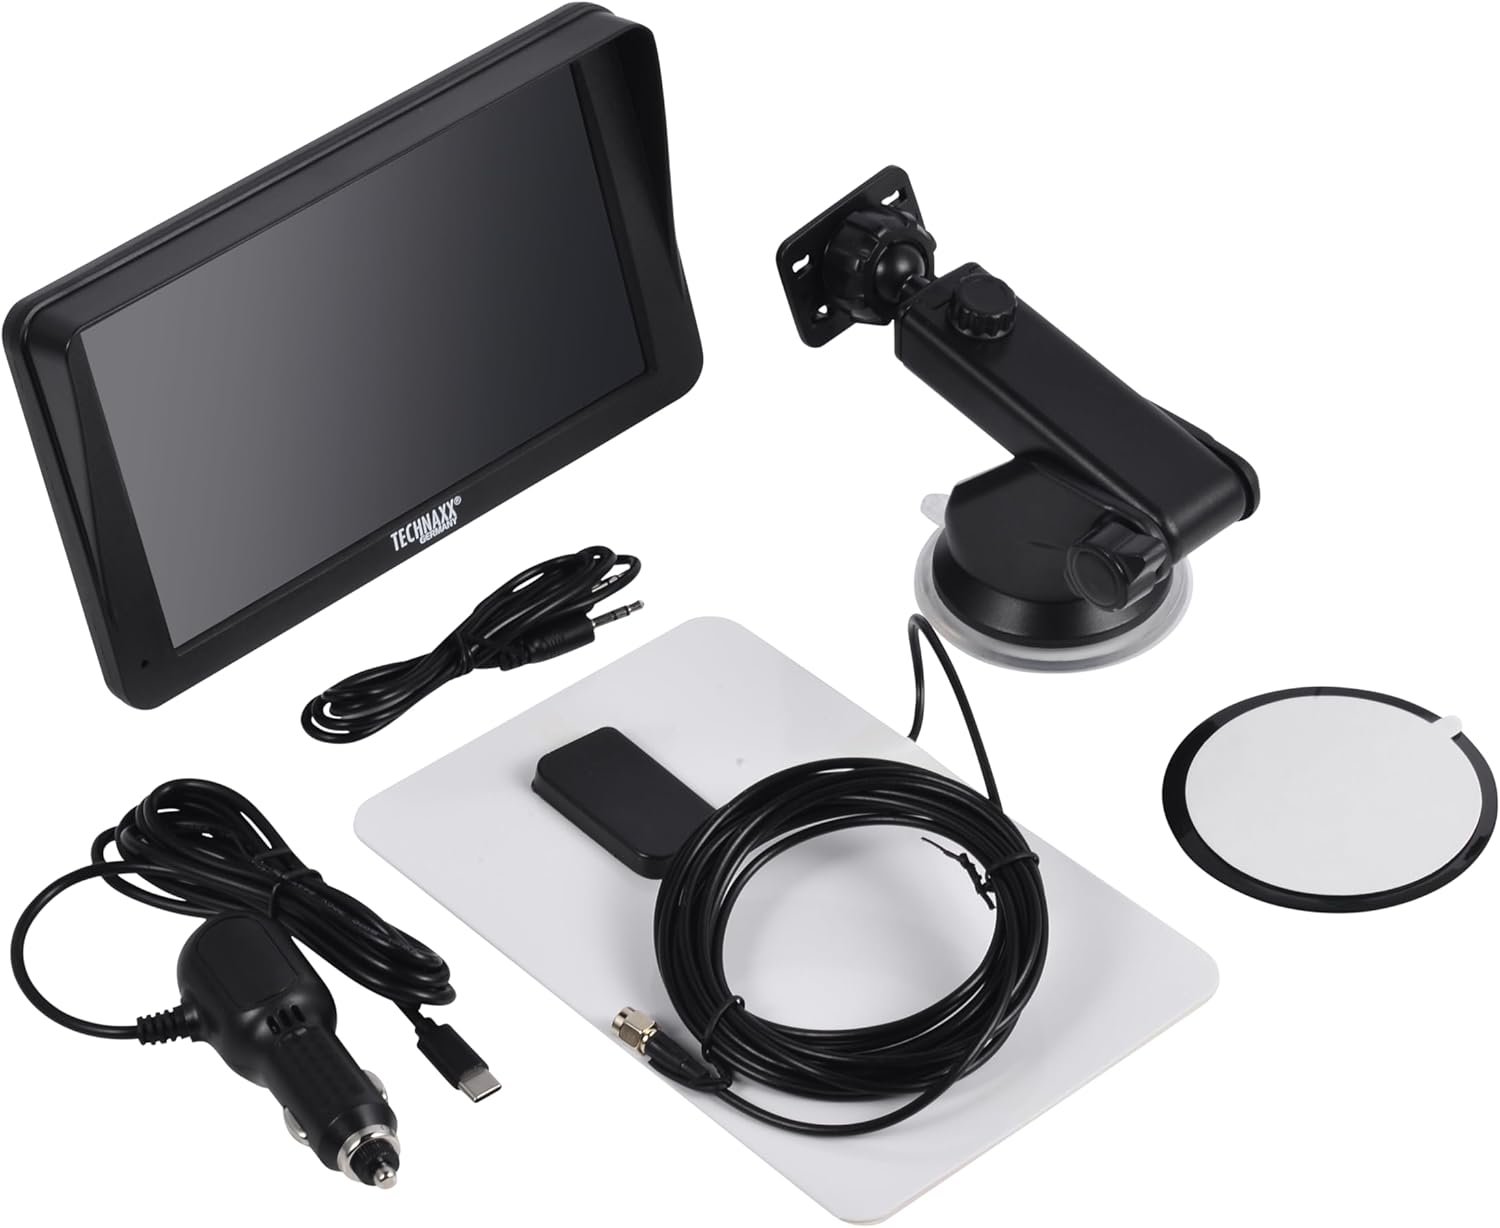
Image: All components included in the Technaxx TX-361 package, neatly laid out.
4. Ürün Bittiview
Familiarize yourself with the main components of your TX-361 monitor.
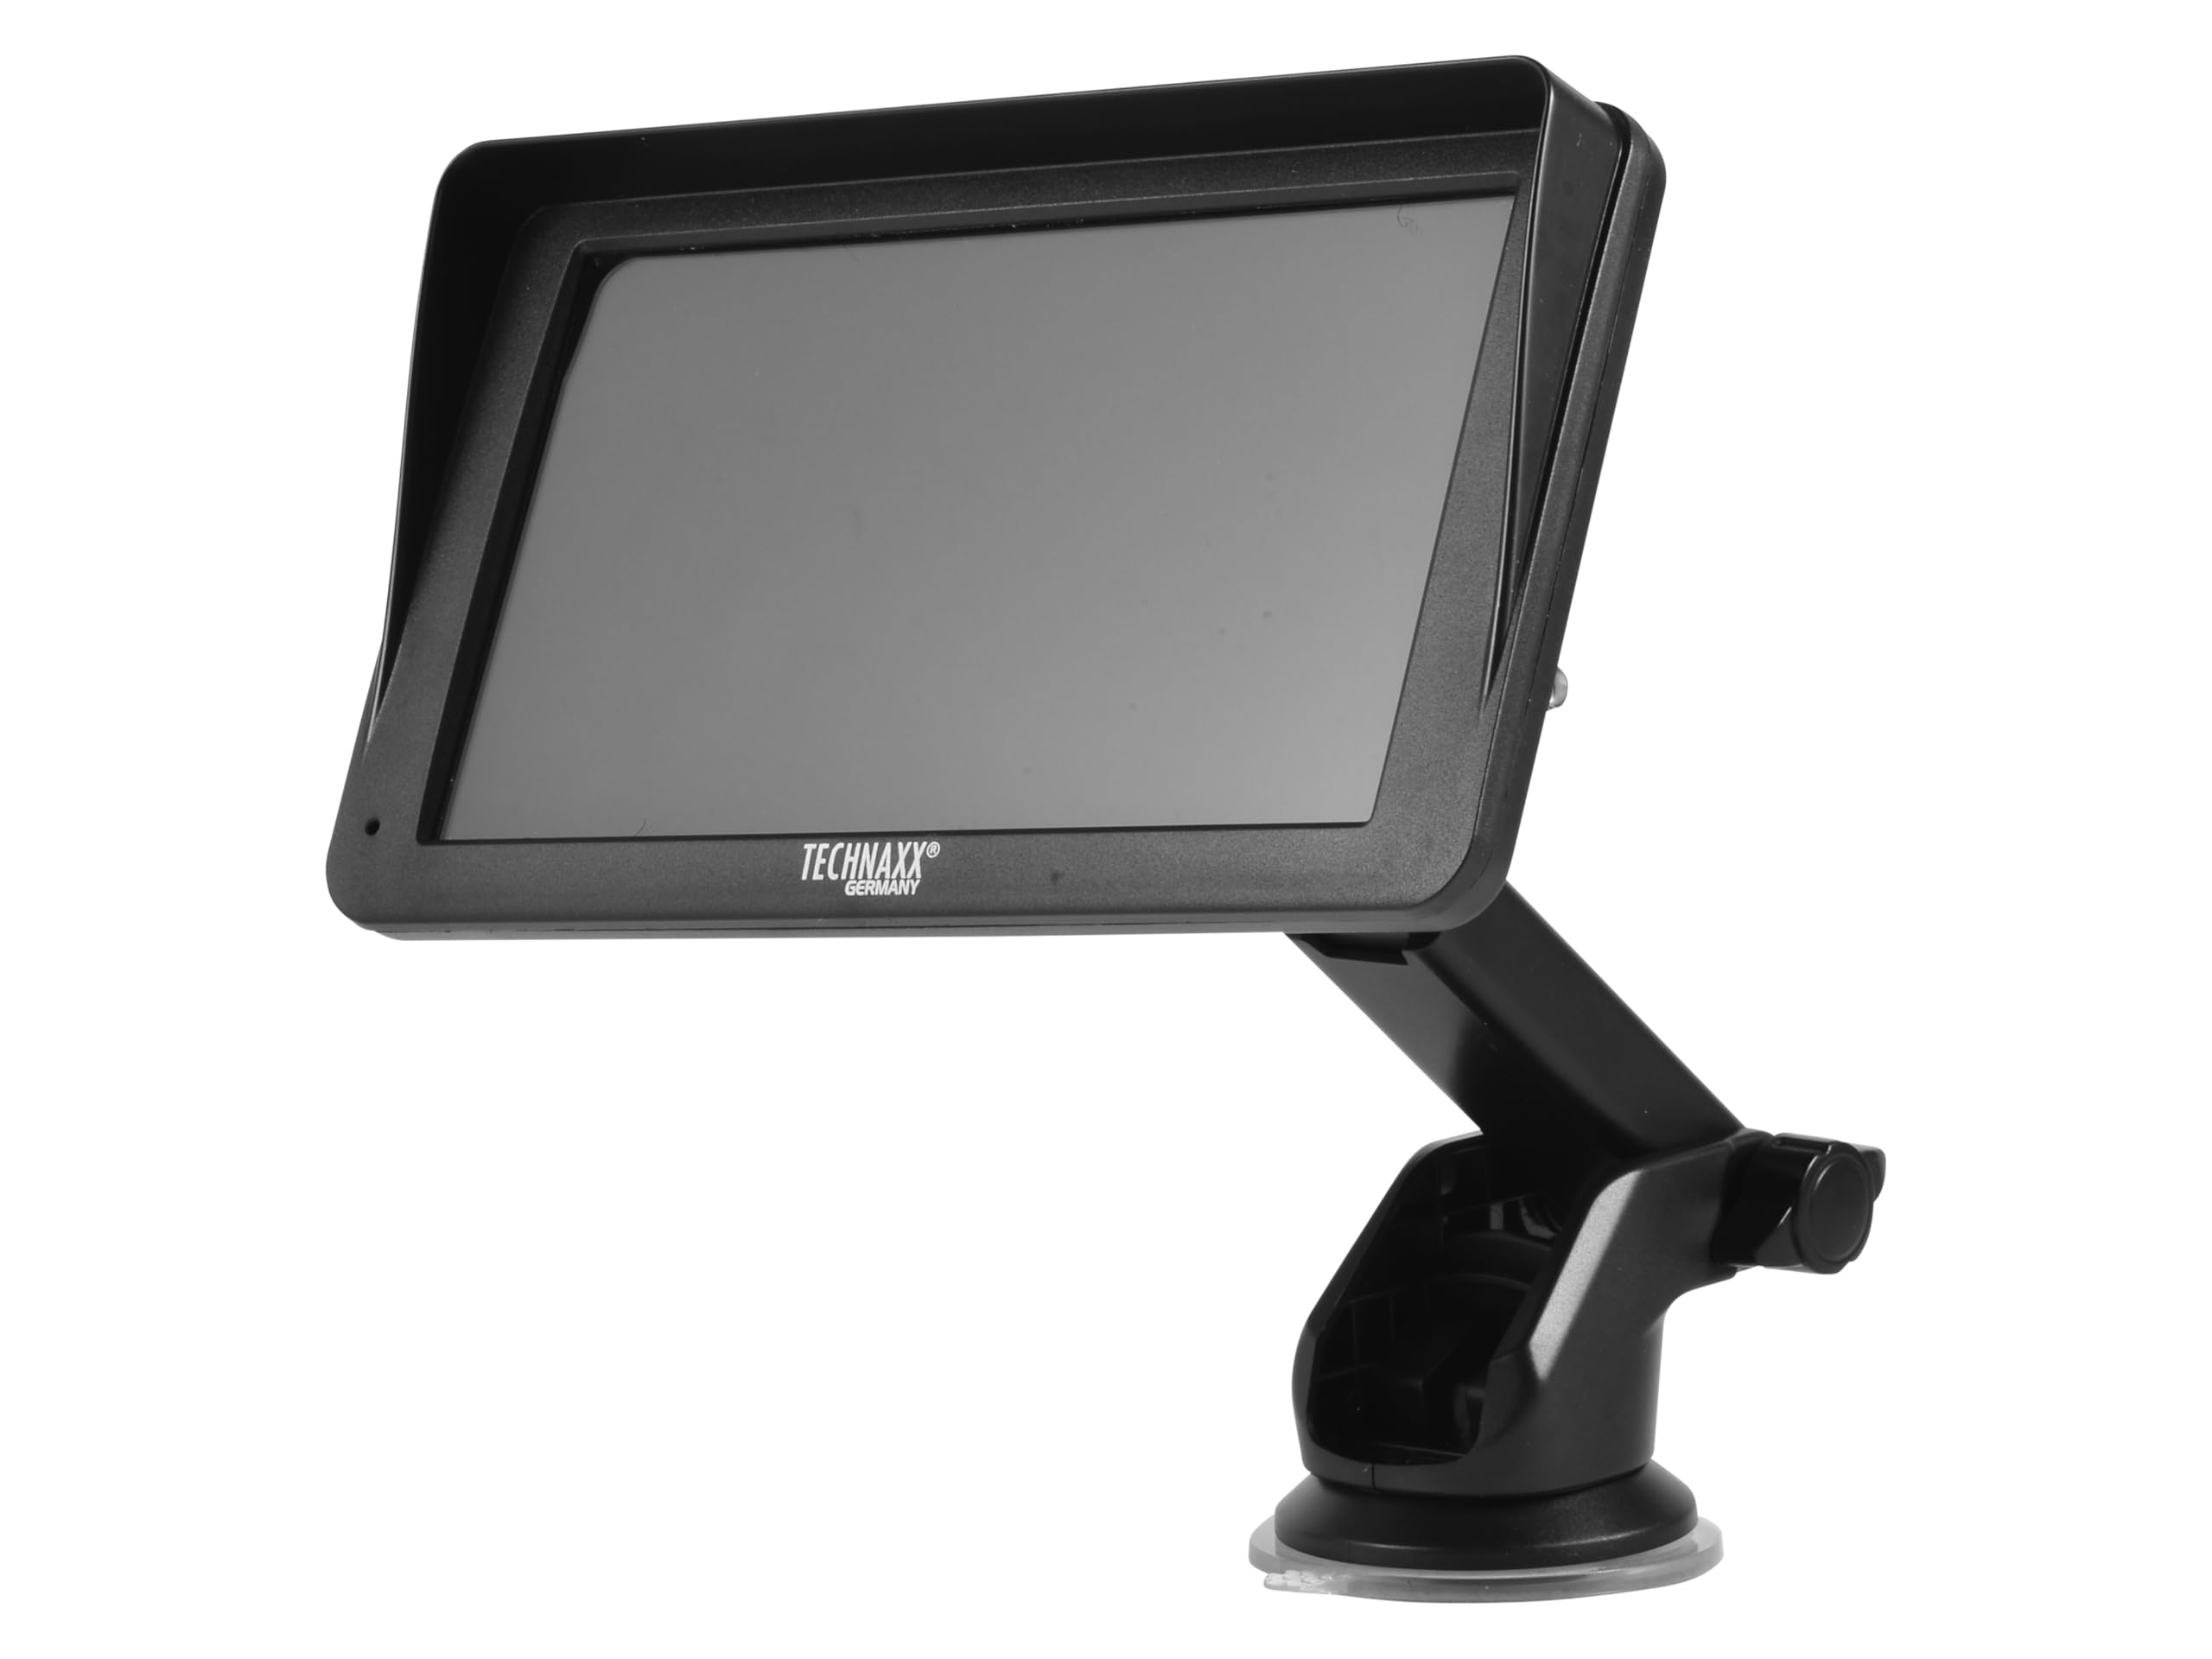
Resim: Ön view of the TX-361 monitor with its 7-inch display and 'TECHN AXX GERMANY' branding, attached to the adjustable mounting stand.

Resim: Arka view of the TX-361 monitor, highlighting the ventilation grilles and the attachment point for the mounting bracket.

Resim: Ayrıntılı view of the right side of the TX-361 monitor, showing the power button, reset button, USB-C power input, AUX output, and USB-A port.
4.1. Cihaz Bileşenleri
- 7-inch Capacitive Touch Screen: Tüm fonksiyonlar için ana ekran.
- Güç Düğmesi: Sağ üst köşede yer almaktadır.
- Sıfırlama Düğmesi: Small pinhole button for system reset.
- USB-C Bağlantı Noktası: Güç girişi için.
- AUX Çıkışı: 3.5mm jack for wired audio transmission.
- USB-A Bağlantı Noktası: For media playback or charging external devices.
- DAB Antenna Input: Connector for the external DAB antenna.
- Entegre Hoparlör: Doğrudan ses oynatımı için.
5. Kurulum
5.1. Cihazın Montajı
The TX-361 can be mounted on your vehicle's windscreen or dashboard using the provided holder.
- Attach the monitor to the mounting bracket.
- For Windscreen Mounting: Clean the desired area on the windscreen. Press the suction cup firmly against the glass and engage the lever to secure it.
- Gösterge Paneline Montaj İçin: Clean the desired area on the dashboard. If necessary, use the adhesive disc provided for a more secure attachment point for the suction cup. Press the suction cup firmly and engage the lever.
- En iyi sonucu almak için monitörün açısını ayarlayın. viewsürüşünüzü engellemeden view.

Image: The TX-361 monitor securely mounted on a car dashboard, showing its position relative to the driver's view.

Image: The TX-361 monitor mounted on a car windscreen, demonstrating an alternative placement option.
5.2. Güç Bağlantısı
- Connect the USB-C end of the power cable to the USB-C port on the monitor.
- Plug the USB-A end of the power cable into the provided 12V/24V cigarette lighter adapter.
- Insert the cigarette lighter adapter into your vehicle's 12V/24V power socket. The device will power on automatically or can be turned on using the power button.
5.3. DAB Antenna Connection
For optimal DAB radio reception, connect the included DAB antenna:
- Connect the DAB antenna cable to the dedicated DAB antenna input on the monitor.
- Mount the DAB antenna on your windscreen or another suitable location, ensuring it has clear line of sight for best signal reception.
6. Kullanım Talimatları
6.1. Açma/Kapama
- Güç Açık: The device typically powers on automatically when connected to the vehicle's power. If not, press and hold the power button on the top right side.
- Kapat: Press and hold the power button until the device shuts down. A short press will turn the screen off/on.
6.2. Initial Setup and Smartphone Connection
The TX-361 supports wireless Apple CarPlay and Android Auto via Wi-Fi and Bluetooth 5.0.
- Akıllı telefonunuzun Wi-Fi ve Bluetooth özelliklerinin etkinleştirildiğinden emin olun.
- On the TX-361 monitor, navigate to the CarPlay or Android Auto section.
- The monitor will display a Bluetooth name. On your smartphone, search for and connect to this Bluetooth device.
- Once connected via Bluetooth, the device will prompt you to enable Wi-Fi for CarPlay/Android Auto functionality. Confirm the connection on your phone.
- After successful pairing, Apple CarPlay or Android Auto will launch automatically on the monitor.
6.3. Dokunmatik Ekran İşlemi
The 7-inch capacitive touchscreen allows for intuitive control:
- Musluk: Öğeleri seçin veya işlemleri onaylayın.
- Tokatlamak: Menüler veya listeler arasında gezinin.
- Yakınlaştırmak için sıkıştırma: (Where supported, e.g., in navigation apps) Adjust map zoom levels.
6.4. DAB Digital Radio
To use the integrated DAB digital radio:
- Ensure the DAB antenna is properly connected.
- From the main menu, select the 'DAB Radio' option.
- The device will automatically scan for available DAB stations.
- Listeden istediğiniz istasyonu seçin.
6.5. FM Radyo
For traditional FM radio reception:
- From the main menu, select the 'FM Radio' option.
- Ekrandaki kontrolleri kullanarak istasyonları tarayın veya manuel olarak bir frekansa ayarlayın.
6.6. Ses Çıkış Seçenekleri
The TX-361 offers several ways to transmit audio to your vehicle's sound system:
- Entegre Hoparlör: Audio will play directly from the monitor's built-in speaker.
- AUX Kablosu: Connect the provided 3.5mm AUX cable from the monitor's AUX output to your car's AUX input. Select 'AUX' as the input source on your car radio.
- FM İletimi: Select an unused FM frequency on the TX-361 and tune your car radio to the same frequency. Audio will be transmitted wirelessly to your car's speakers.
7. Bakım
- Temizlik: Cihazın ekranını ve dış yüzeyini temizlemek için yumuşak, kuru bir bez kullanın. Aşındırıcı temizleyiciler veya çözücüler kullanmayın.
- Depolamak: Cihazınızı uzun süre saklayacaksanız, güç bağlantısını kesin ve serin ve kuru bir yerde saklayın.
- Yazılım Güncellemeleri: Üreticinin periyodik olarak kontrol edin webEn iyi performansı sağlamak için mevcut tüm yazılım güncellemelerini bulabileceğiniz site.
8. Sorun Giderme
| Sorun | Olası Çözüm |
|---|---|
| Cihaz açılmıyor. |
|
| Cannot connect to CarPlay/Android Auto. |
|
| Poor DAB/FM radio reception. |
|
| Ses çıkışı yok. |
|
9. Özellikler
| Özellik | Şartname |
|---|---|
| Model Numarası | 5361 |
| Görüntülemek | 7 inç Kapasitif Dokunmatik Ekran |
| Bağlantı Teknolojisi | Wi-Fi (Dual-band 2.4 / 5 GHz), Bluetooth 5.0 |
| Özel Özellikler | Wireless CarPlay & Android Auto, DAB Digital Radio, FM Radio, Touchscreen Display |
| DAB Frekans Aralığı | Band III: 174-240 MHz |
| Ses Çıkışı | AUX, FM Transmission, Integrated Speaker |
| Güç Kaynağı | 12V/24V via Cigarette Lighter |
| Ürün Boyutları (D x G x Y) | 18.8D x 10.8G x 3.5Y santimetre |
| Ürün Ağırlığı | 0.58 Pound (yaklaşık 263 gram) |
10. Garanti ve Destek
Technaxx products are covered by a manufacturer's warranty. For detailed warranty information, please refer to the warranty card included with your product or visit the official Technaxx website. For technical support, troubleshooting assistance, or service inquiries, please contact Technaxx customer support through their official channels.
You can often find additional resources, FAQs, and contact information on the Technaxx official webalan.