
1. Giriş
This manual provides comprehensive instructions for the installation, operation, and maintenance of your Chieftec Mesh MidiTower LCX-01SL-SL-B PC case. Please read this manual thoroughly before beginning any installation to ensure proper setup and safe handling of your components.
2. Ürün Bittiview
The Chieftec Mesh MidiTower LCX-01SL-SL-B is a versatile computer chassis designed for ATX 2.0 power supplies and Micro ATX motherboards. It features a mesh design for optimal airflow and includes multiple drive bays for storage and optical devices. The case provides convenient front panel connectivity with two USB 2.0 ports and two USB 3.0 ports.

Resim: Dahili view of the Chieftec Mesh MidiTower LCX-01SL-SL-B PC case, highlighting the drive bays and general layout.
3. Kurulum ve Kurulum
3.1 Güvenlik Önlemleri
- Herhangi bir bileşeni takmadan veya çıkarmadan önce daima güç kaynağını duvar prizinden çıkarın.
- Hassas bileşenlerin elektrostatik deşarj (ESD) hasarından korunması için antistatik bileklik takın.
- Fiziksel hasarı önlemek için parçaları dikkatlice taşıyın.
3.2 Kasanın Açılması
- Kılıfı düz ve sağlam bir yüzeye yerleştirin.
- Locate and remove the thumbscrews or standard screws securing the side panel(s) at the rear of the case.
- Gently slide the side panel(s) backward and lift them away from the chassis.
3.3 Anakart Kurulumu
- Install the I/O shield into the opening at the rear of the case.
- Align the motherboard with the pre-installed standoffs. If necessary, install additional standoffs according to your motherboard's form factor.
- Carefully place the motherboard onto the standoffs, ensuring the I/O ports align with the I/O shield.
- Anakartı birlikte verilen vidalarla sabitleyin. Çok fazla sıkmayın.
3.4 Güç Kaynağı Kurulumu
- Position the ATX 2.0 power supply unit (PSU) in the designated bottom-mount bay.
- Güç kaynağındaki vida deliklerini kasanın arka panelindeki vida delikleriyle hizalayın.
- Verilen vidalarla güç kaynağını sabitleyin.
3.5 Sabit Sürücü Kurulumu
The Chieftec Mesh MidiTower features tool-less drive trays for easy installation of 3.5-inch hard drives.
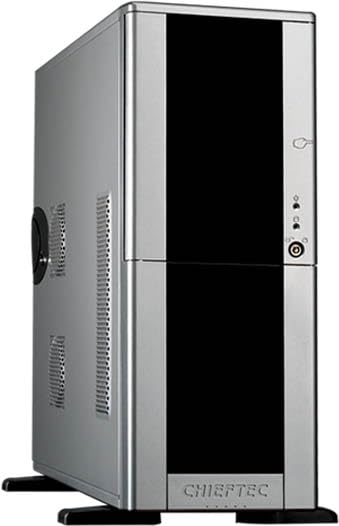
Image: Installation of a 3.5-inch hard drive into a tool-less drive bay.
- Gently pull out an empty drive tray from the drive cage.
- Flex the sides of the tray to fit the 3.5-inch hard drive, aligning the screw holes on the drive with the pins on the tray.
- Once the drive is secured in the tray, slide the tray back into the drive cage until it clicks into place.
- Connect the SATA data and power cables to the installed hard drive.
3.6 Optical Drive Installation (5.25-inch bays)
- Remove the desired 5.25-inch bay cover from the front panel.
- Slide the optical drive into the bay from the front of the case until it is flush with the front panel.
- Secure the drive using the provided tool-less clips or screws on both sides.
- Connect the SATA data and power cables to the optical drive.
3.7 Genişletme Kartı Kurulumu
- Remove the appropriate expansion slot cover(s) from the rear of the case.
- Insert the expansion card (e.g., graphics card, sound card) into the corresponding PCIe slot on the motherboard.
- Kartı bir vida veya kasanın sabitleme mekanizmasıyla güvenli bir şekilde yerleştirin.
3.8 Kablo Yönetimi
Anakart tepsisinin arkasındaki kablo yönlendirme oyuklarını ve sabitleme noktalarını kullanarak kabloları düzenleyin. Bu, hava akışını iyileştirir ve estetiği artırır.
3.9 Vakanın Kapatılması
- Tüm bileşenlerin güvenli bir şekilde takıldığından ve gerekli tüm kabloların bağlandığından emin olun.
- Slide the side panel(s) back into place and secure them with the thumbscrews or standard screws.
4. Çalıştırma
Once all internal components are installed and the case is closed, connect your monitor, keyboard, mouse, and other peripherals to the appropriate ports on your motherboard's I/O panel. Connect the power cable to the power supply unit and then to a wall outlet. Press the power button on the front of the case to start your system.
5. Bakım
5.1 Temizlik
- Optimum hava akışını sağlamak için toz filtrelerini (varsa) düzenli olarak temizleyin.
- Use compressed air to remove dust from inside the case and components. Ensure the system is powered off and unplugged before cleaning.
- Kasanın dışını yumuşak bir bezle silin.amp bez. Sert kimyasallardan kaçının.
5.2 Hava akışı
Ensure the case has adequate clearance around its intake and exhaust vents to allow for proper airflow and cooling of internal components.
6. Sorun Giderme
6.1 Sistem Açılmıyor
- Güç kablosunun hem güç kaynağına hem de duvar prizine güvenli bir şekilde bağlandığından emin olun.
- Ensure the power switch on the back of the power supply is in the 'ON' position.
- Ön panel güç düğmesi kablosunun anakarta doğru şekilde bağlı olduğundan emin olun.
- Confirm all internal power connections (24-pin ATX, 8-pin CPU, PCIe power) are firmly seated.
7. Özellikler
| Özellik | Şartname |
|---|---|
| Model Adı | Mesh MidiTower LCX-01SLSLB |
| Ürün Model Numarası | LCX-01SL-SL-B |
| Dava Türü | MidiTower |
| Anakart Uyumluluğu | Mikro ATX |
| Güç Kaynağı Uyumluluğu | ATX 2.0 (Bottom Mount) |
| Boyutlar (UxGxY) | 21.26 x 8.07 x 20.63 inç |
| Ürün Ağırlığı | 11.66 pound |
| USB 2.0 Bağlantı Noktaları | 2 |
| USB 3.0 Bağlantı Noktaları | 2 |
| 5.25" Sürücü Yuvaları | 4 |
| Soğutma Yöntemi | Hava |
| Renk | Siyah |
| Malzeme | Metal |
8. Garanti ve Destek
For warranty information and technical support, please refer to the official Chieftec website or contact your local retailer. Warranty terms and conditions may vary by region and product. Keep your proof of purchase for warranty claims.